
Russian Kilo
ORP Orzeł – 291 in service as Polish “Eagle 291”
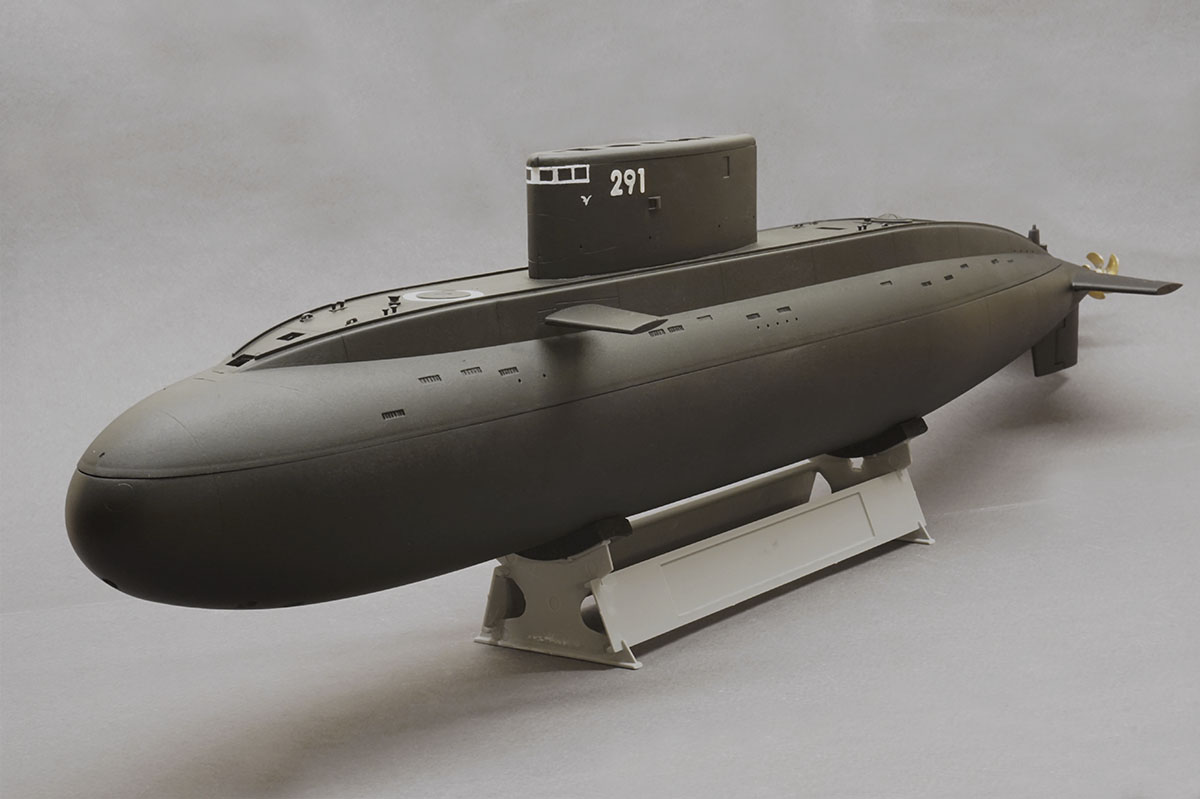
Measurements:
- Length: 510mm
- Displacement: 0,5 kg
- Scale: 1:144
- type: static diver
Russian Kilo Class is a plastic model conversion for a static diver with a WTC and a fitting kit of my own design.
The idea about a mini sub came after constructing the almost 2 meter long – Engels Typhoon. I wanted to have something portable, which I would be able to take with me on holidays.
The very start of the project: 31.10.2010 r.
First version of the model with a WTC prototype: somewhere during 2011 r.
Refitting the model with the second version of the WTC: 01.01.2017 r.
The definitive end of work on the model: 15.04.2019
Maiden voyage: 19.04.2019 r.
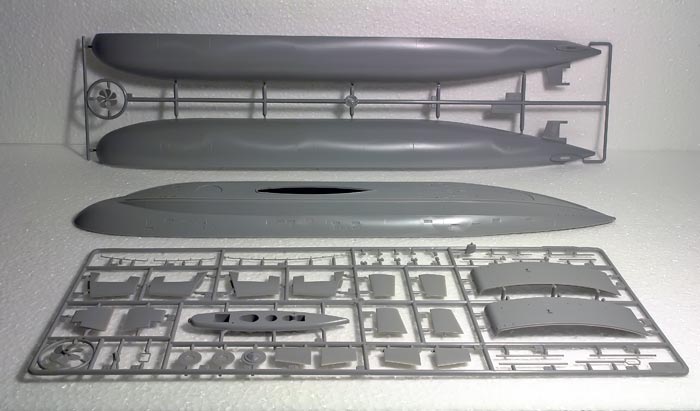
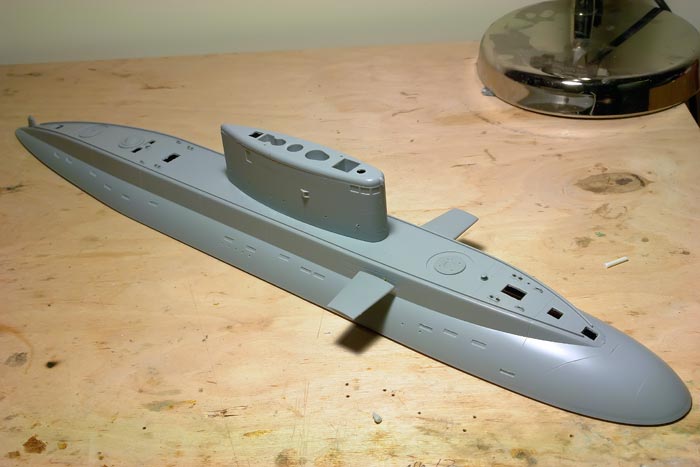
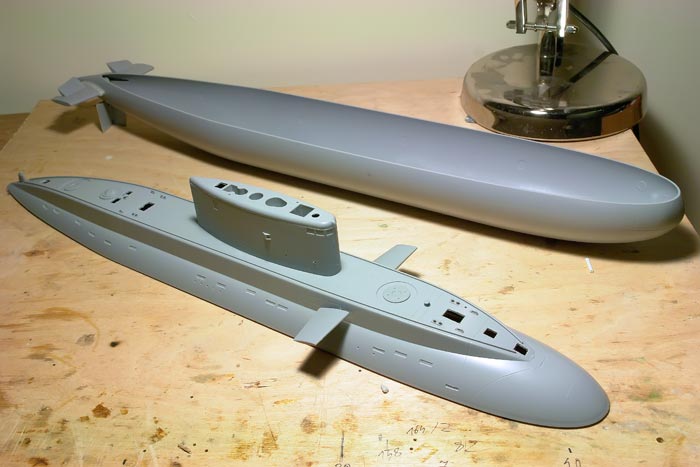
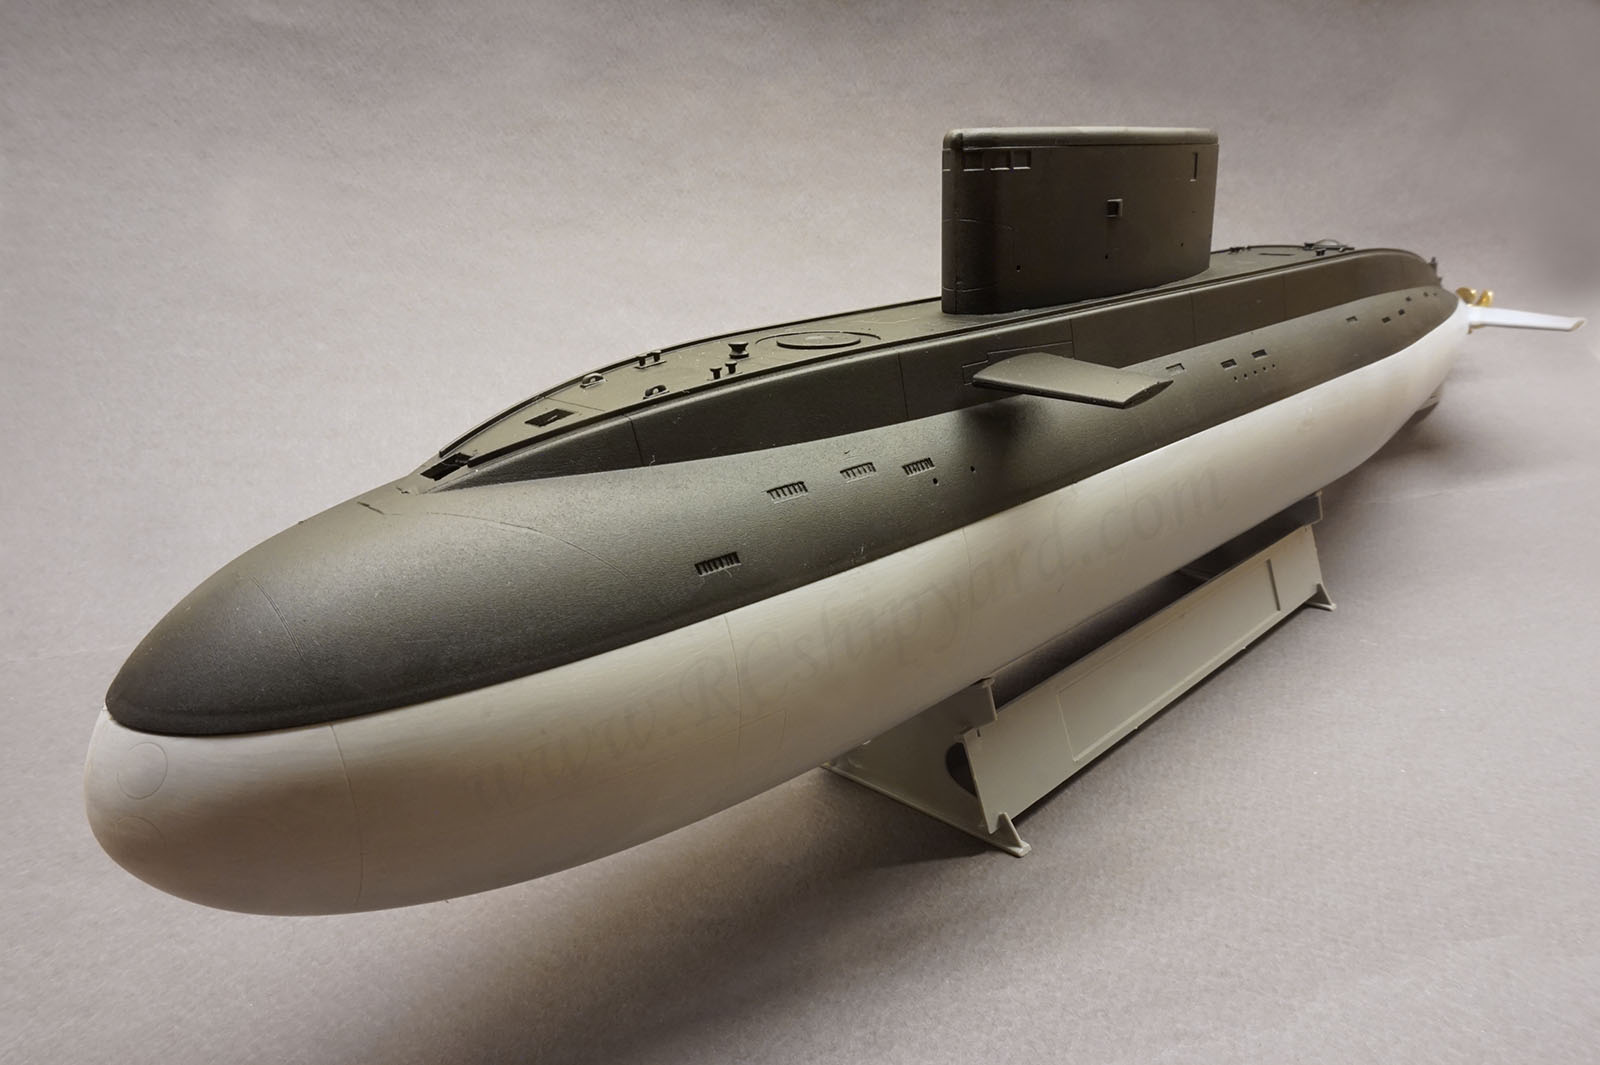
The hull of The Russian Kilo:
After inspoecting all the parts from the box I was quite surprised. I was pretty sure that the model will be a thin long cigar and that it will be really hard to fit a 50mm (2 inch) diameter WTC. You’re actually able to fit a WTC of a 60mm diameter, but it’s something I wouldn’t really recommend as you really need the extra length, not the diameter.
The contents of the box is in my opinion quite modest … However, this is probably normal for modern submarine models – especially in the 1:144 scale. The hull consists out of three main parts and a single frame with details. Well, that’s the charm of post WWII subs.
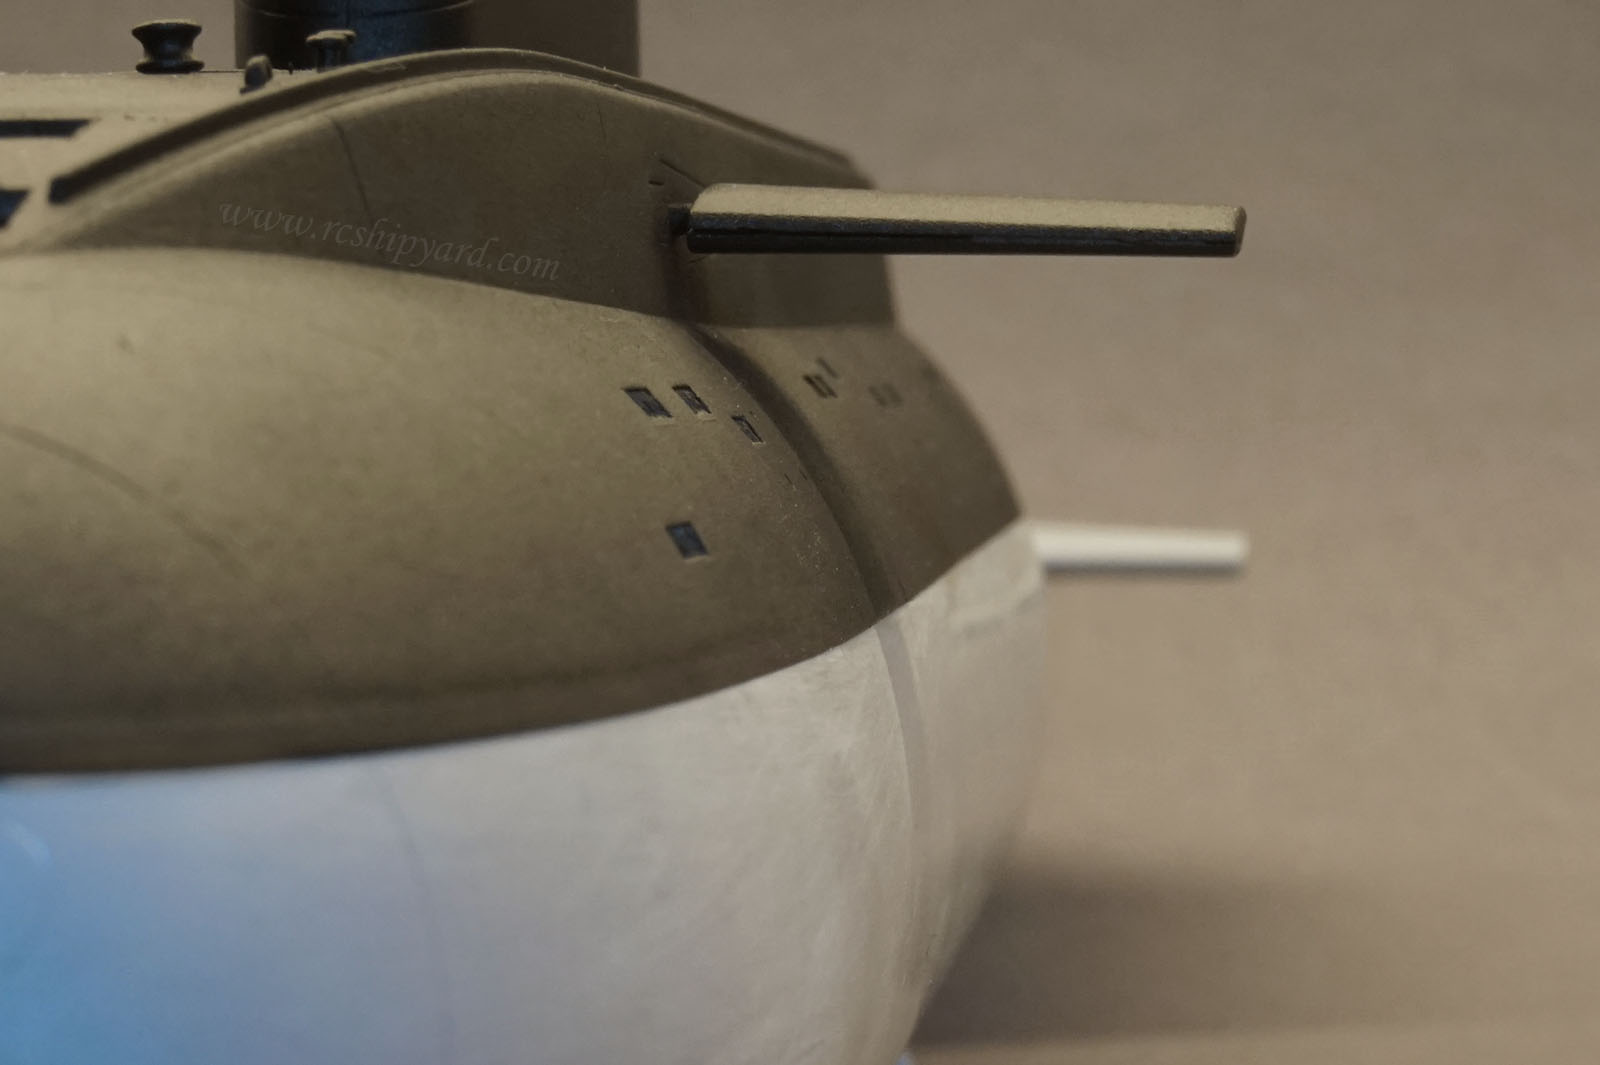
I began adapting the hull by modifying the parts which need to move. The rudders first, then the dive planes. I’ve carefully drilled holes in all of them and glued in the 1.5mm rods. Using a 1.5mm brass rod is a little overkill for this size of a boat, but I guess I used what I had in my workshop back then.
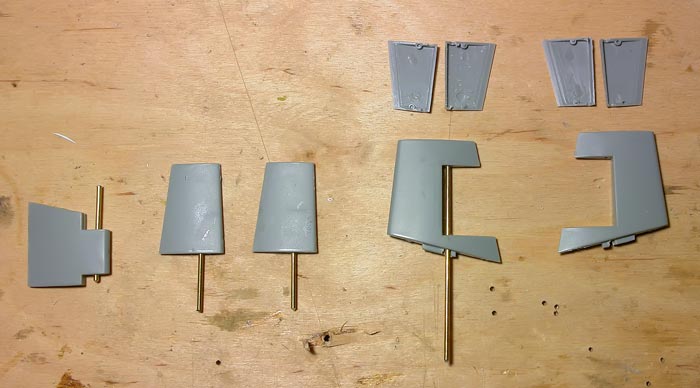

 While the glue in the stern rudders and stern planes was curing, I began my work on the bow (front) dive planes. They needed some extra work as due to the small amount of space, the lever can only be placed under the control rod. Also, both the bow and stern planes will be controlled by a single servo and the setup in such a way would cause them to work in the wrong directions. A simple reversing mechanism was added and it did the job. The mechanism also allows for additional trimming of the system – you can now extend or limit the angular movement of the bow dive planes.
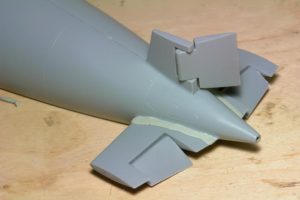 Then came the time to assemble the stern rudders and the dive planes. Small arms for the pushrods were glued in to the plane shafts and every pushrod has been equipped with a magnetic connector on it’s other end for quick and easy connection/disconnection. This idea turned out to be a bullseye!


All the gaps between the hull and the non movable parts of the planes/rudders have been filled with putty and left for hardening. I will sand them down for a smooth surface later – before painting.
Finally the lower hull was glued together. I have also attached the tower and some of the hull details. It was a tough decision, but I decided not to mount any periscopes and antennas as this is going to be a portable model which I’ll be taking with me abroad – possibly even by plane when going on holidays and I wanted to minimize the risk of breaking any elements. The hull also gained some flooding holes. I did think about cutting out the openings on the sides too, but decided not to, as I had bad experience with holes of such a small diameter from the Revell U-boot VIIC conversion. With a model of this size, the surface tension of the water can seriously affect the trim.
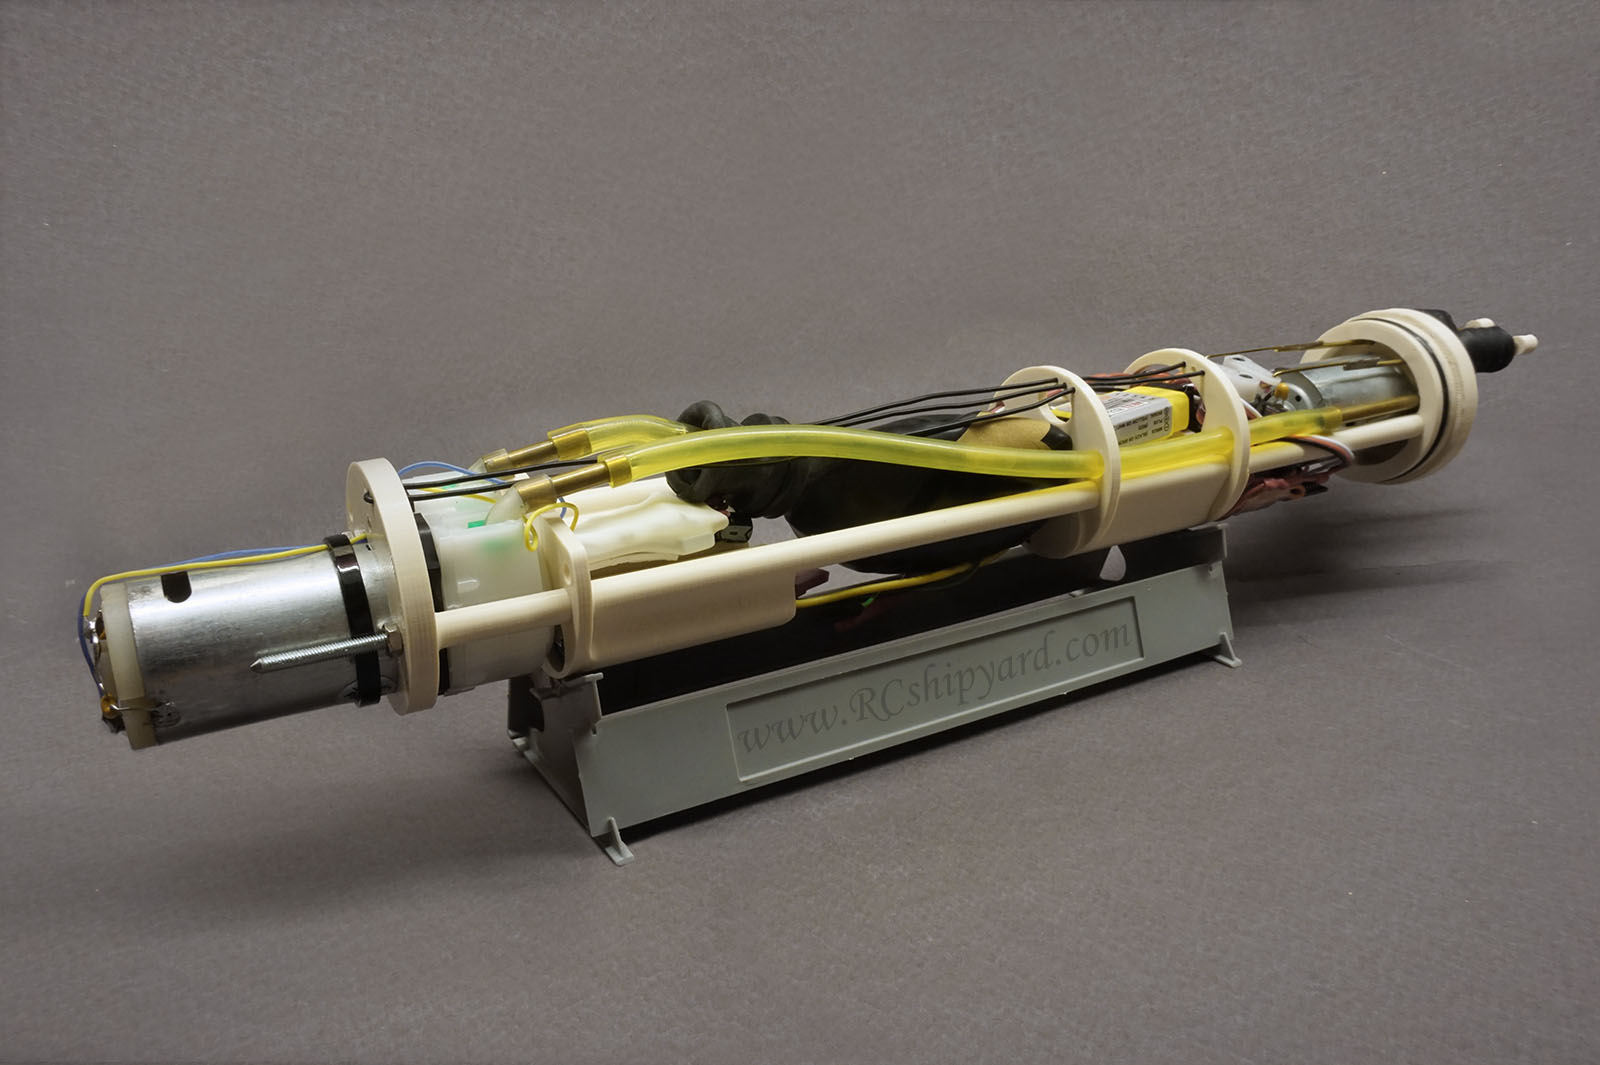
WTC – version 2.0.
WTC is the most important part of every submarine, not only the model but a the real vessels too. Currently, the Kilo model is equipped with a new and better watertight cylinder, which no longer has any design flows like my first one. The individual elements of the cylinder were designed using 3D CAD software and then manufactured on several CNC machines. After many computer simulations and even more hours of tests, I was able to design and manufacture a small cylinder that could easily compete with most of the manufacturers in Europe.
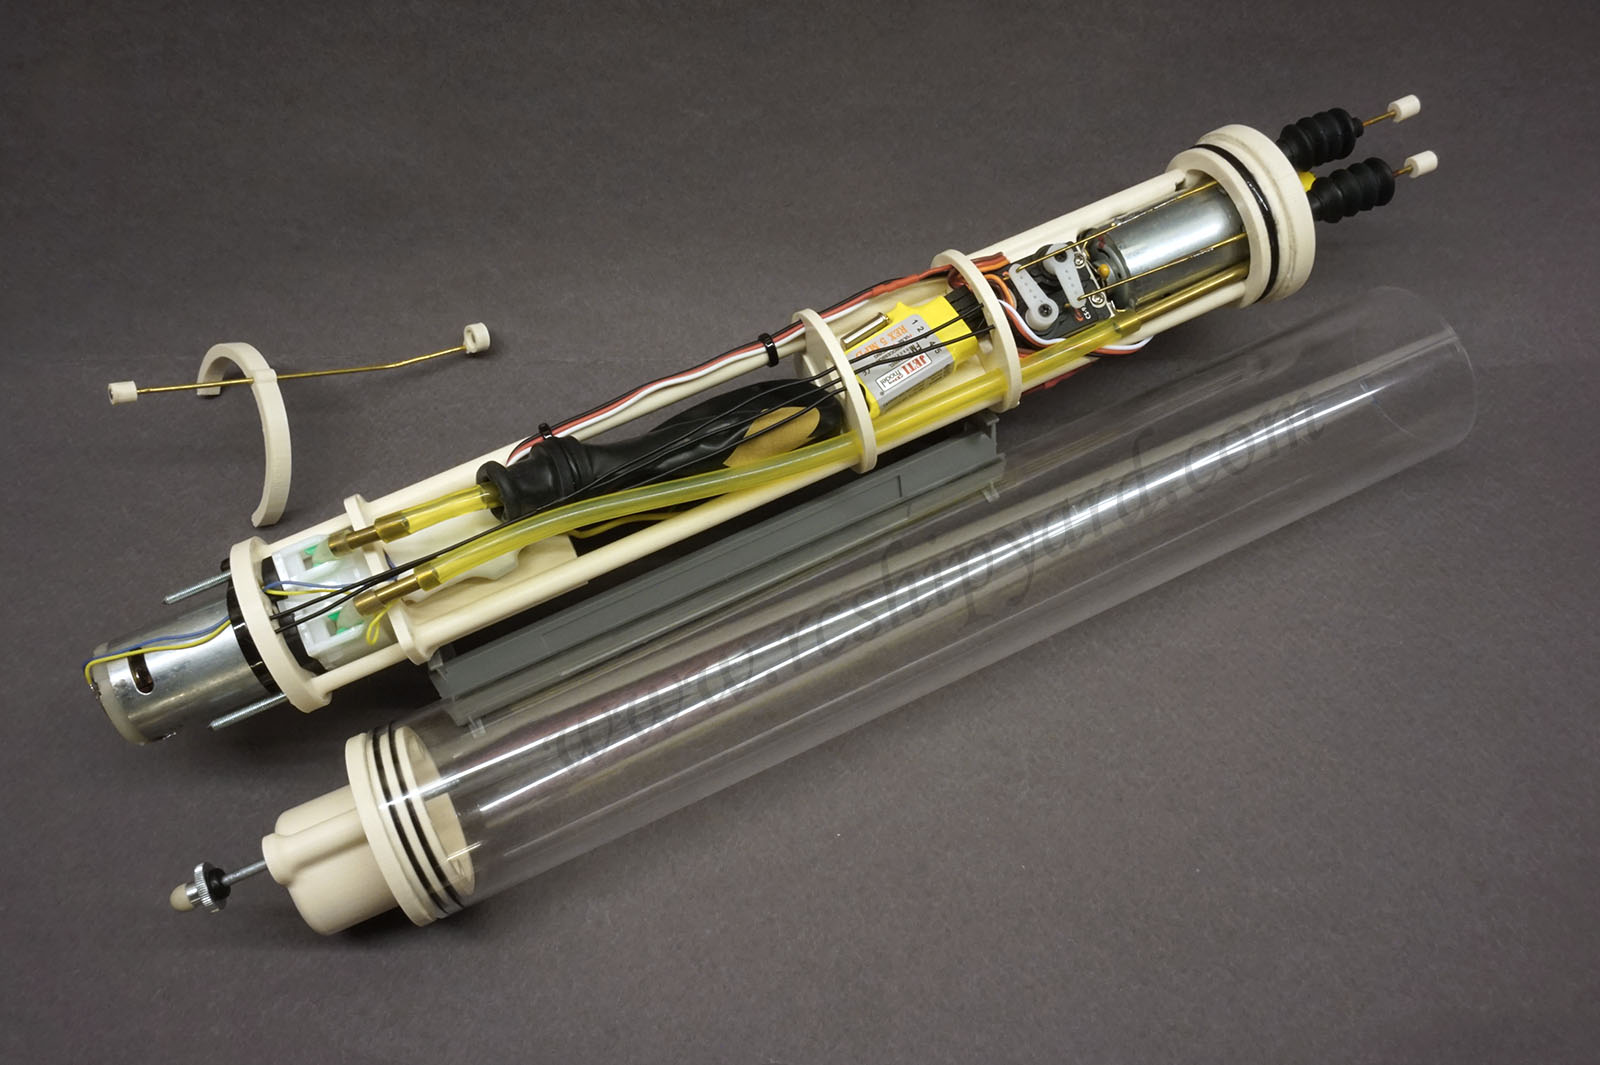
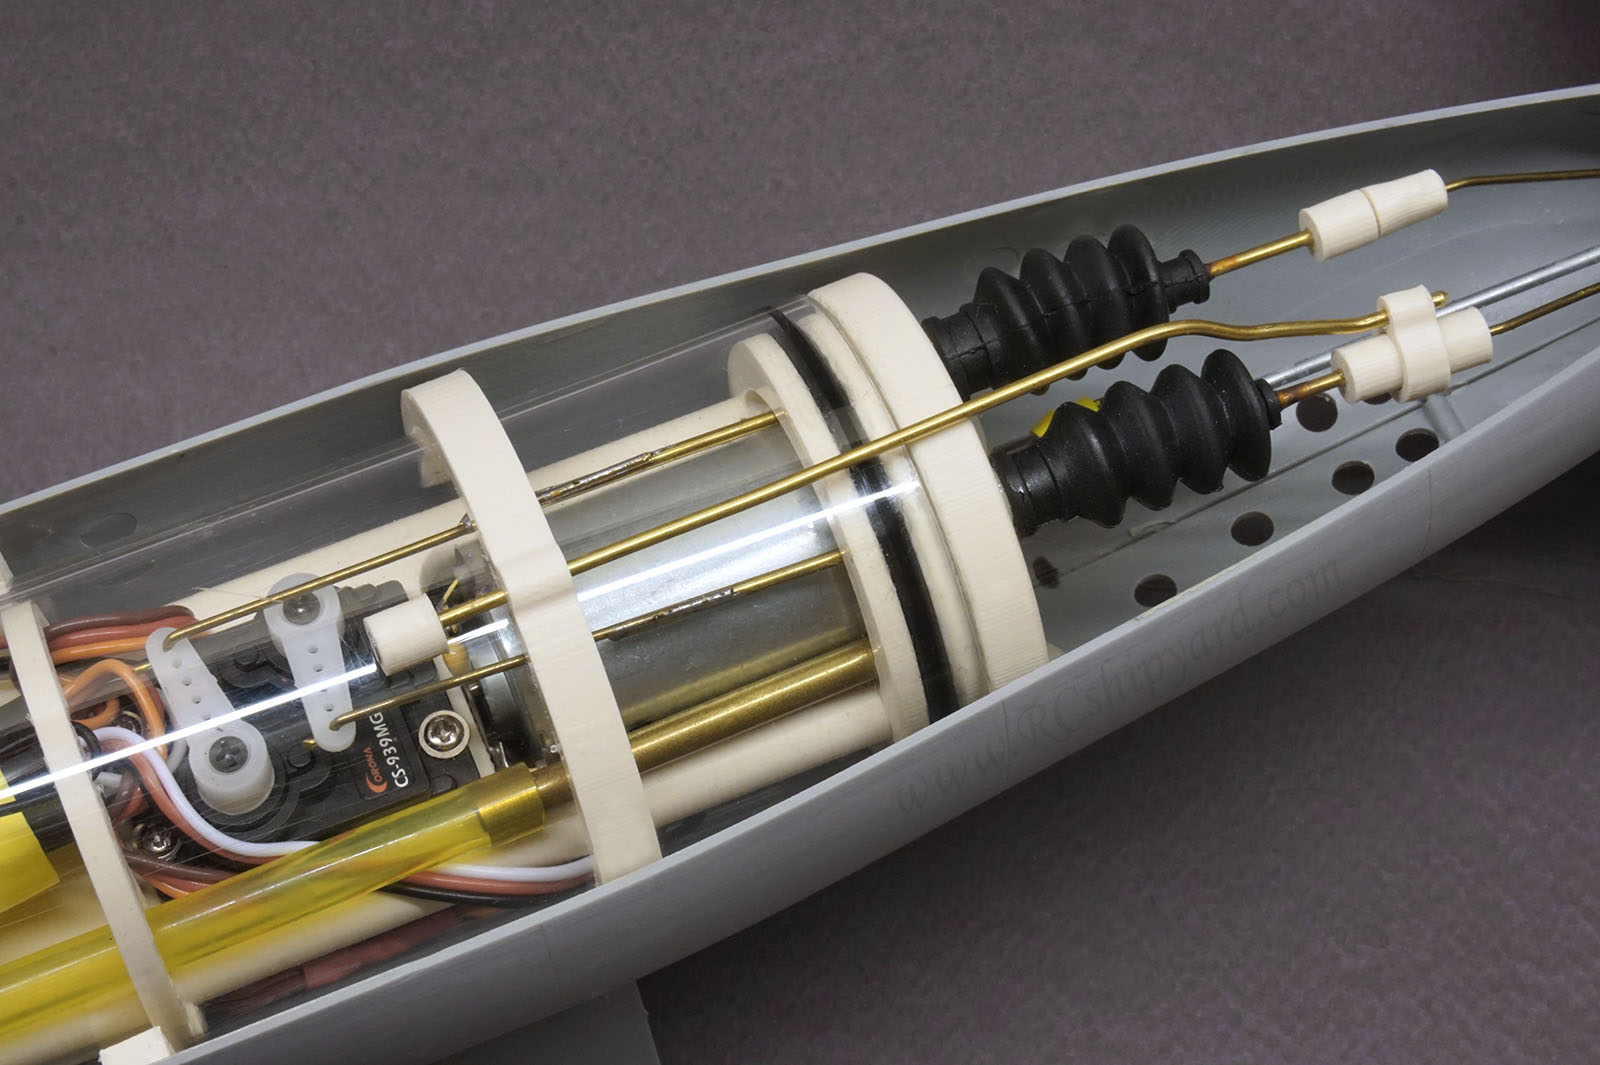
As always, I began my work on the WTC by designing the stern (back) end cap – because of its biggest complication and influence on the all other parts of the WTC. It’s a kind of engine room of the model – the motor output shaft, pushrods with their seals and of course the water inlet to the ballast tank – they all are here here. After that part was done, I began my work on the next sections: servo mounts, rear battery section and RC receivers place, ballast tank section, the front batteries section, ballast pump section and finally the front (bow) end cap together with the WTC closing mechanism.
From a CAD design to the real thing:
Project assumptions…
- Diameter 50mm
- static diving system with an elastic ballast tank
- a pack of 7.4V, with a minimal capacity of a 1500mAh
- 50/50 weight distribution under 600 gram
- modular design for other future projects

…and the real thing:
Technical data:
- WTC diameter 50mm – Achieved!
- weight 590 gram with a 50/50 weight distribution – Achieved
- Battery 1300mAh 7.4V Li-Ion – A bit less than I planned.
- Modular design – Achieved
- static diving system with an elastic ballast tank – Achieved
Additional data:
- Tube length: 305mm
- Overall length of the WTC: 340mm
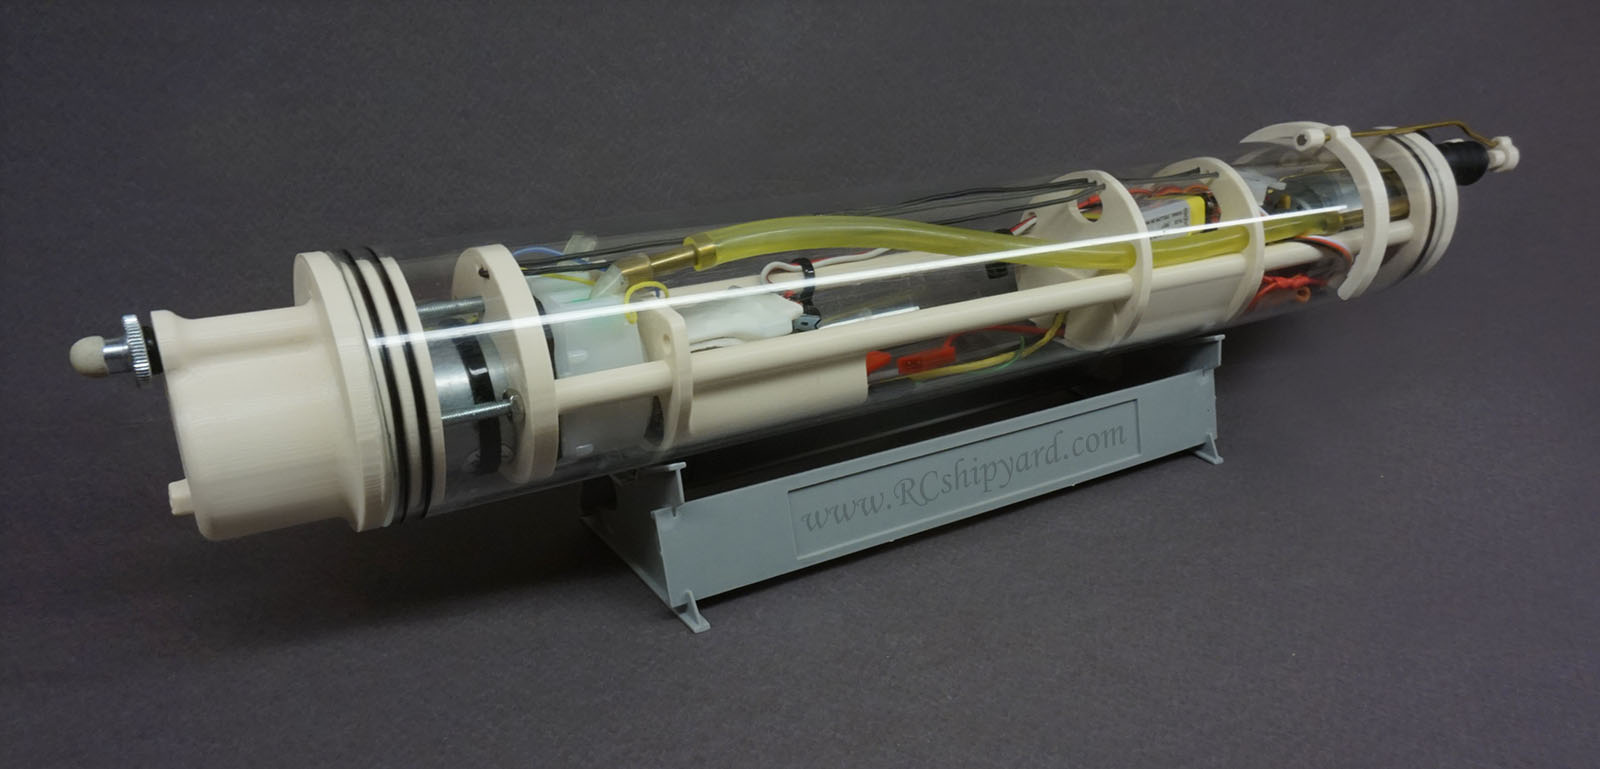
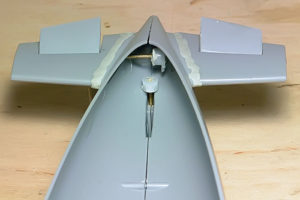
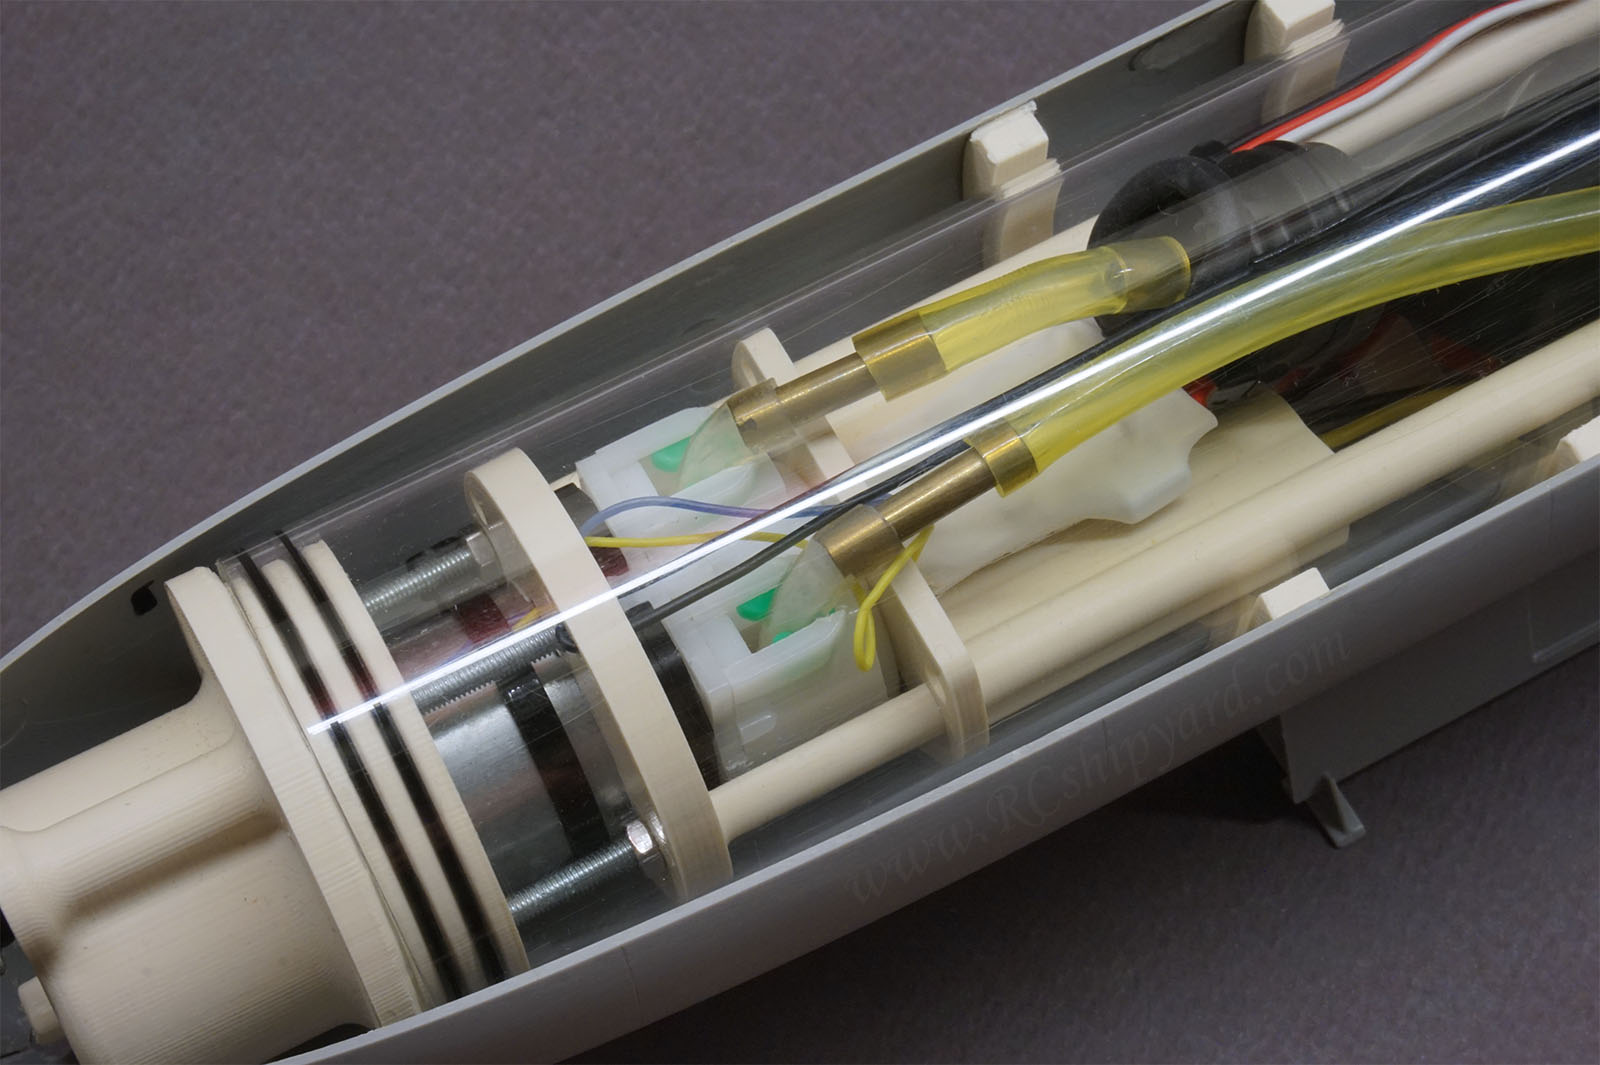
The bow (front) cap, due to the use of a fairly large pump, required a rather unusual shape. As you can see, it has an embossing that allows to slide in the motor from the ballast system pump. In addition, the front endcap has a hole for a 3mm rod ended with a nut and a gasket. The whole cap is sealed with double o-rings to make everything watertight and safe. Double o-rings are more reliable, but such a caps are much harder to remove (or insert) from the WTC tube. However, in this case, the project assumes removing the electronics tray from the tube by sliding it through the stern. The bow cap doesn’t need to be removed at any times and can even be glued in permanently.
As I mentioned earlier the WTC design is modular. That means that the single modules can be arranged in any order, mirrored, multiplied and etc. They can be used in other projects and it all depends on how long the WTC we want (or can) have. The weight distribution is also very important – the WTC should have the center of gravity in the middle – where the the ballast tank should be. In the case of WTC for the Kilo class, I managed to achieve this goal perfectly and I’m very proud of it.
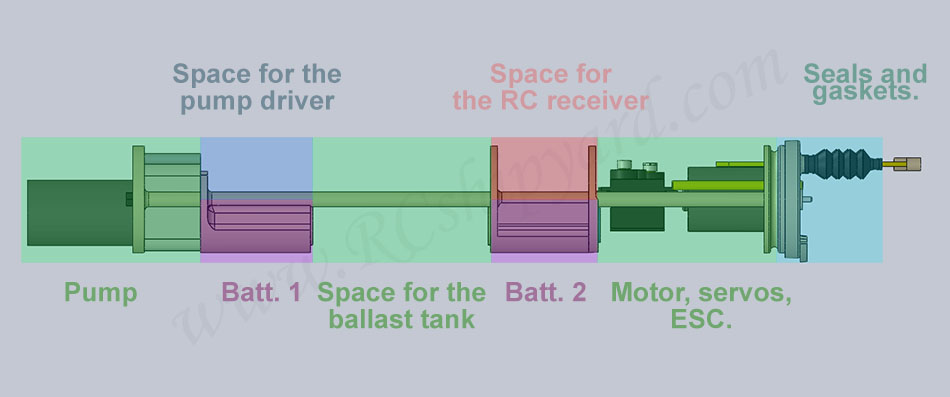
Every section has been described above on the technical drawing, while below you can compare it with a photo of the real thing.
The hull will fit a WTC even with a 60mm diameter. So why I’ve decided to use a WTC 10mm smaller? The first reason why, is that I value the correct waterline of the model. I really don’t like the situations when the model has a flooded deck when surfaced. To avoid such scenarios, it’s necessary to determine how much of the WTC floats above the waterline when the model floats on the surface. Once we do this, we calculate the volume of this space above the surface. For the correct operation of the model, a tank with such (more or less) volume is needed. I know that every physics teacher would like to crucify me now for oversimplifying the matter, but it seriously – this method does the job when it comes to MODEL submarines.
When we take a look on the picture below, it’s not difficult to guess that the less WTC floats above the surface, the smaller the ballast tank we need. Therefore, it is a good idea to use a WTC tube with the smallest possible diameter. A smaller tube can always be mounted lower or higher allowing us to control how much of it will float on the surface – with the help of adding ballast or foam. By moving a smaller tube lower or higher, we can also control how much deck will float above the surface too (the waterline). In the case of the 50mm WTC in the Kilo, the amount of tube which floats above surface is really small and this allows the use of a rather small ballast tank.
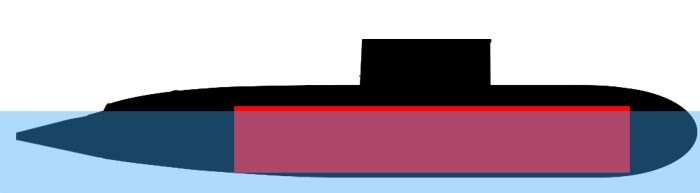
The WTC volume floating above the water surface equals the required ballast tank capacity. You can read more about that subject in the “Technology” chapter of this website.
Mounting the WTC in the hull:
The second reason for using a 50mm tube for the WTC is the wiggly hull of the Trumpeter Kilo model itself. As the lower half consists out of two parts it needs additional stiffening in the form of cradle supports (I just call them ribs). The ribs will take some of the space inside and would not allow the use of the 60mm tube any more. In addition – the ribs of my design, function as a “snap in place” for the WTC and allow for a perfect fit of the upper half of the hull with the lower one.
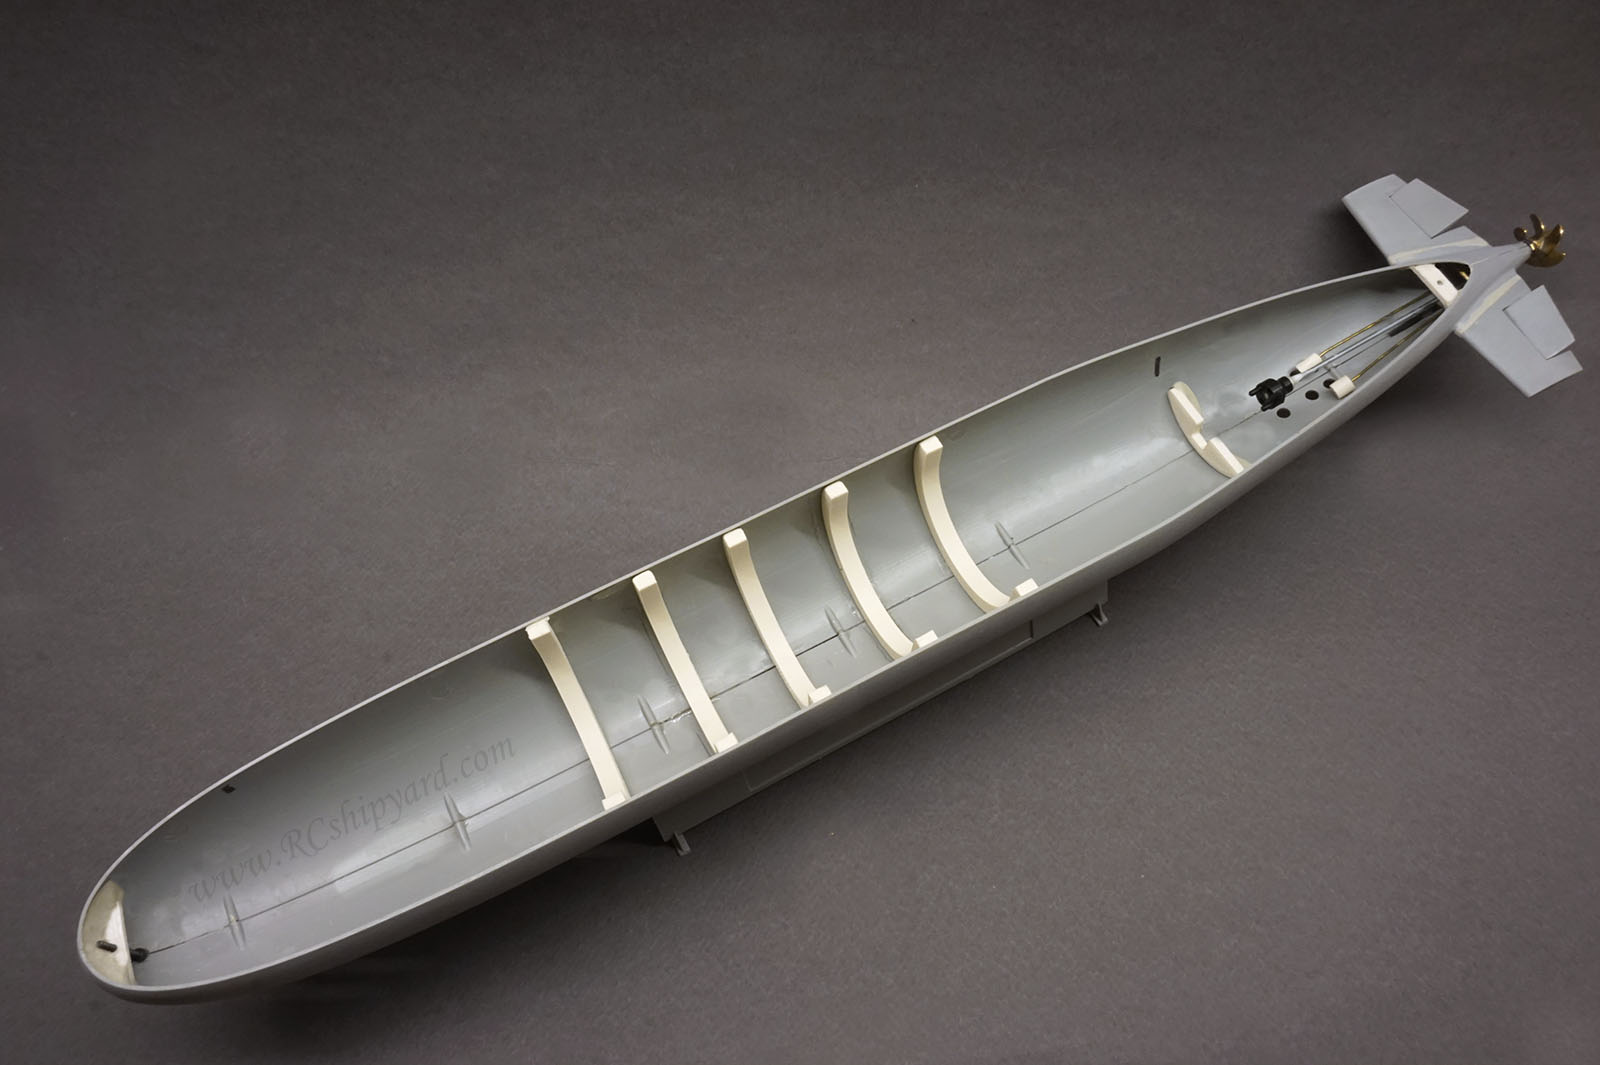
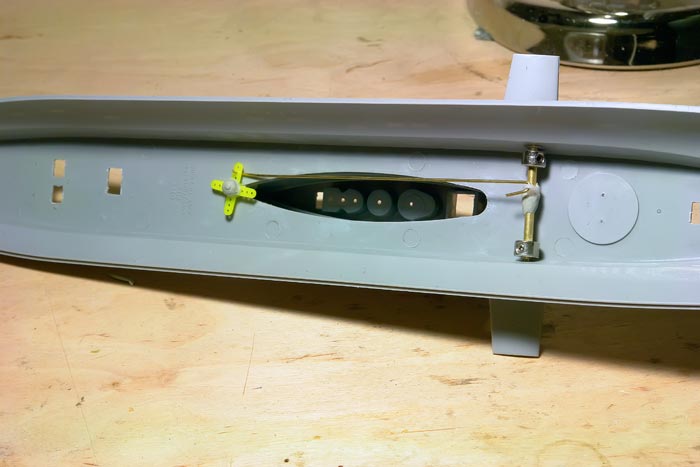
I am especially proud of the accuracy of the stiffening ribs. They allow the hull half’s to match absolutely perfect. I’ve made some photos especially when the lower hull was not painted yet, just to show how the ribs help to get the perfect fit. Remember that we are talking about a fully removable connection.
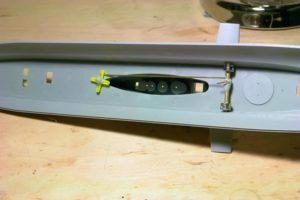
This is how the WTC looks inside the model. You do not need any elastic bands or screws. The tube enters the ribs with a gentle squeeze and slams between them. The idea allows for quick assembly and disassembly of WTC in the hull.
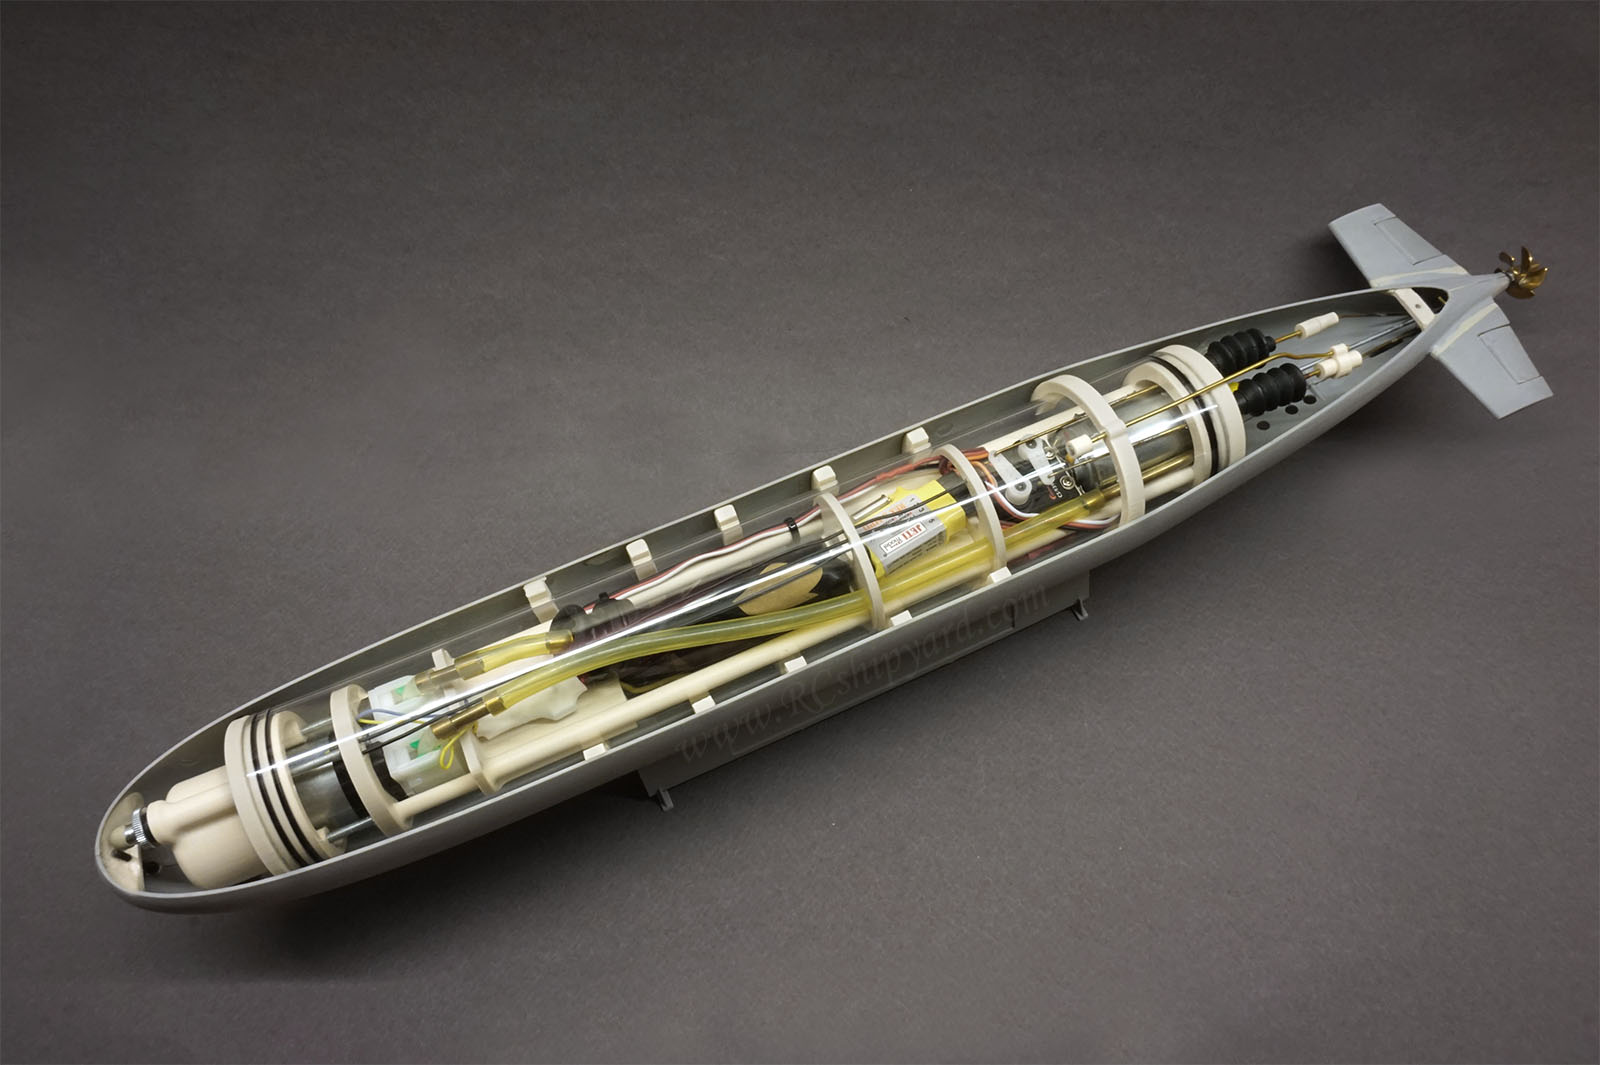
What’s also worth noticing is the method of connecting the WTC pushrods with the push rods of the rudders and dive planes. These are magnetic connectors enabling quick and trouble-free connection of the WTC with the hull mechanisms. The propeller shaft is also connected through a special ratchet clutch twhich is also magnetic.
A close up shot of the bow (front) section. It can be clearly seen how the pump motor enters the extra space in the endcap. Below the yellow tubing you can also see the pumps driver.
Trimming:
The model is really small, so the initial trimming was carried out painlessly in a small container on the working bench. What’s worth mentioning is that to achieve a horizontal trim, I only needed a single 5gram lead weight and about 2cc of foam! However, as I wanted to improve the stability of this very small model, I also added some additional 40 grams of ballast under the WTC, and a few “patches” of styrodur (foam increasing buoyancy) on the hull around the WTC. It improved the models behaviour significantly.
Running with a new WTC 2.0
The maiden patrol of the new Kilo opened my season in 2019. It was carried out without any problems and lasted about 30 minutes. The WTC had no leaks and I used about 40% of the battery capacity. As always – minor corrections and trimming was necessary – adding 3 grams of lead in the bow. The ballast tank with a peristaltic pump is a very precise and a simple method of achieving a neutral buoyancy.

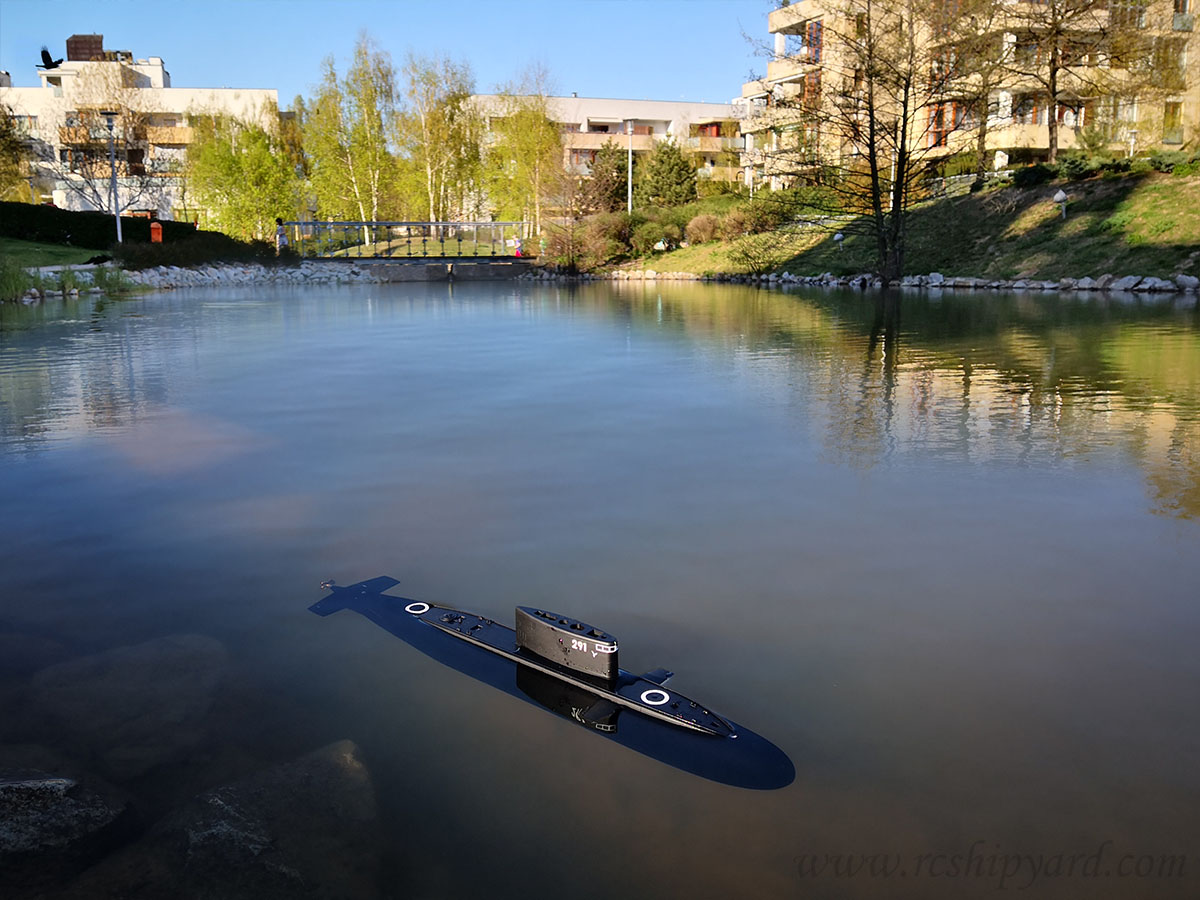
Photo during a dive:

And of course two short clips:
Last update:
22.04.2019
Using any of the materials gathered here without the written consent of the author is strictly prohibited.