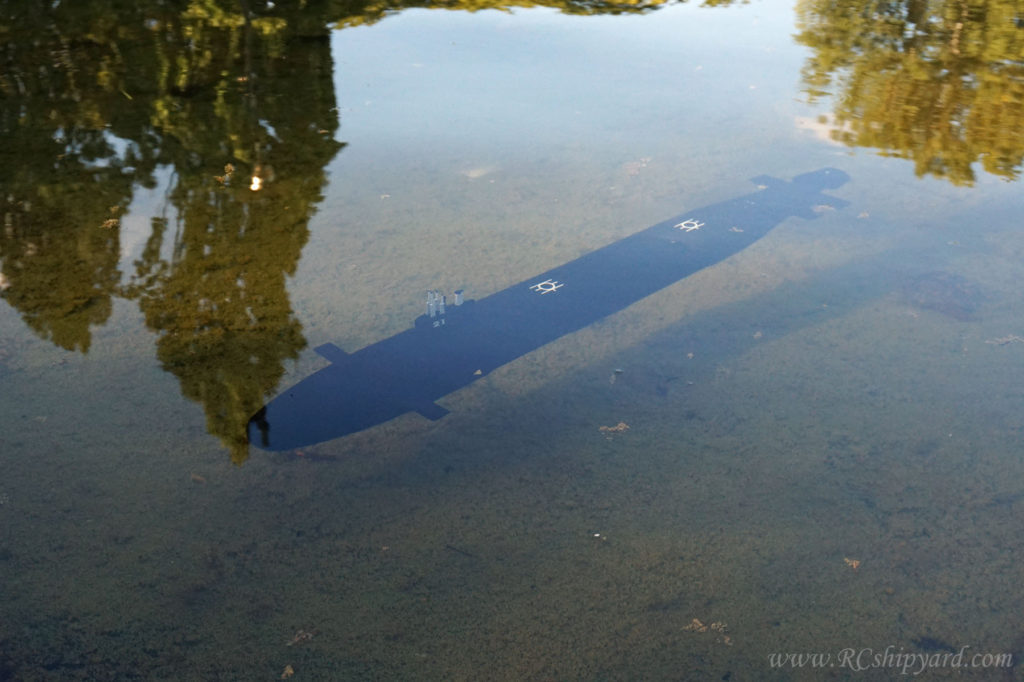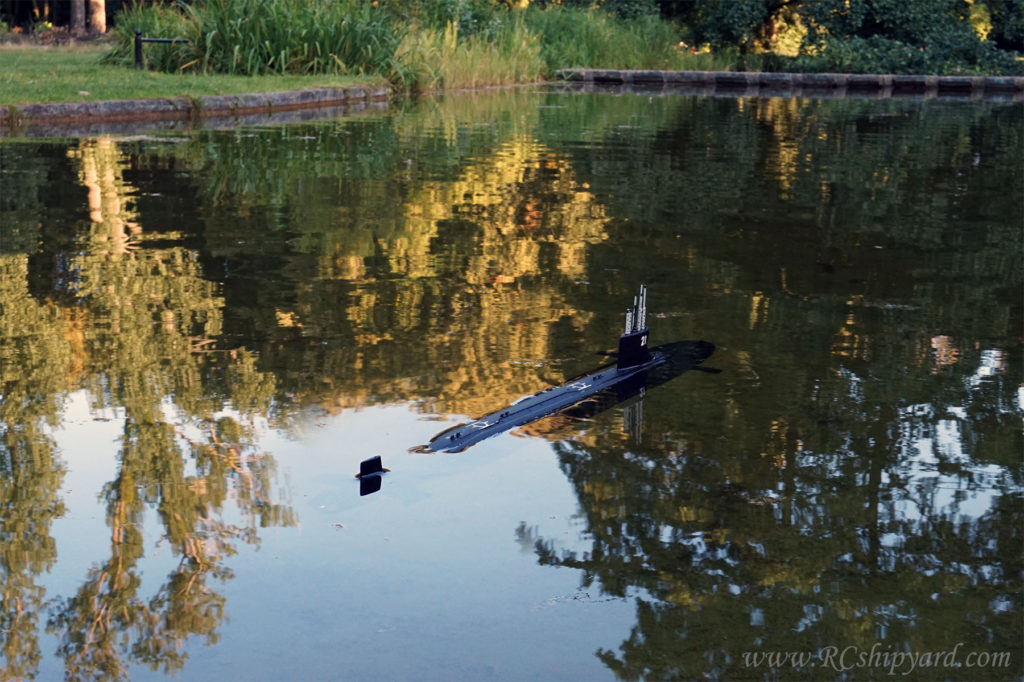
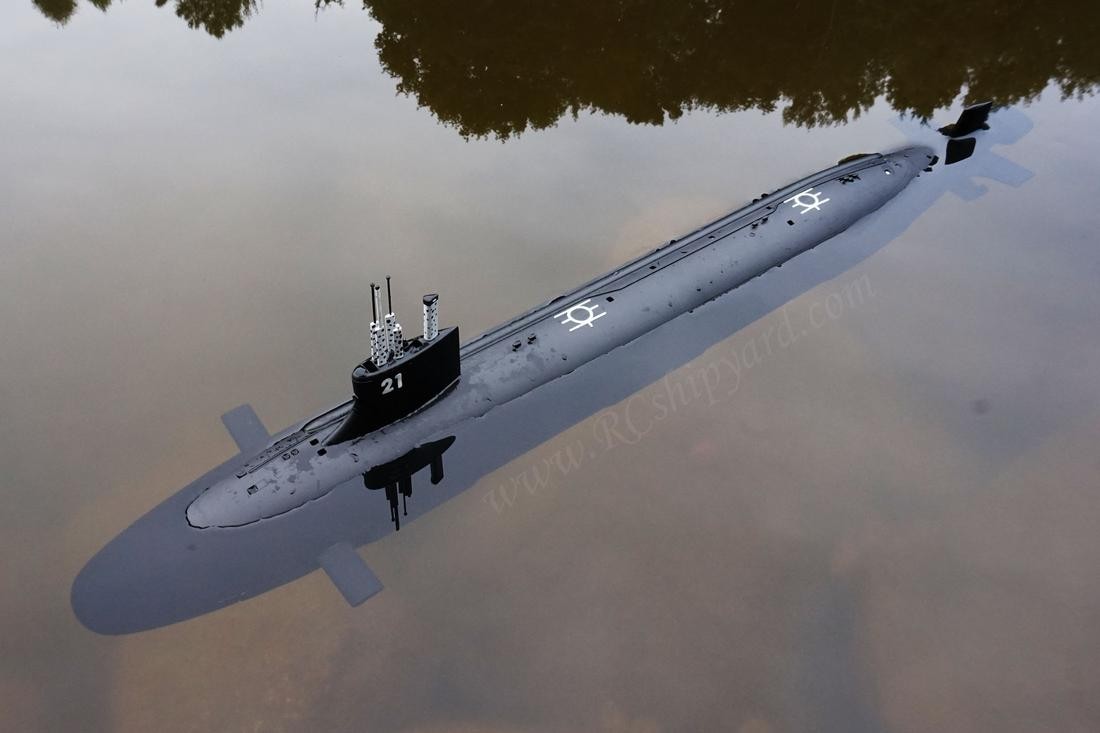
SSN-21 Seawolf
(Trumpeter plastic display model to RC conversion)
Measurements:
- Length: 75 cm
- Displacement: 1.15kg
- Scale: 1:144
- Type: static diver (elastic ballast tank)
SSN-21 Seawolf is a plastic model conversion for a radio controlled submarine with a WTC tube and a conversion kit of my own design.
The idea was to test some of the universal engineering solutions and ideas of my modular WTC system and how much it will speed up the model built process. It speeds up… A LOT!
Build :
Built start: 29.04.2019
Built end: 21.08.2019
Maiden Voyage: 26.08.2019
(really quick built thanks to my modular WTC system)
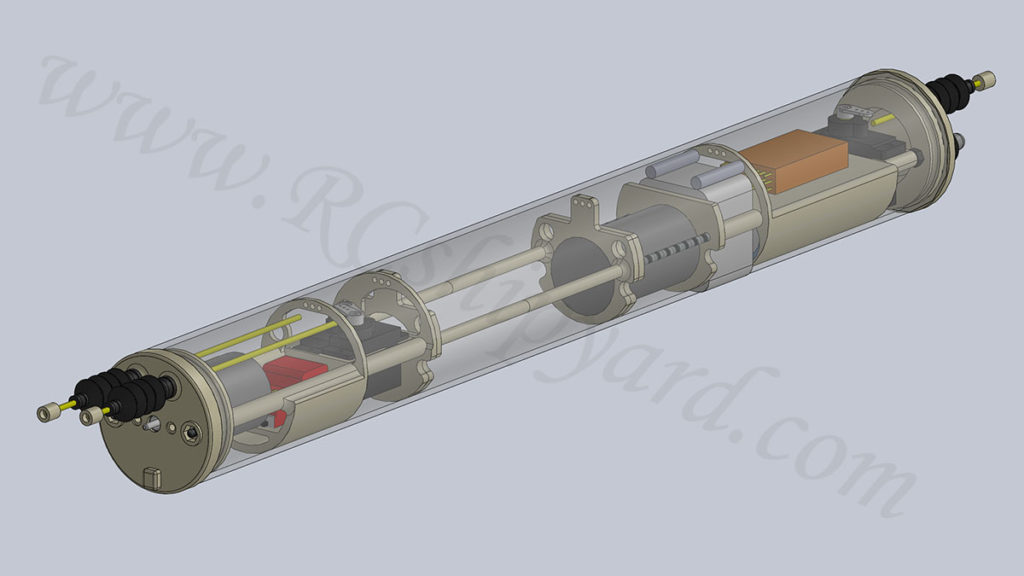
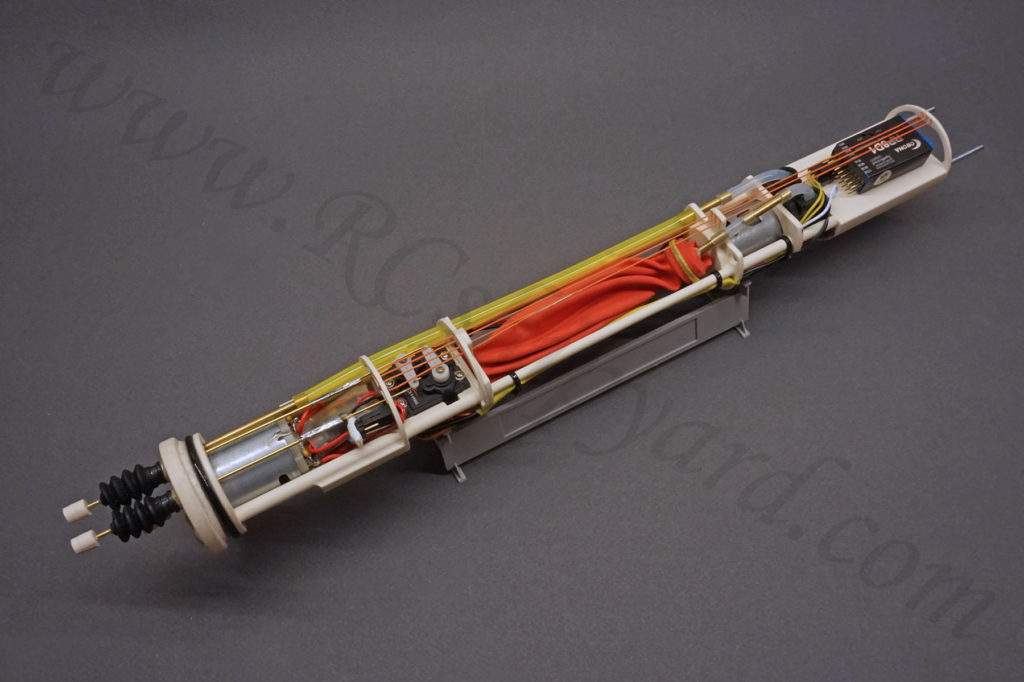
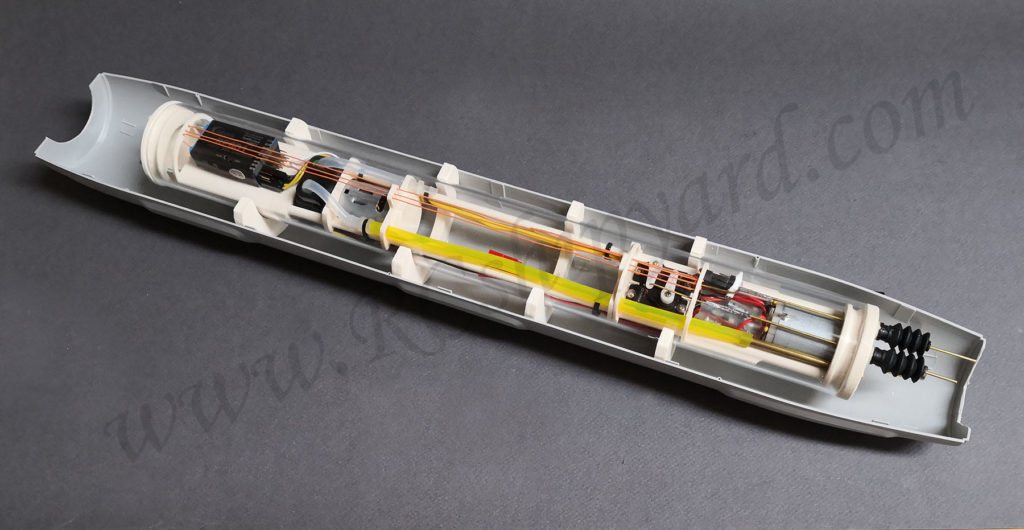
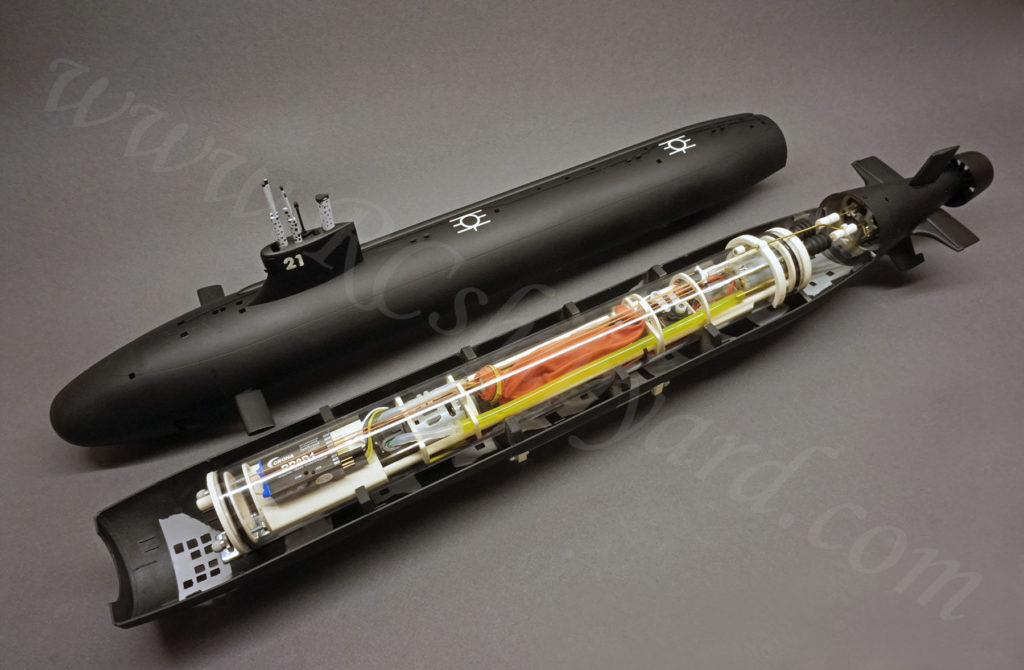
The Water-Tight-Cylinder (WTC):
The Pressure Tube (WTC) has a modular design and shares some of the elements – like the stern cap type and the ballast system type with the WTC from them Trumpeter Kilo Conversion. This allowed me to speed up the build and focus only on missing elements – the bow cap and a new – bigger battery compartment which was designed to hold two 18650 Li-ion cells. This allowed to use some really high capacity cells like 3300 or 3600mAh. The running time of the model will be long for sure!
From a 3d project…
…to the real thing:
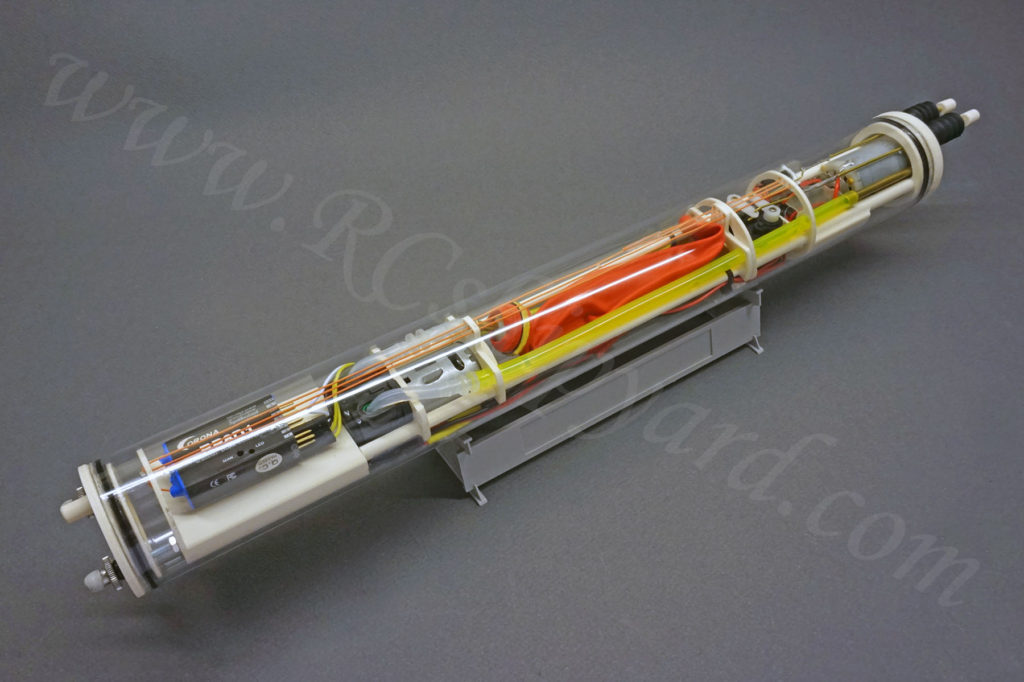
The tube is a 10cm (3.94″) longer then the tube for the Trumpeter Kilo. This additional space was distributed between the larger battery space and the space of the now bigger elastic ballast tank. There is also some free space left in the bow and an additional pylon for glueing in a rubber bellow/gasket in the front cap of the WTC for those who would like use additional servo, pitch controller or an Arduino board – in short words space and options for those who like to develop and modify their projects!

It’s worth to notice a dedicated space for the antenna and lots of space for the radio receiver. It allows use a full size, dual conversion receiver. Both of those allow to keep the antenna inside the WTC – no need to drag the antenna outside and watch it dangle in the water during a run!
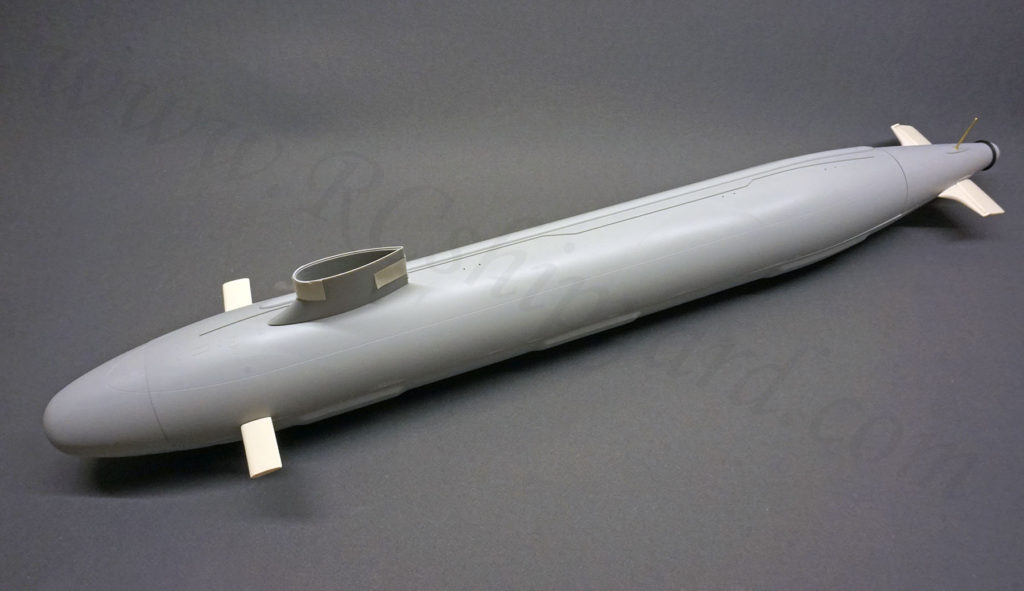
The plastic hull:

Like I said earlier this is a conversion – assembling a Radio Controlled model out of a plastic display model – The Trumpeter SSN-21 Seawolf box number 05904. You can get his model for about 30$ on Ebay directly from China. It’s a really good deal for a model of this size in my opinion.
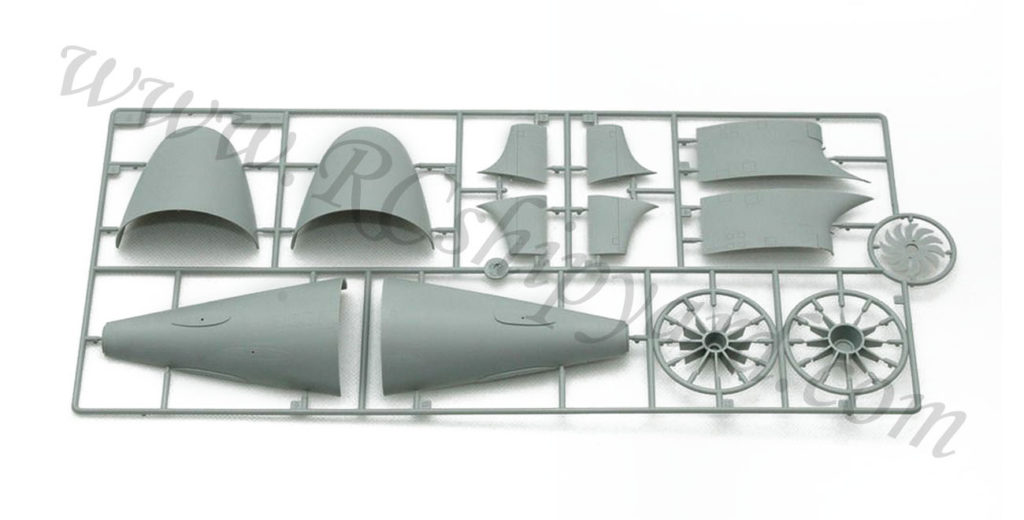
The content of the box of the Trumpeter Seawolf is fairly poor, but at the same time it makes it an easy model for assembly and further conversion. There are 3 frames with the elements in the box: The frame with the main hull parts, rudders, bow dive planes, periscopes and the stabilizers etc.:
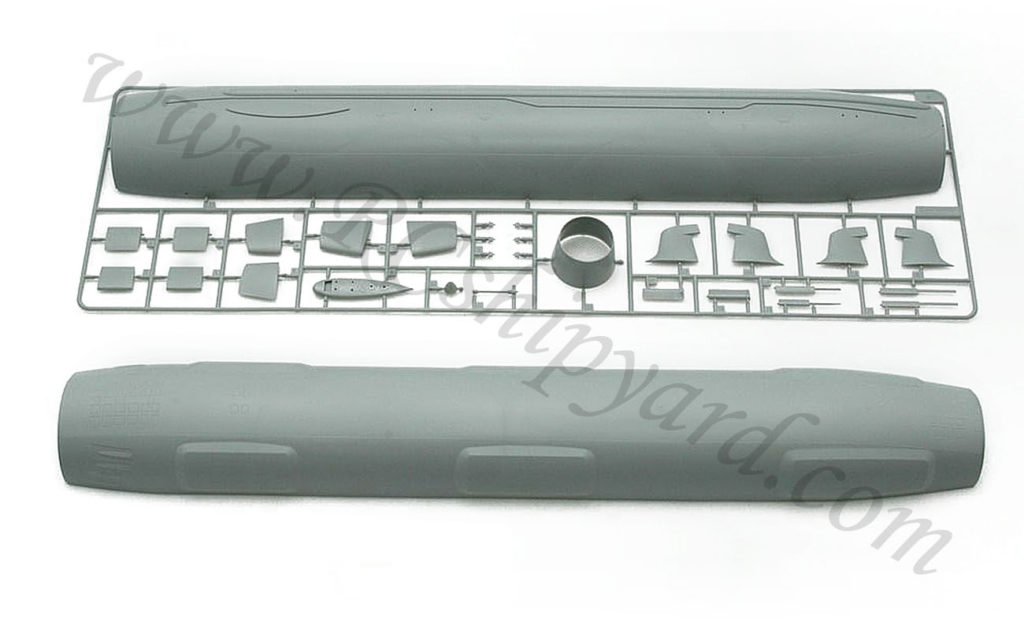
The frame with the sail, bow and stern – each dived to two parts and some elements for the jet drive. Most likely we will be skipping those last as we will need a propeller:
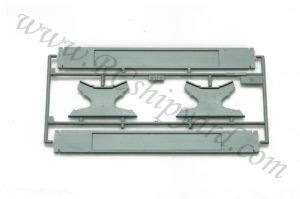
…and the the last little frame with the boat stand which Trumpeter gives to it’s every model submarine… Sadly, for this particular model it’s way to short. The model is very unstable when placed on it and I highly recommend to throw this damn thing away and get something longer, heavier and with rubber pads!
There’s a selection of things which need to be modified to make any plastic model usable in water as a RC vessel. We also need to remember that it was designed to be glued permanently and not as something which will be assembled and disassembled. The hull will very often need to be stiffen and strengthened. There’s also the matter of rudders which almost always need to be replaced for a bigger ones or at least with ones which can rotate. This was one of the first things which I had to deal with here. So a new set of dive planes and rudders have been created:
New planes and rudders compared to the ones straight from he box
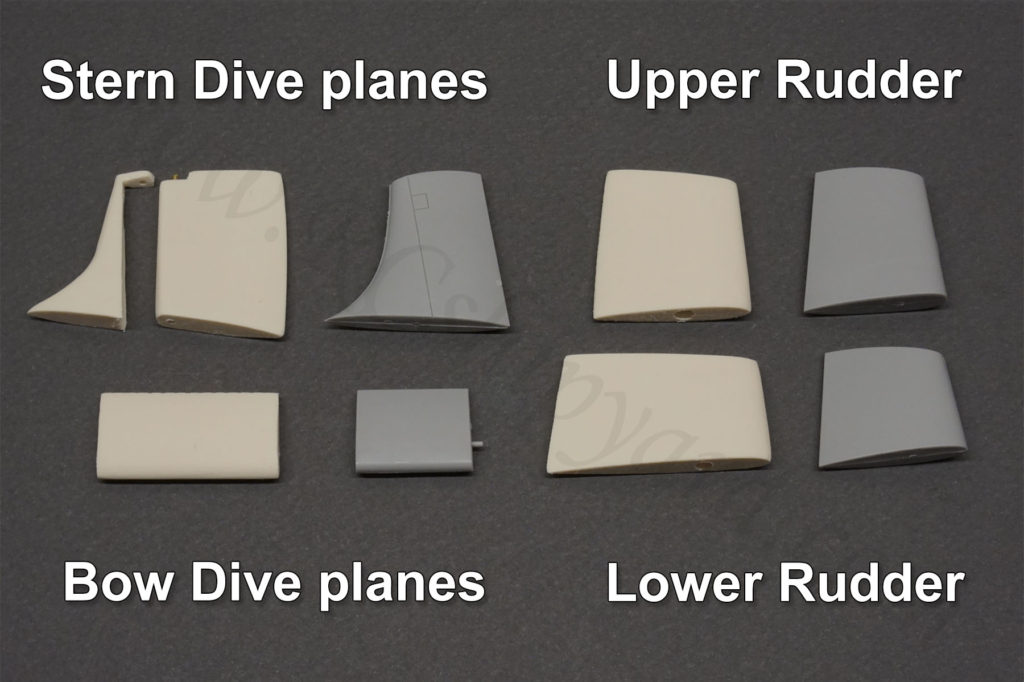
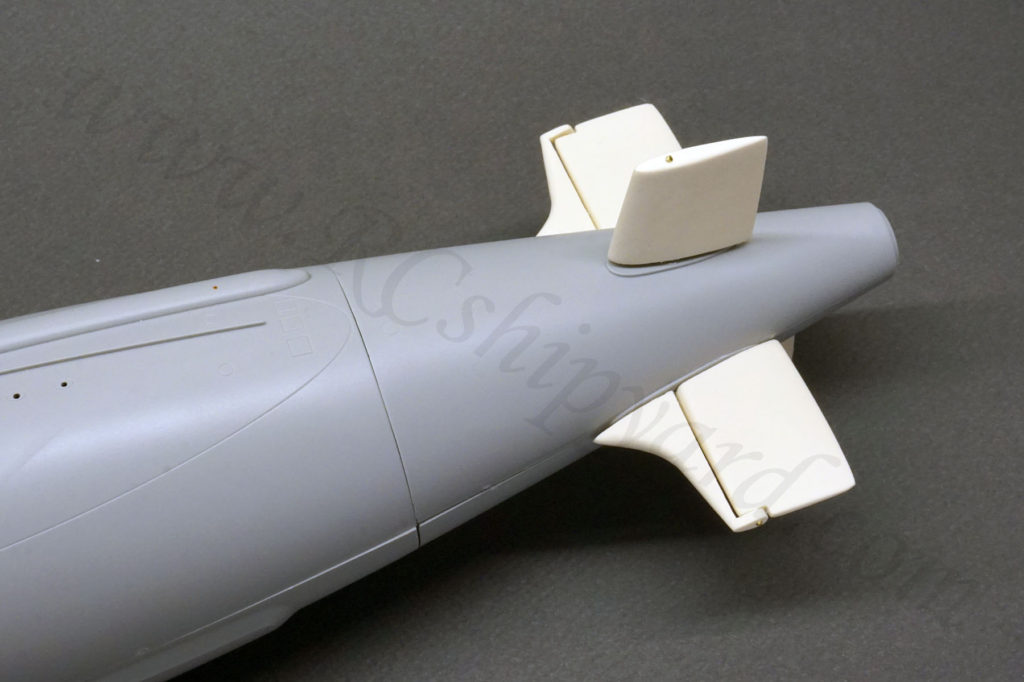
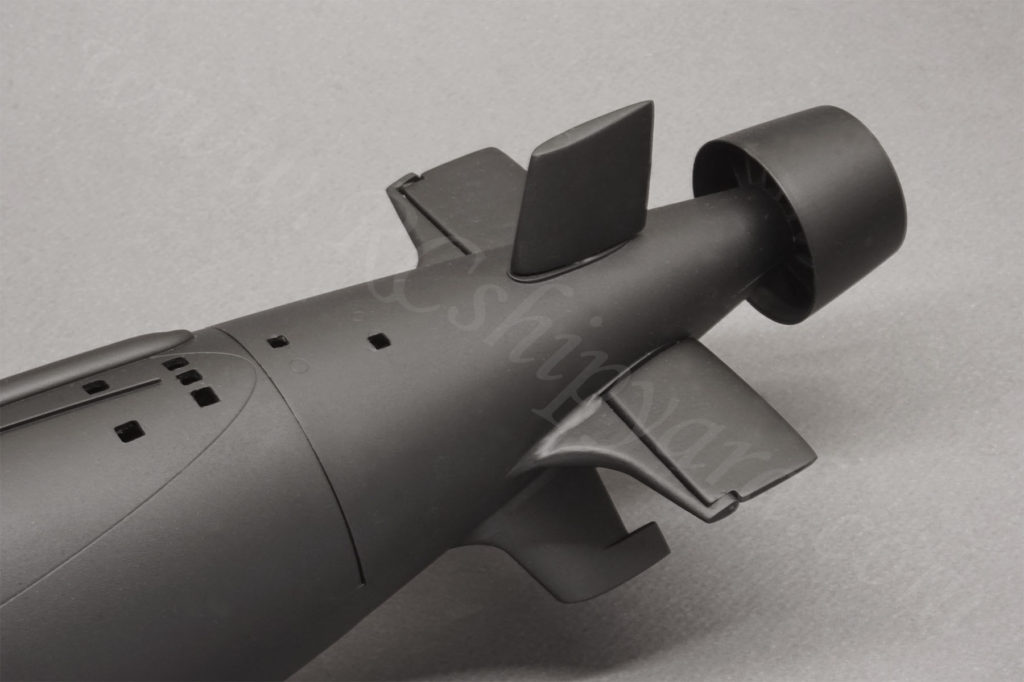
The grey ones are the plastic “original” ones out of the box. The white ones are made by me. You can clearly see that they have been slightly enlarged for better manoeuvrability, but I kept their shape at the same time. Additional hinge was created for the stern dive planes as Trumpeter has skipped this detail to simplify the production.
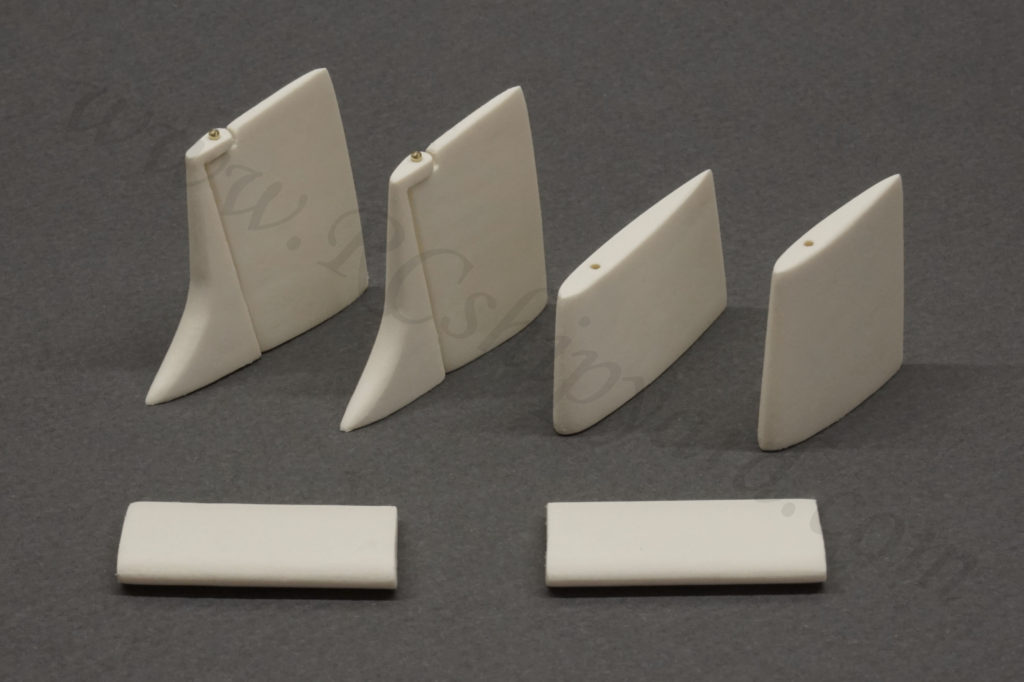
Finished product ready for glueing in place.
After dealing with that problem I began my work on the plastic hull. It was soft and wiggly – clearly needed additional structures to become more rigid. I also needed mounting points for my WTC tube. I decided to deal with this problem in the same manner I did with the Kilo. I have designed and manufactured a set of ribs which which both stiffen the hull from the inside and at the same time they will be the support for the WTC tube.
4 ribs in the lower hull:
The great news is that the ribs in the upper hulls are also a great place to hide the pushrod which will move the bow dive planes!
and 3 more in the upper hull:
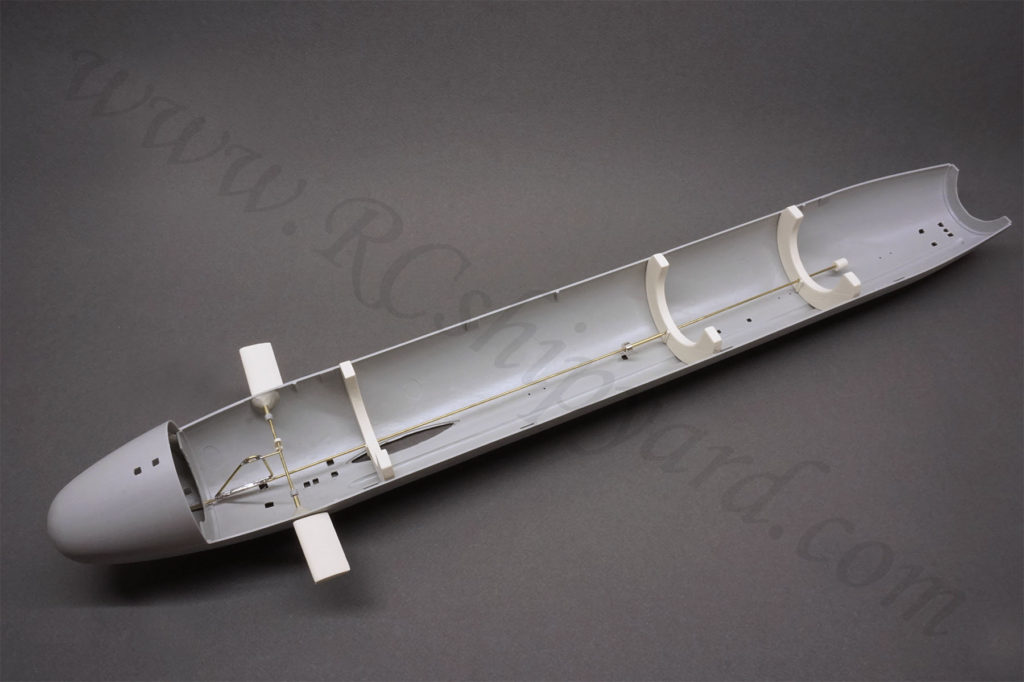
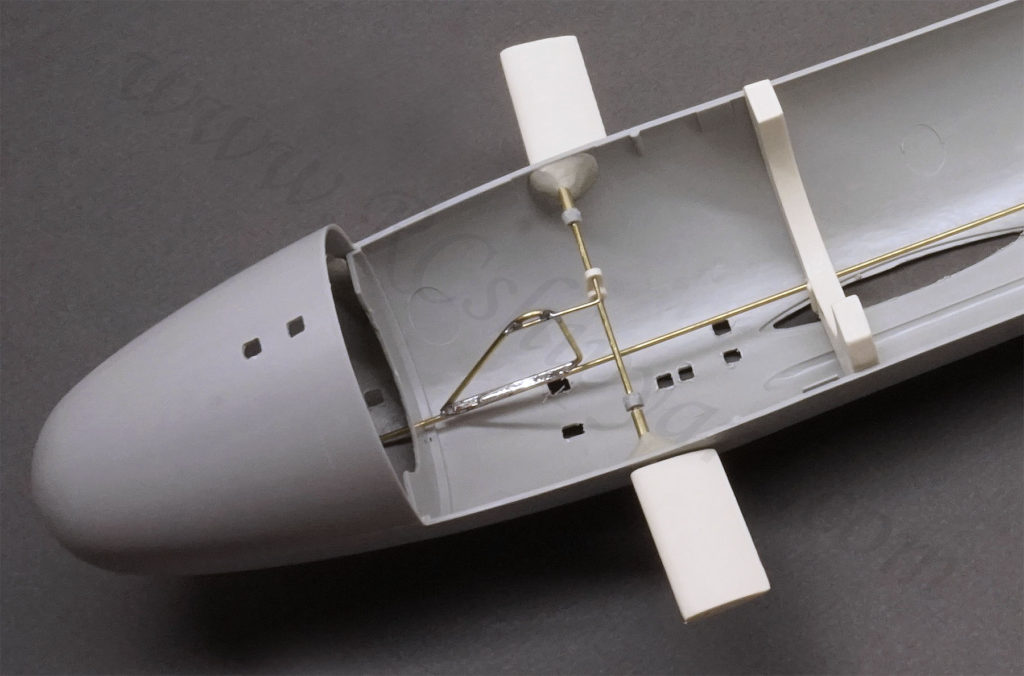
As you can see I have decided to glue in the bow “cone” permanently to the main hull as it improved the stiffness of the upper part quite greatly. The bow dive planes mechanism has been also assembled and glued in place. It’s worth to mention that it needs to be placed further in the front than the shaft of the bow planes as you need the space behind the planes shaft for your WTC tube. On the other end of the bow planes shaft there is one of my magnetic connectors. It will connect to the WTCs pushrod automatically when placed in close proximity.
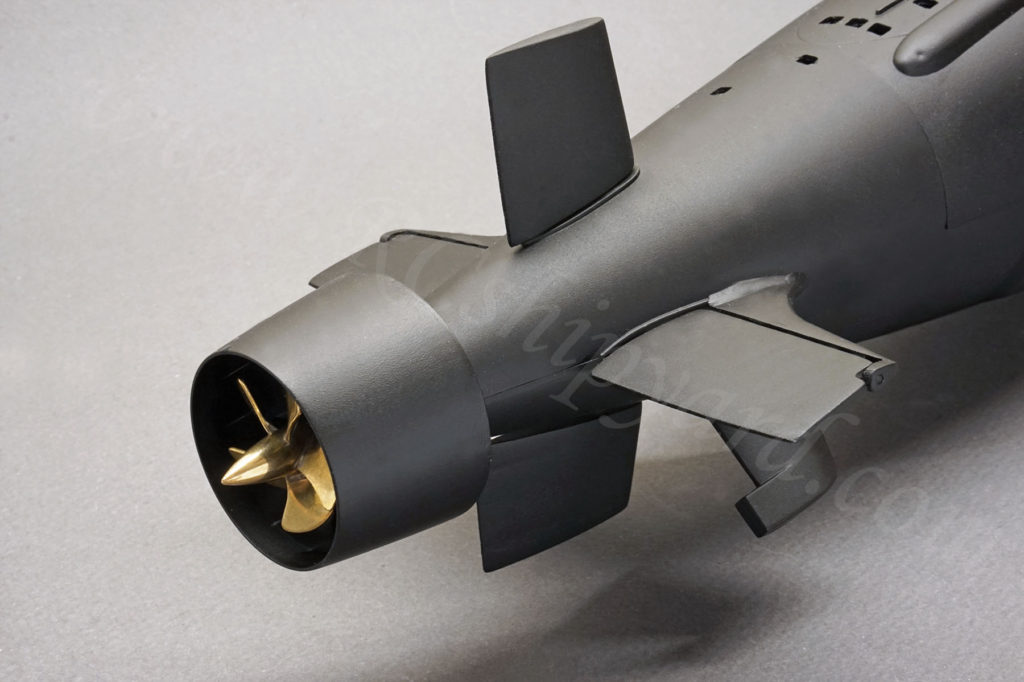
Stern:
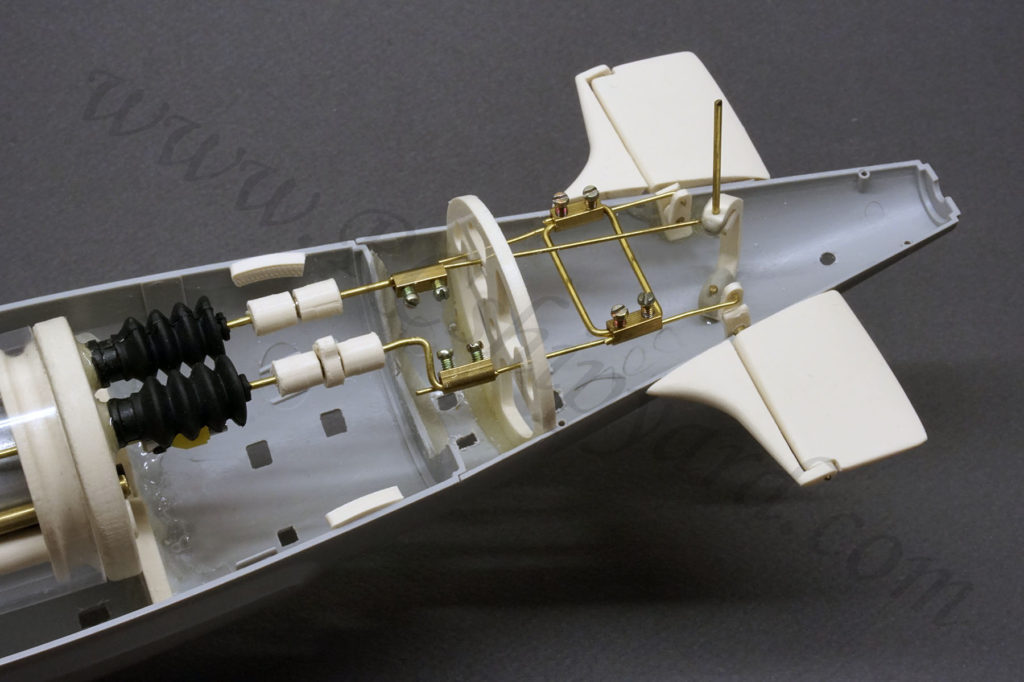
The stern of the model which is being converted to RC is usually the hardest and the most time consuming. It’s not really different with the Seawolf. You have make the dive planes rotating, the rudders and between all that you need to place the shaft for the propeller. The shaft itself needs fixing points and bearings. You also need a quick way to connect the wet part of the mechanisms with the WTC tube. To deal with this challenges a selection of parts has been designed and developed.
The plastic bulkhead with slots for the pushrods and a hole for the shaft in the middle. You can also see the brass bearings being glued in. The brass rod on the photo below is placed in the bearings only temporarily – to assemble and connect everything levelled and linear. In the final stage of assembly of the stern, each dive plane will have it’s own shaft as I need the center of the stern for the main shaft.
Next step – the process of designing, developing and aligning the pushrods and their connections with the WTC:

Further progress. All the pushrods have now been aligned and fine trimmed to match the positions of the servos. I can still use the Radio trimmer but the better it is all aligned mechanically the better will the model behave. The hull’s pushrods are connected with the pushrods from the WTC with magnetic connectors which make assembly and disassembly nice and easy. The little rectangle made out of brass rod (on the right from the round bulkhead) should’ve been soldered but this one time I took the liberty of allowing myself for a lazy shortcut – two collets with double screw each which are usually used for changing the length of a pushrod do the job too. I’ll just put lots of locktite and we can forget about it 😉 :
A closed Stern – checking how everything fits. It does fit nicely, but I had to fight with the hull a little as my unit came warped. I really wonder is it only mine or the general problem with this Trumpeter model.
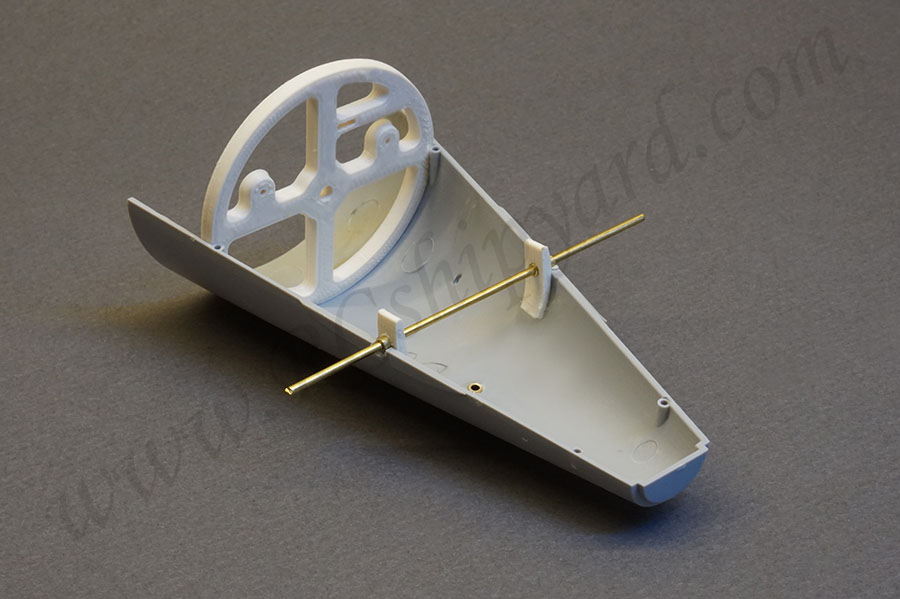
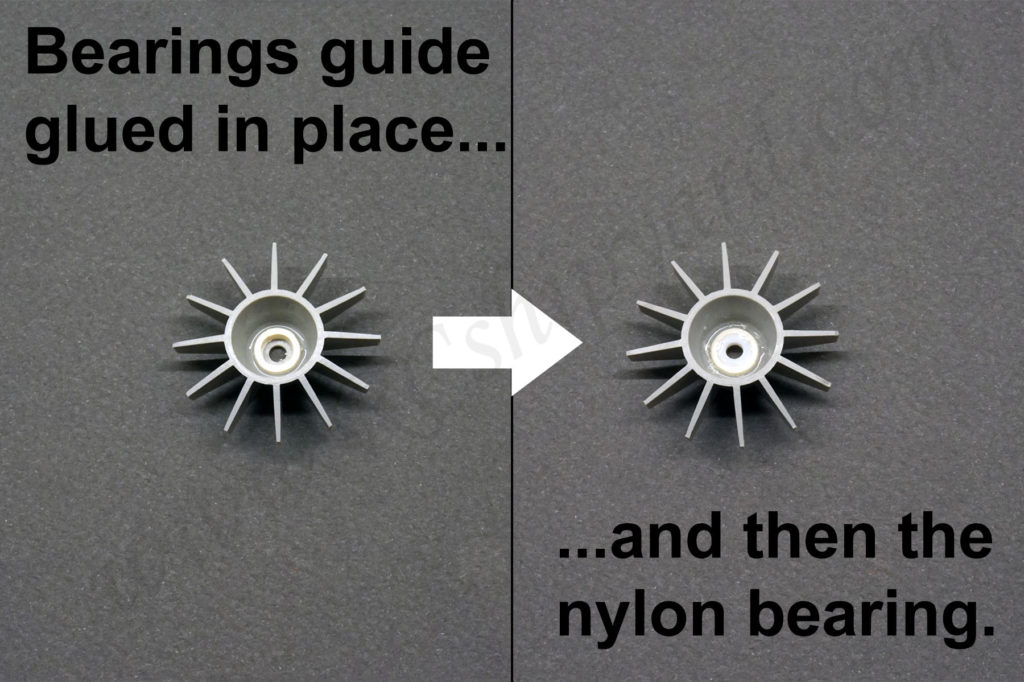
Then came the time to mount the very end of the stern – the element which looks like a little sun and actually is a mounting point for the characteristic nozzle of the Seawolf. However before gluing it permanently in place I had to develop a bearing for the propeller’s shaft. I decided to go with a simple nylon bearing capable of working submerged.
In the left side of the photo you can see a little white ring in the grey plastic part. It’s is the bearing’s guide – it perfectly fits and fills the center of the part made by Trumpeter – you just can’t place it wrong as it goes in only with some force and snaps in place. It will make sure that the nylon bearing is glued precisely in the center (right part of the photo) as the bearing itself will go directly inside.
Now everything (except the upper rudder) was glued in together permanently. Magnetic connectors and the shaft couplers have been aligned and locked. I’ve filled with putty and sanded down all the nasty gaps between the hull and the planes/stabilizers too!
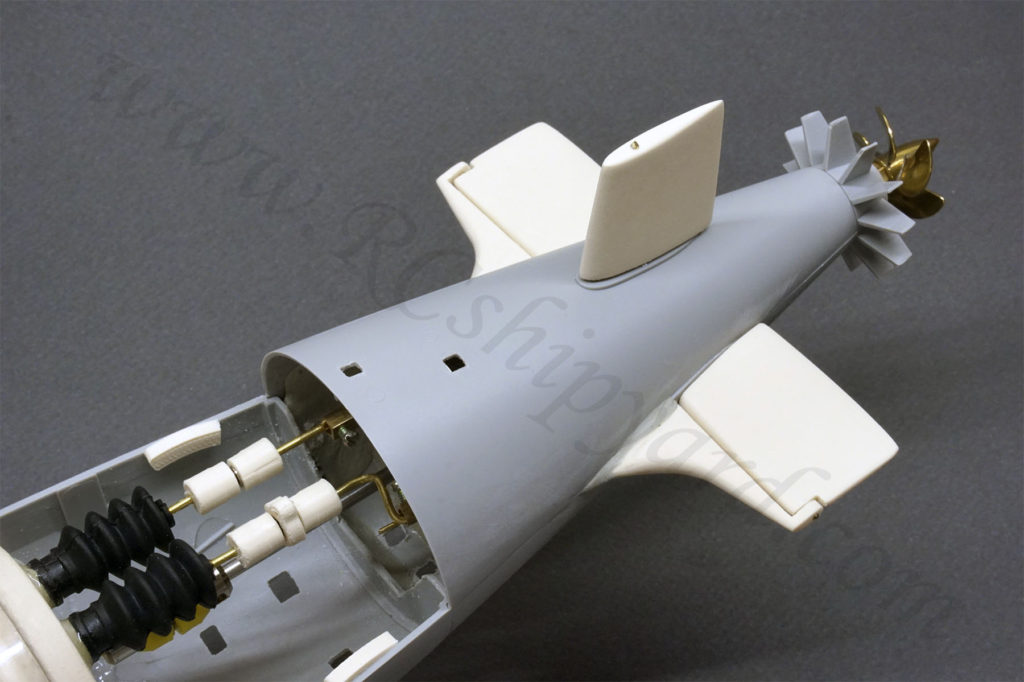
One more check do all the elements fit correctly. Then came the time for filling the last few gaps with putty – especially in the bow. Finally the whole hull will be sanded down slightly to make the model ready for painting.
Painting:
I decided to go with a classic black matt finish. I know that those red belly subs look way better (like I did with the Akula or the Typhoon), but I have a long queue of models for this year and had to speed up few things!
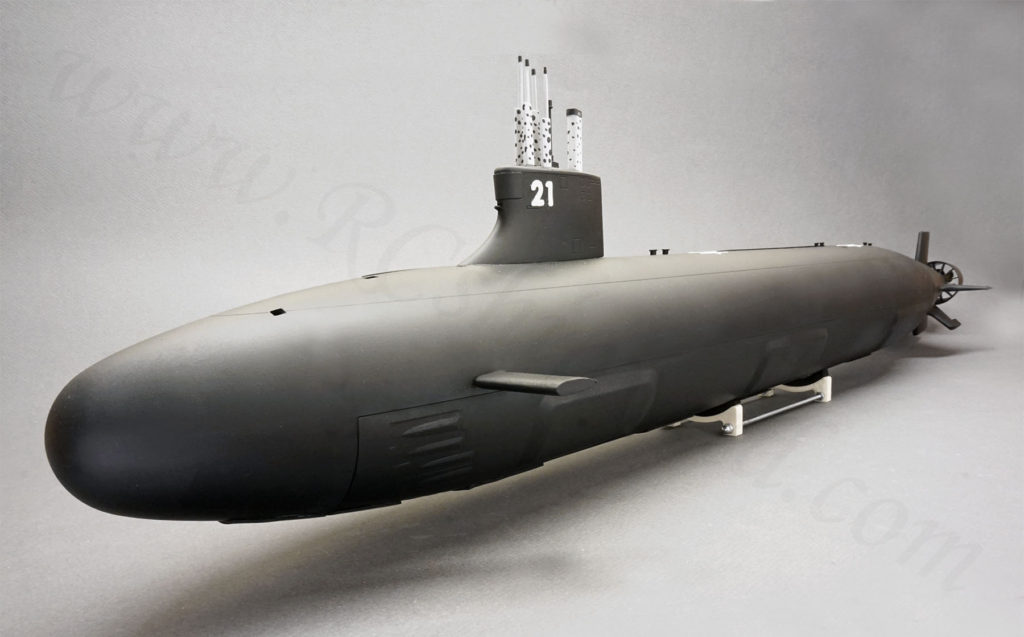
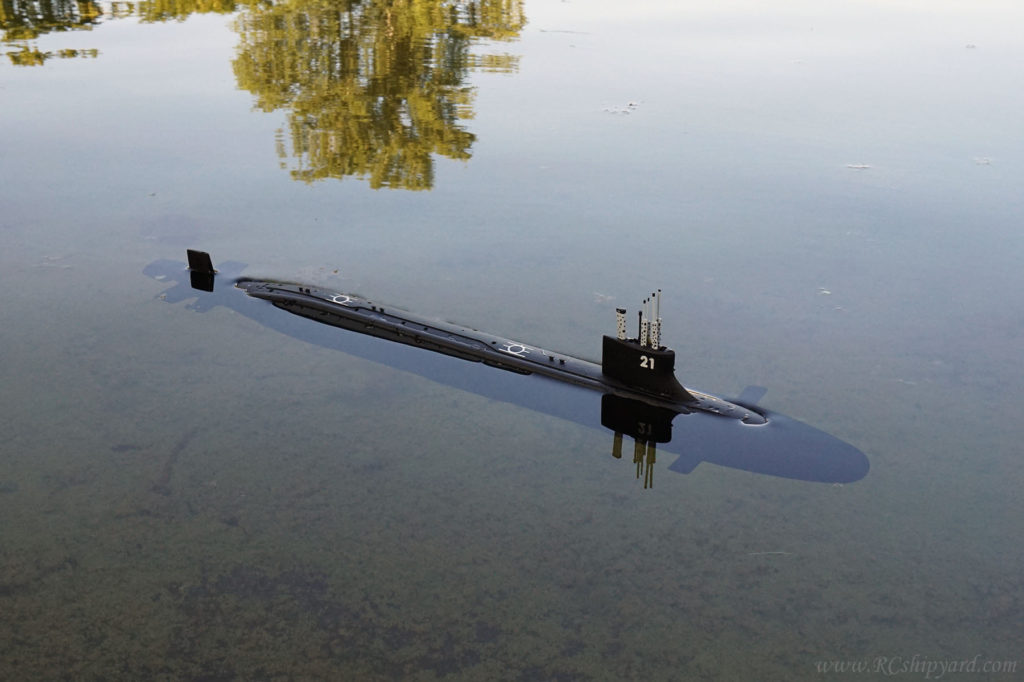
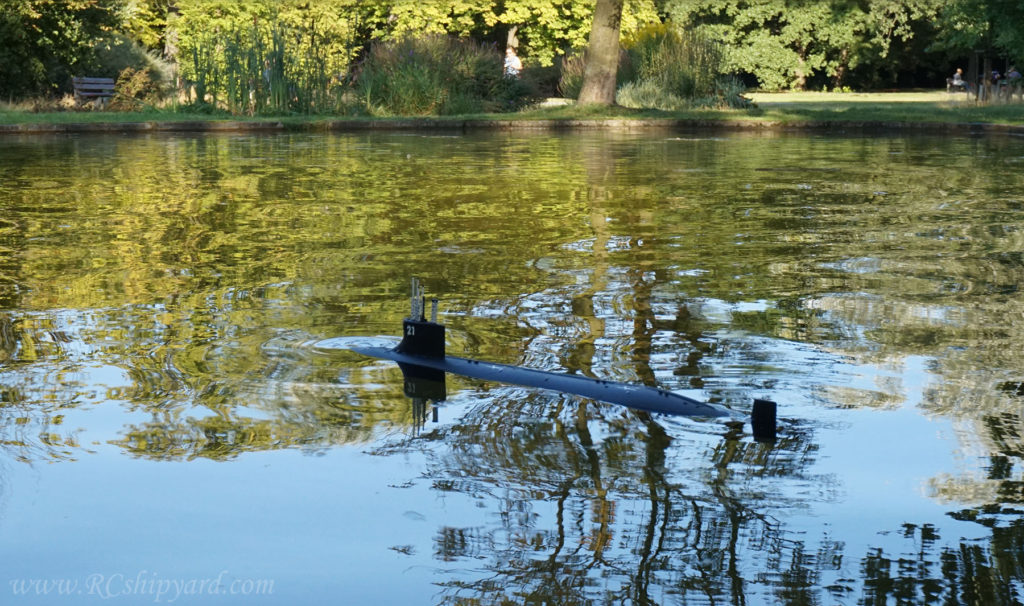
Finished and painted model:
Finished model splits ONLY into TWO pieces allowing for an quick and easy access to the WTC tube.
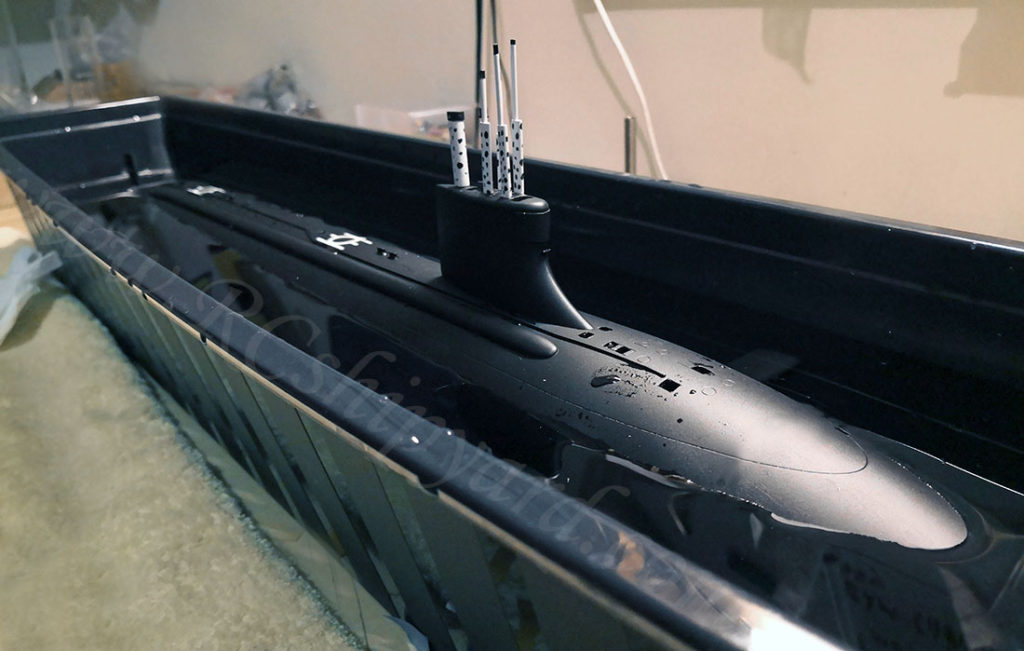
Trimming:
One of the very few advantages of the small scale models is that you don’t need a pool to trim them. A long flower pot will do just fine. You can put it on your work bench and work on the model while sitting comfy in a chair, not half bent over the pool or on your knees in the bathroom! As you can see on the photo the model sits a little to high in the water. That’s a perfect scenario for any model submariner as it means you just need some ballast and adding it under the WTC will add stability to your vessel! Something you really, really want in a model of this size!
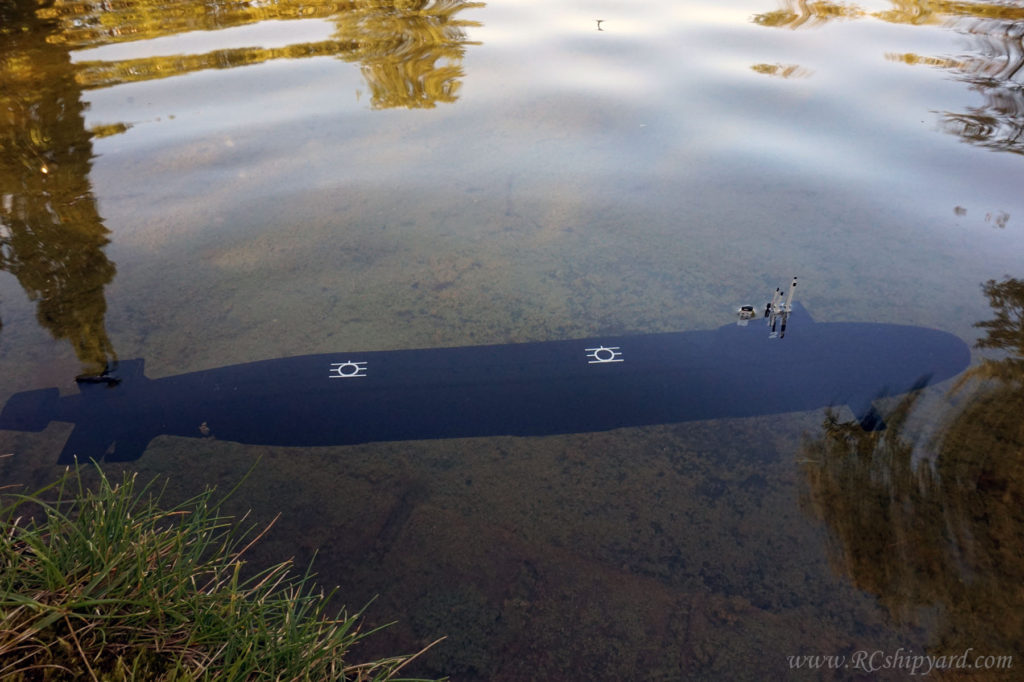
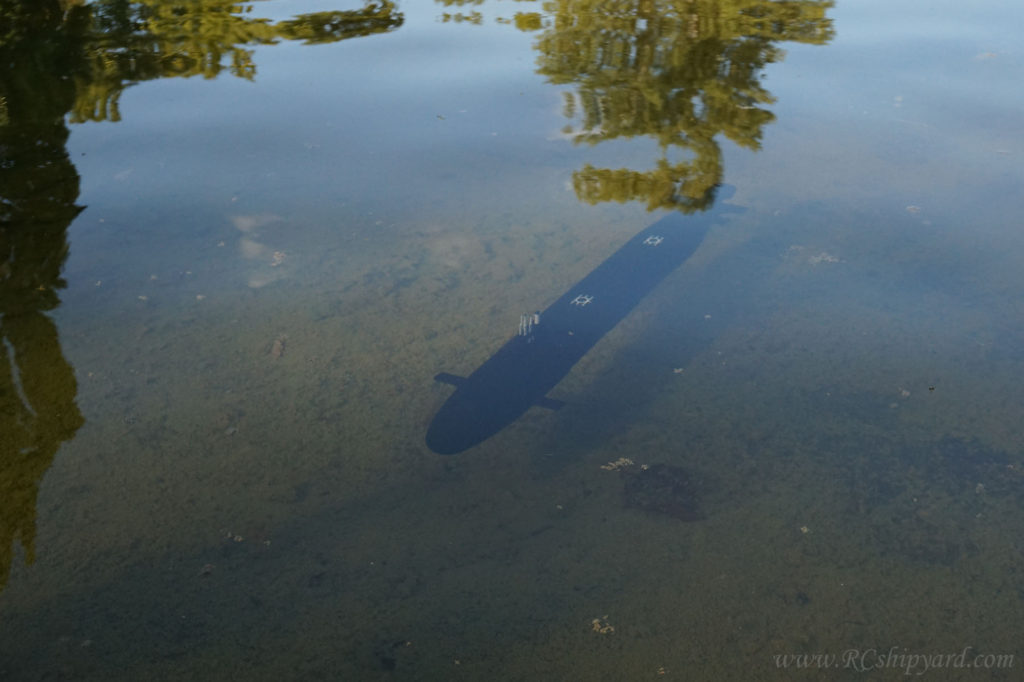
Maiden Voyage:
Maiden voyage took place 26.08.2019 in one of the Warsaw parks. The initial trim was not bad, but the model required two pieces of foam for a stable underwater trim and a 5gram ballast weight in the bow for a good surface run trim.