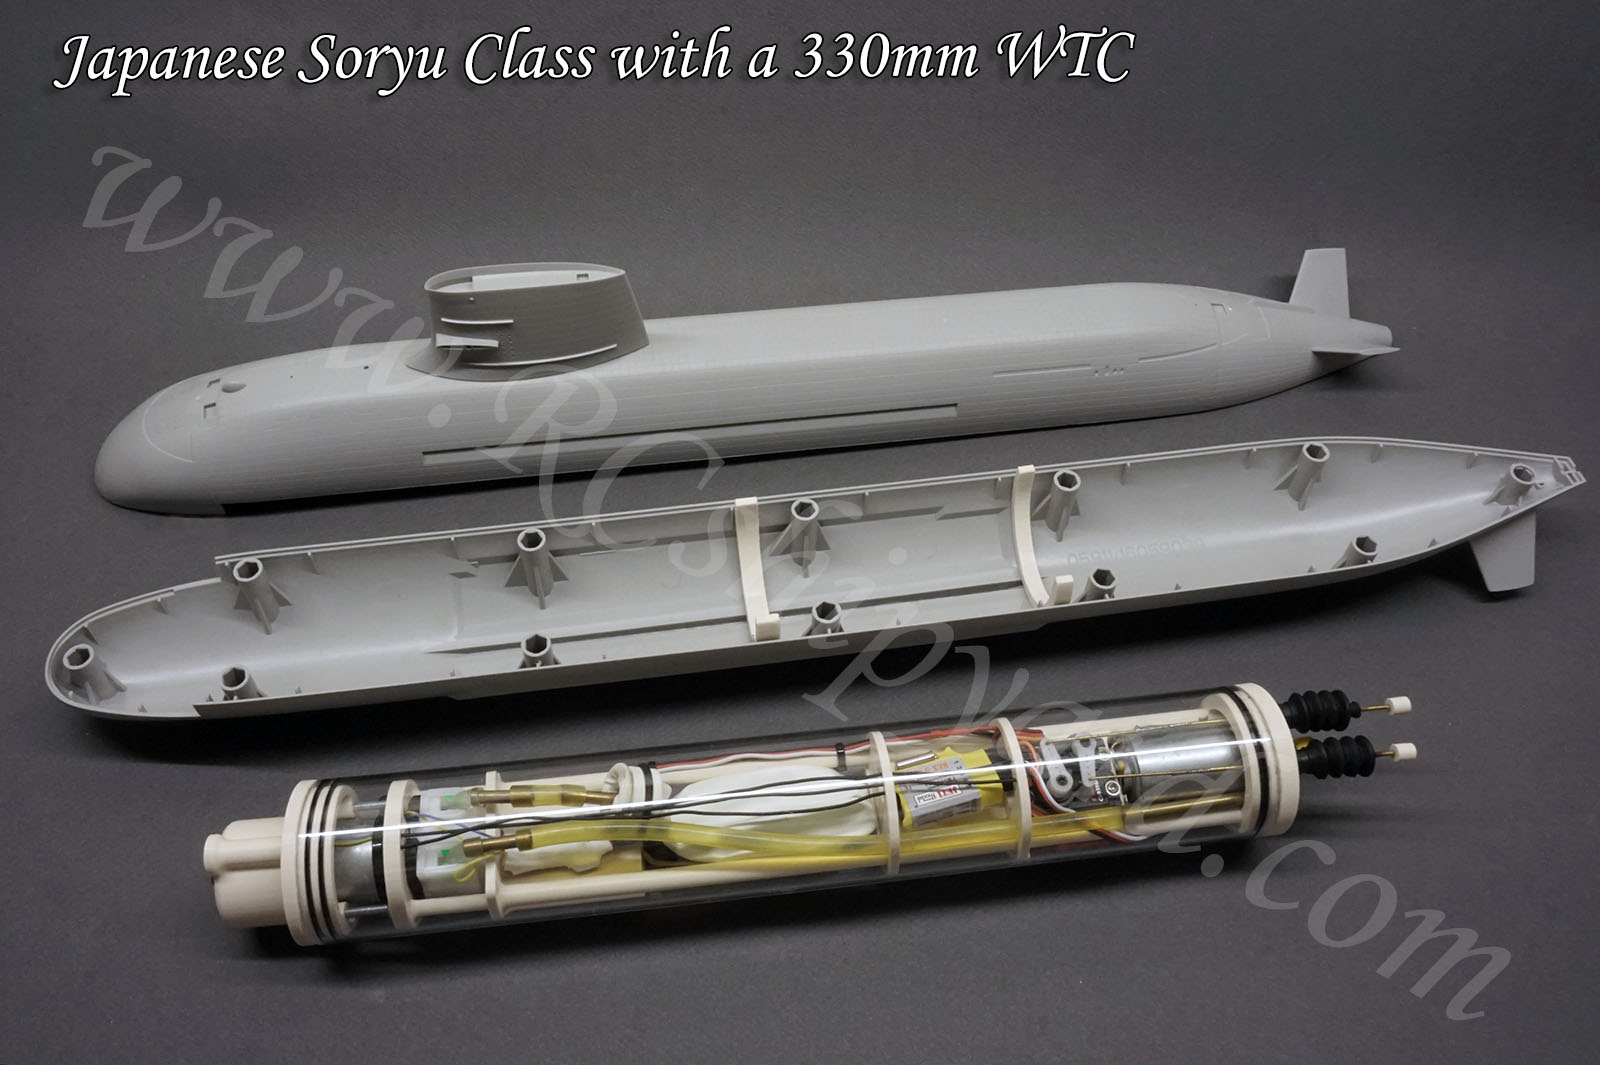
Japanese Soryu Class (Trumpeter RC conversion)
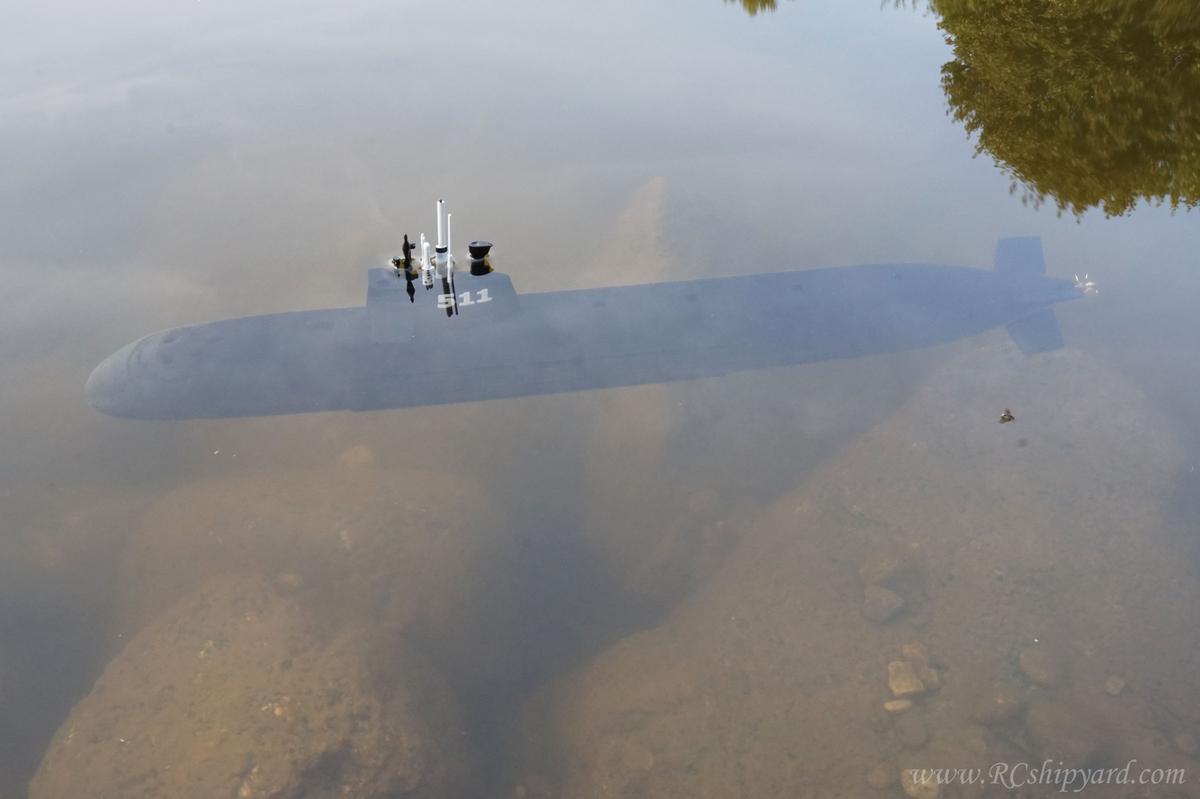
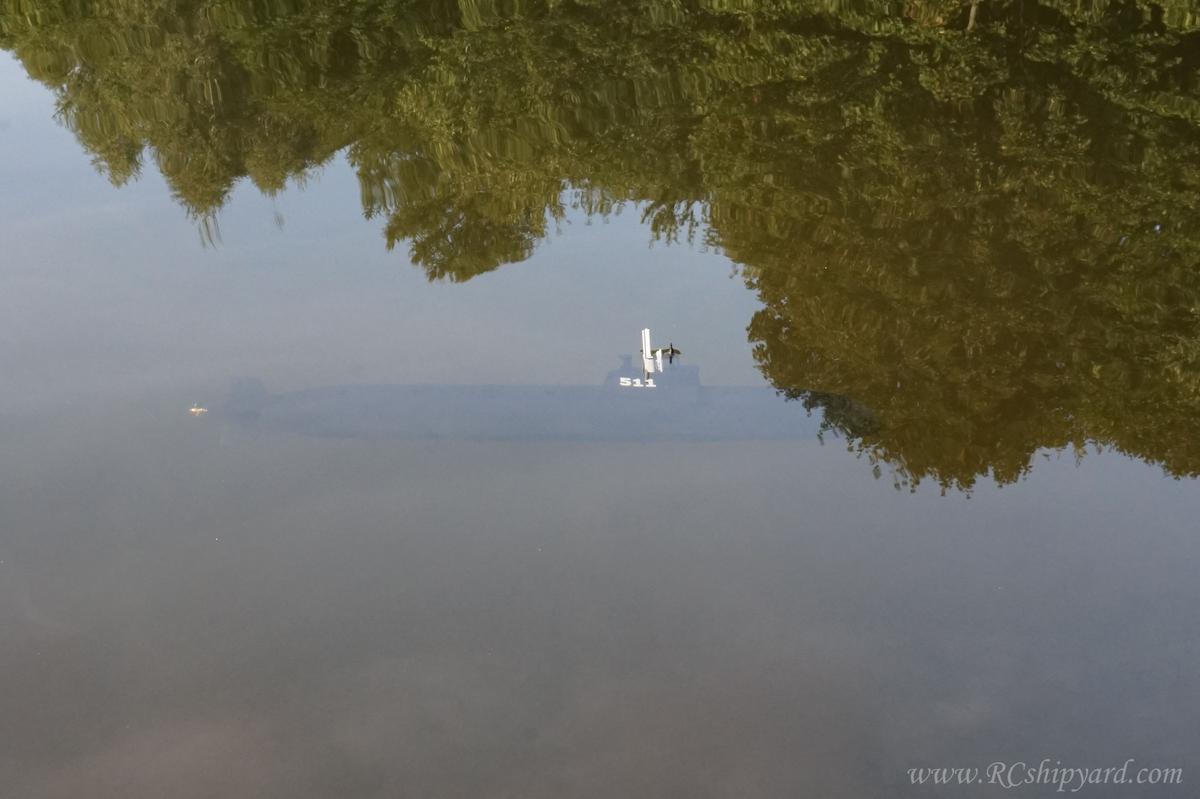
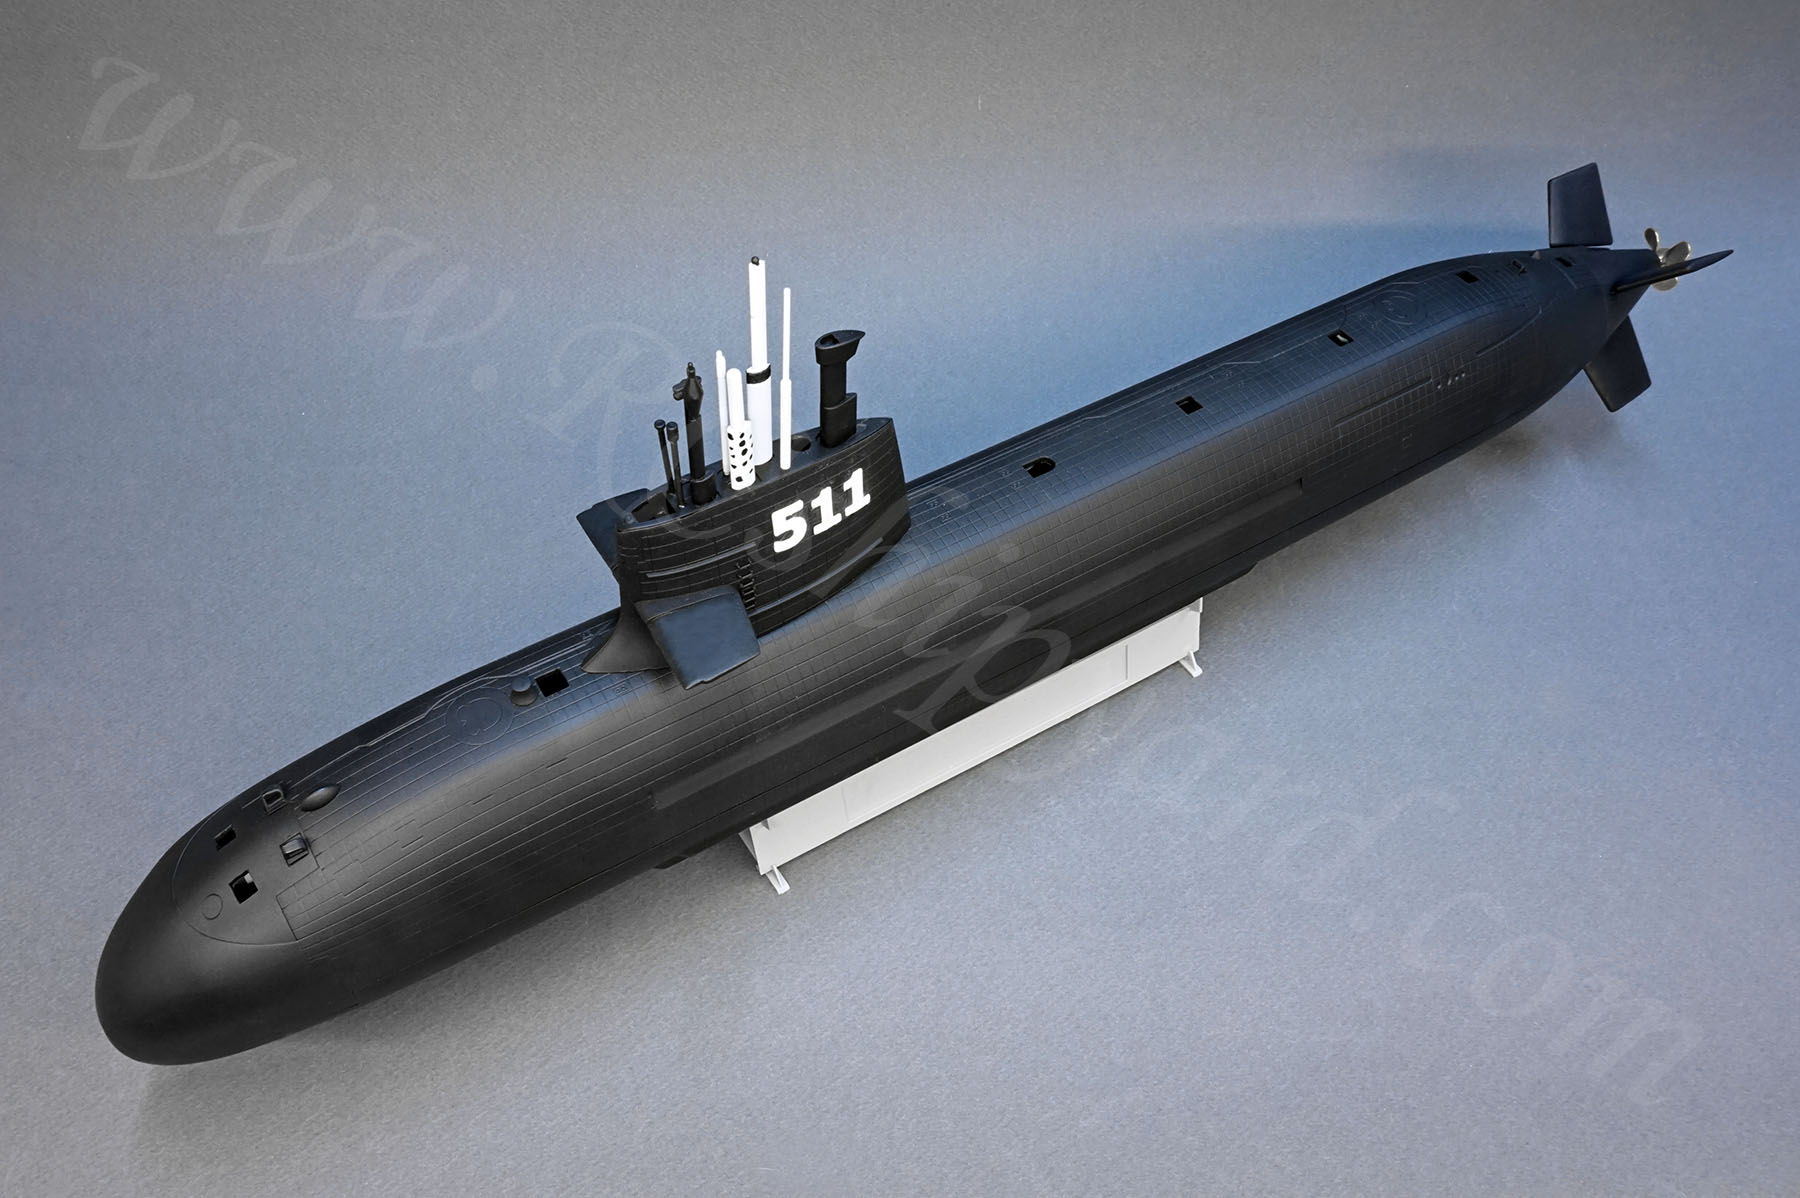
 SS 511 “Oryu”
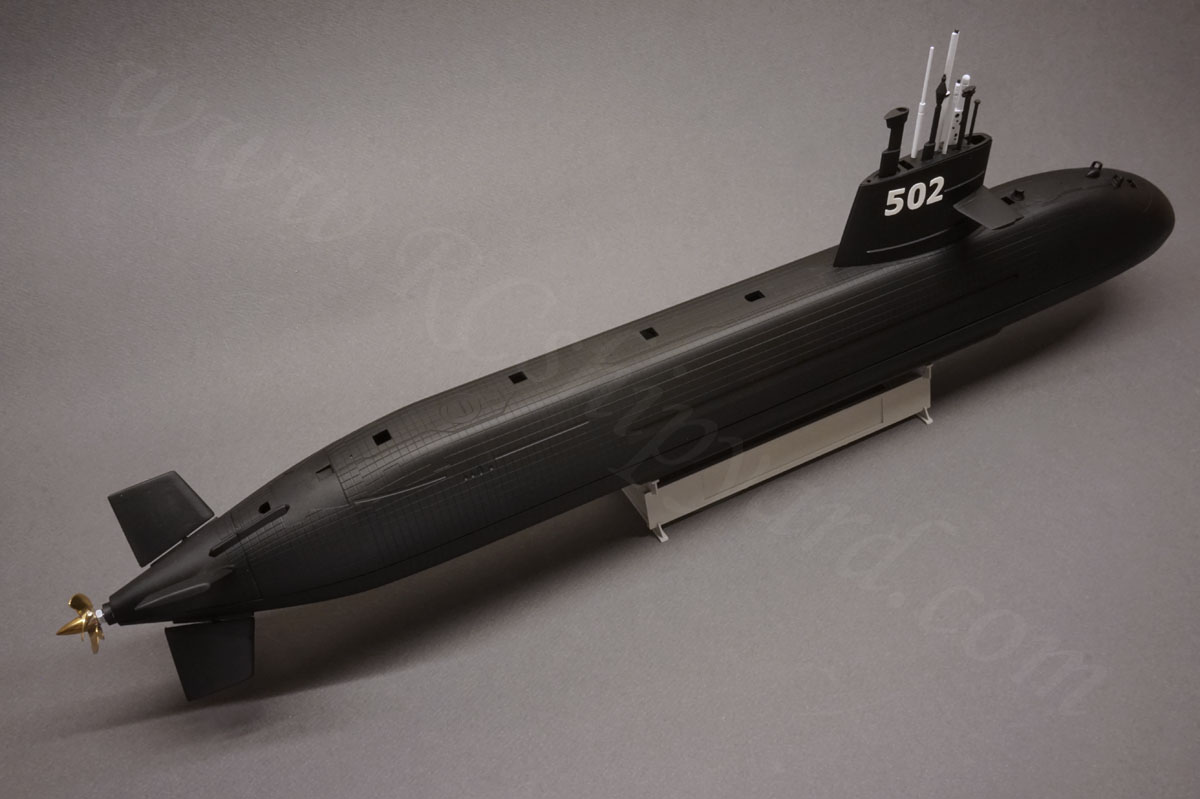
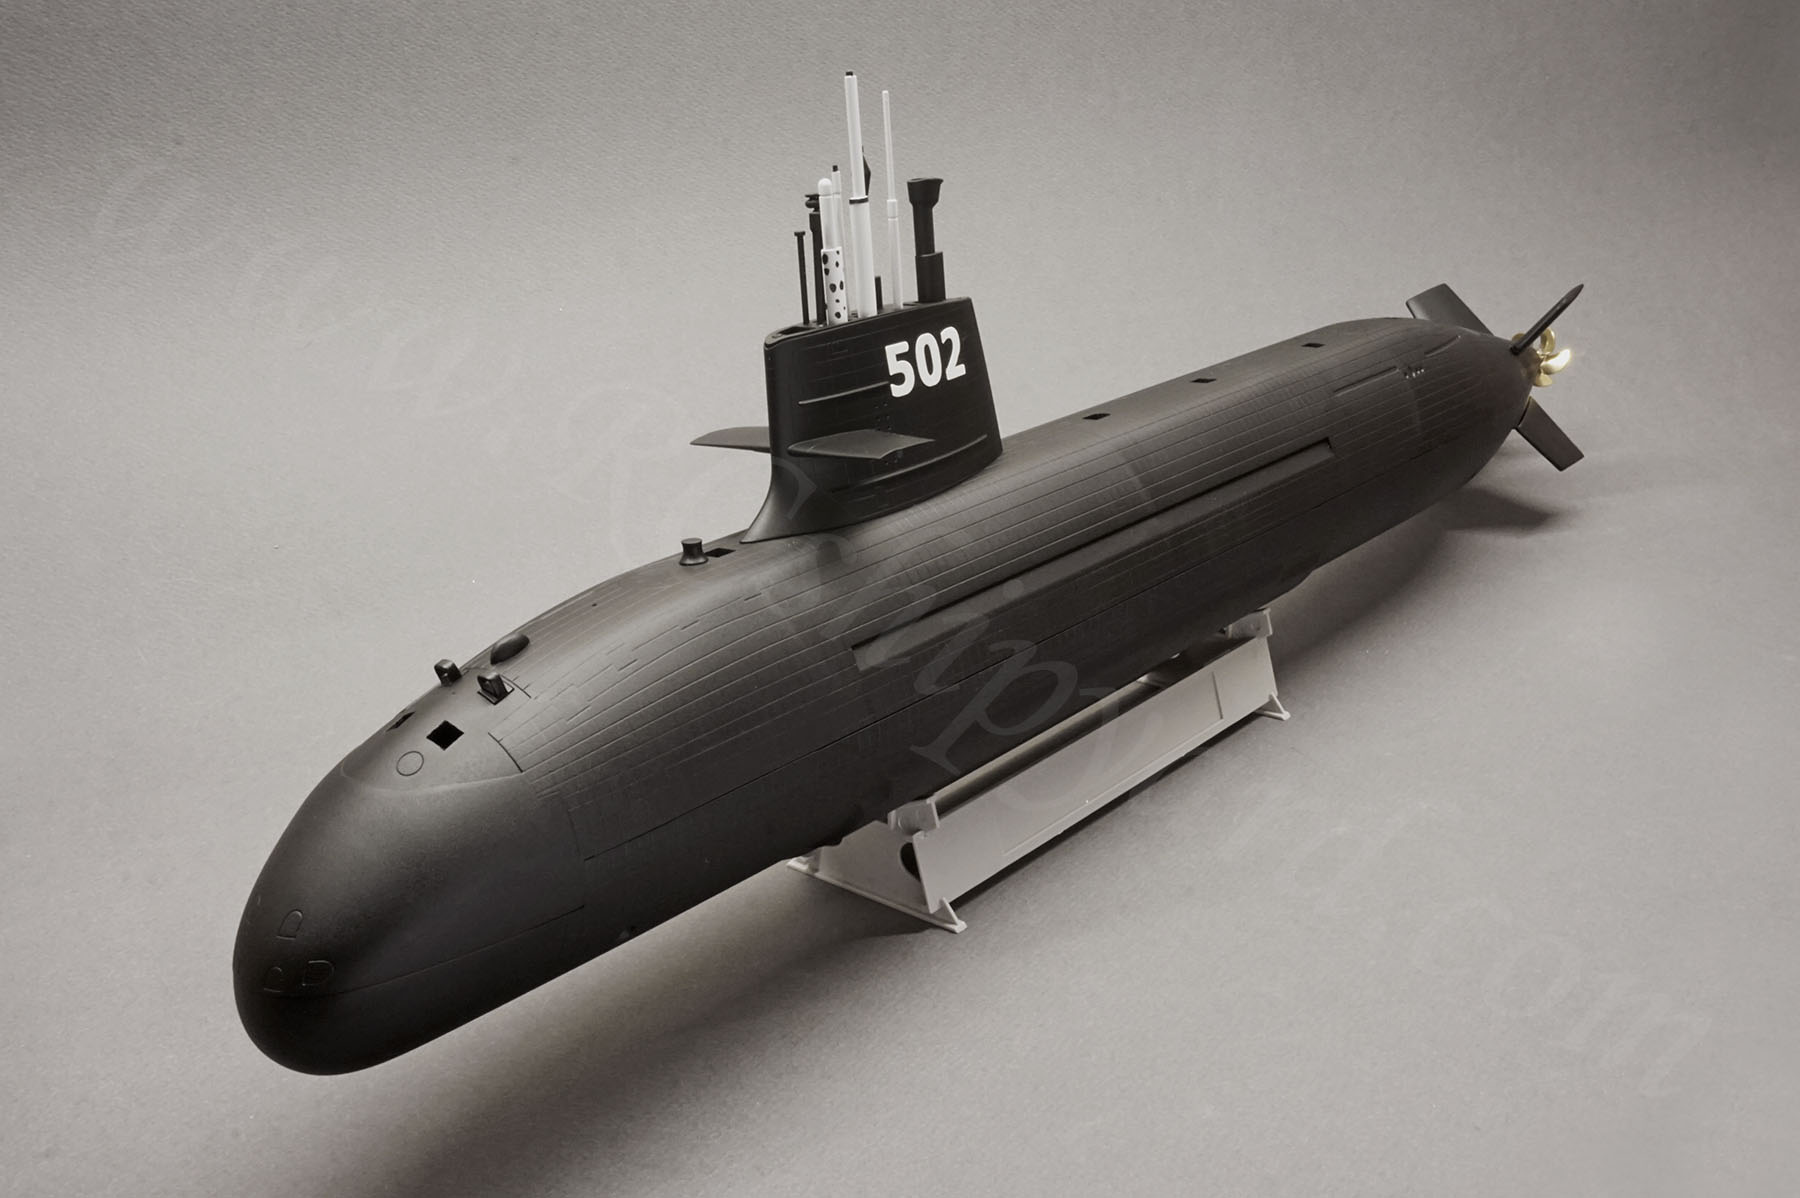
SS 502 “Unryu”
(Trumpeter plastic display model to RC conversion)
Measurements:
- Length: 59 cm
- Displacement: 0.95kg
- Scale: 1:144
- Type: static diver (elastic ballast tank)
Japanese Soryu Class is a plastic display model converted for a radio controlled submarine with a RC WTC tube and a conversion kit of my own design.
Built start: 29.08.2019
Built end of the first model: 07.10.2019 – “SS 502 Unryu”
Built end of the second mdoel: 08.09.2020 – “SS 511 Oryu”
First of all – I have made two of the Soryu class boats – one model after another.
– The 502 “Unryu” uses the same cylinder as the Kilo and has operational stern planes only. It’s the first version of the model.
– The 511 “Oryu” uses a dedicated cylinder which allows for operational stern planes and additionally fairwater planes. It’s the second version of the model.
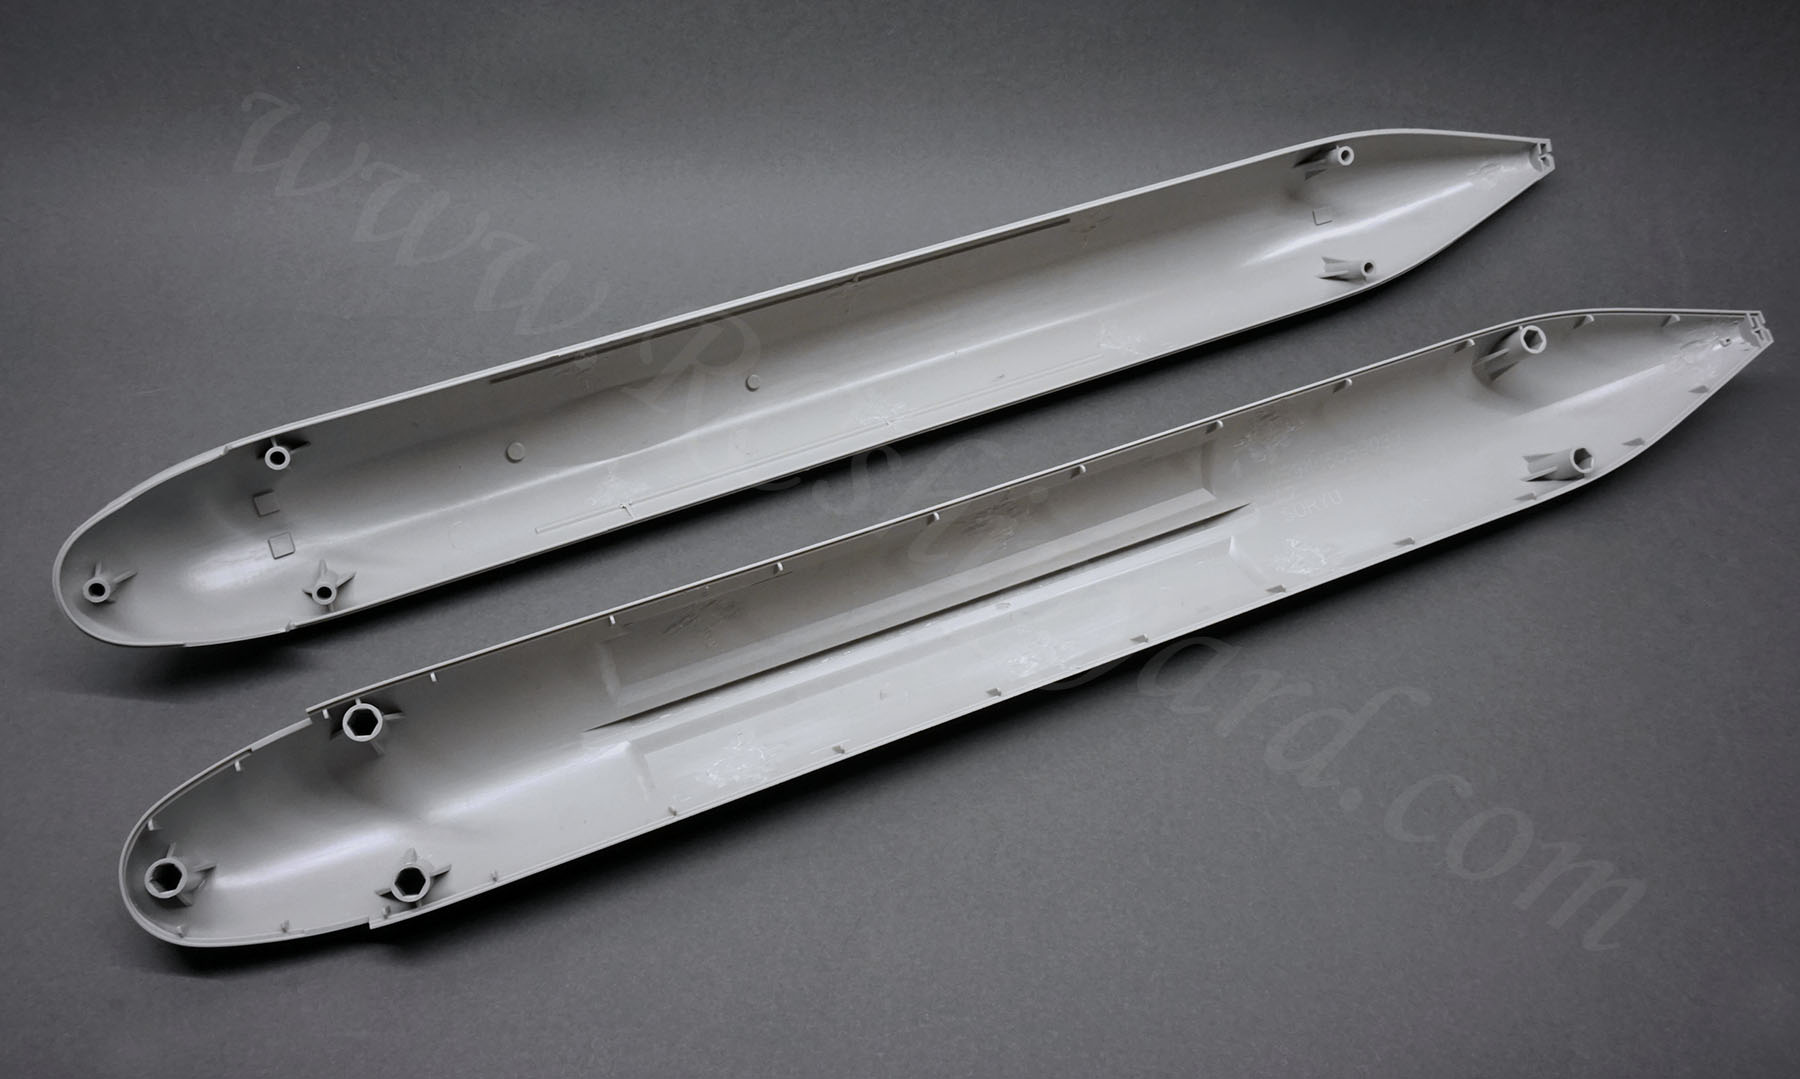
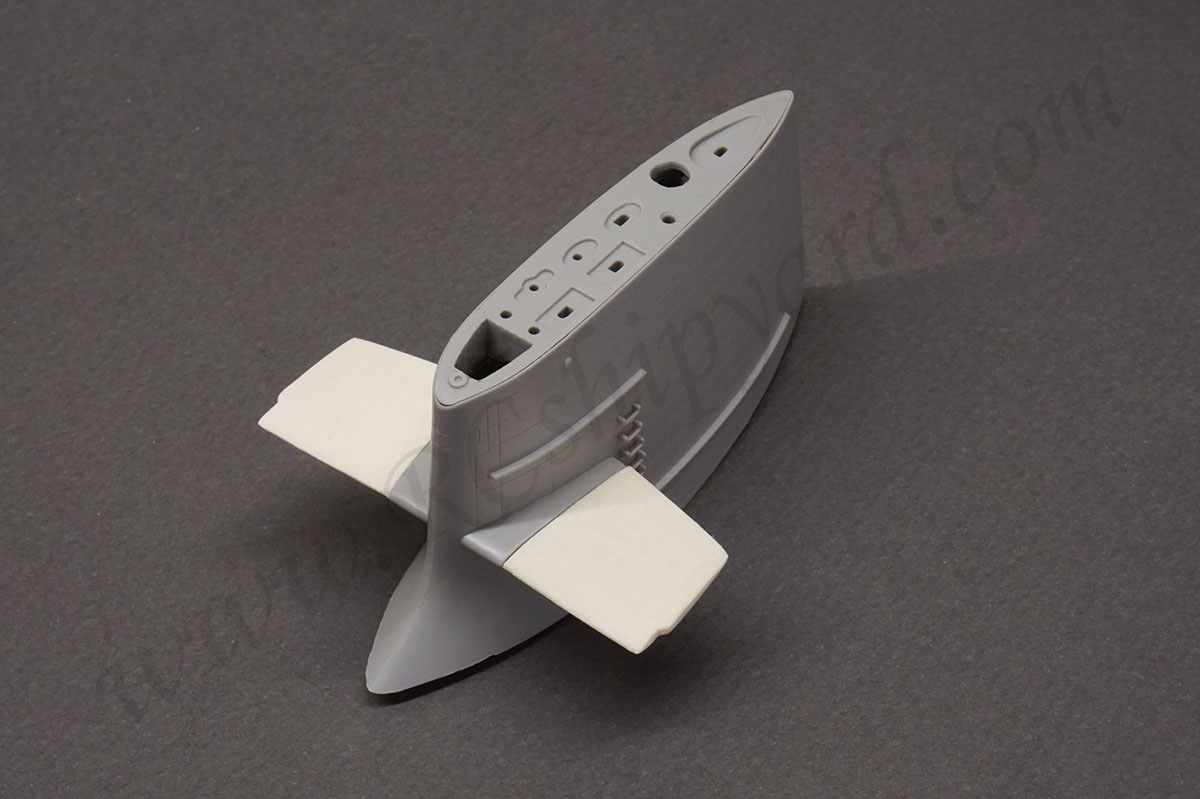
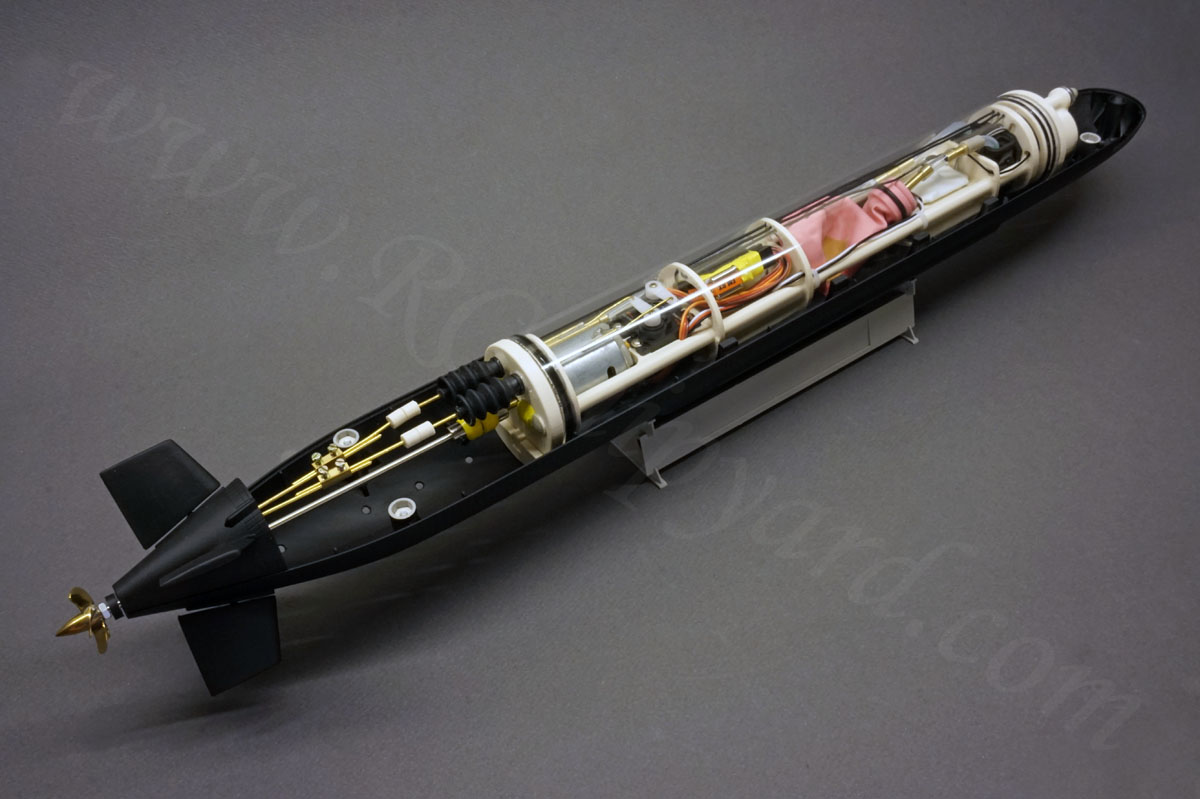
The hull:
The hull is a plastic display model made by Trumpeter (Trumpeter 05911). The quality and stiffness of the two hull shells is excellent, far more superior than in the older Trumpeter submarines – Seawolf and the Kilo. The model has lots of details and you can clearly see a technical advance.
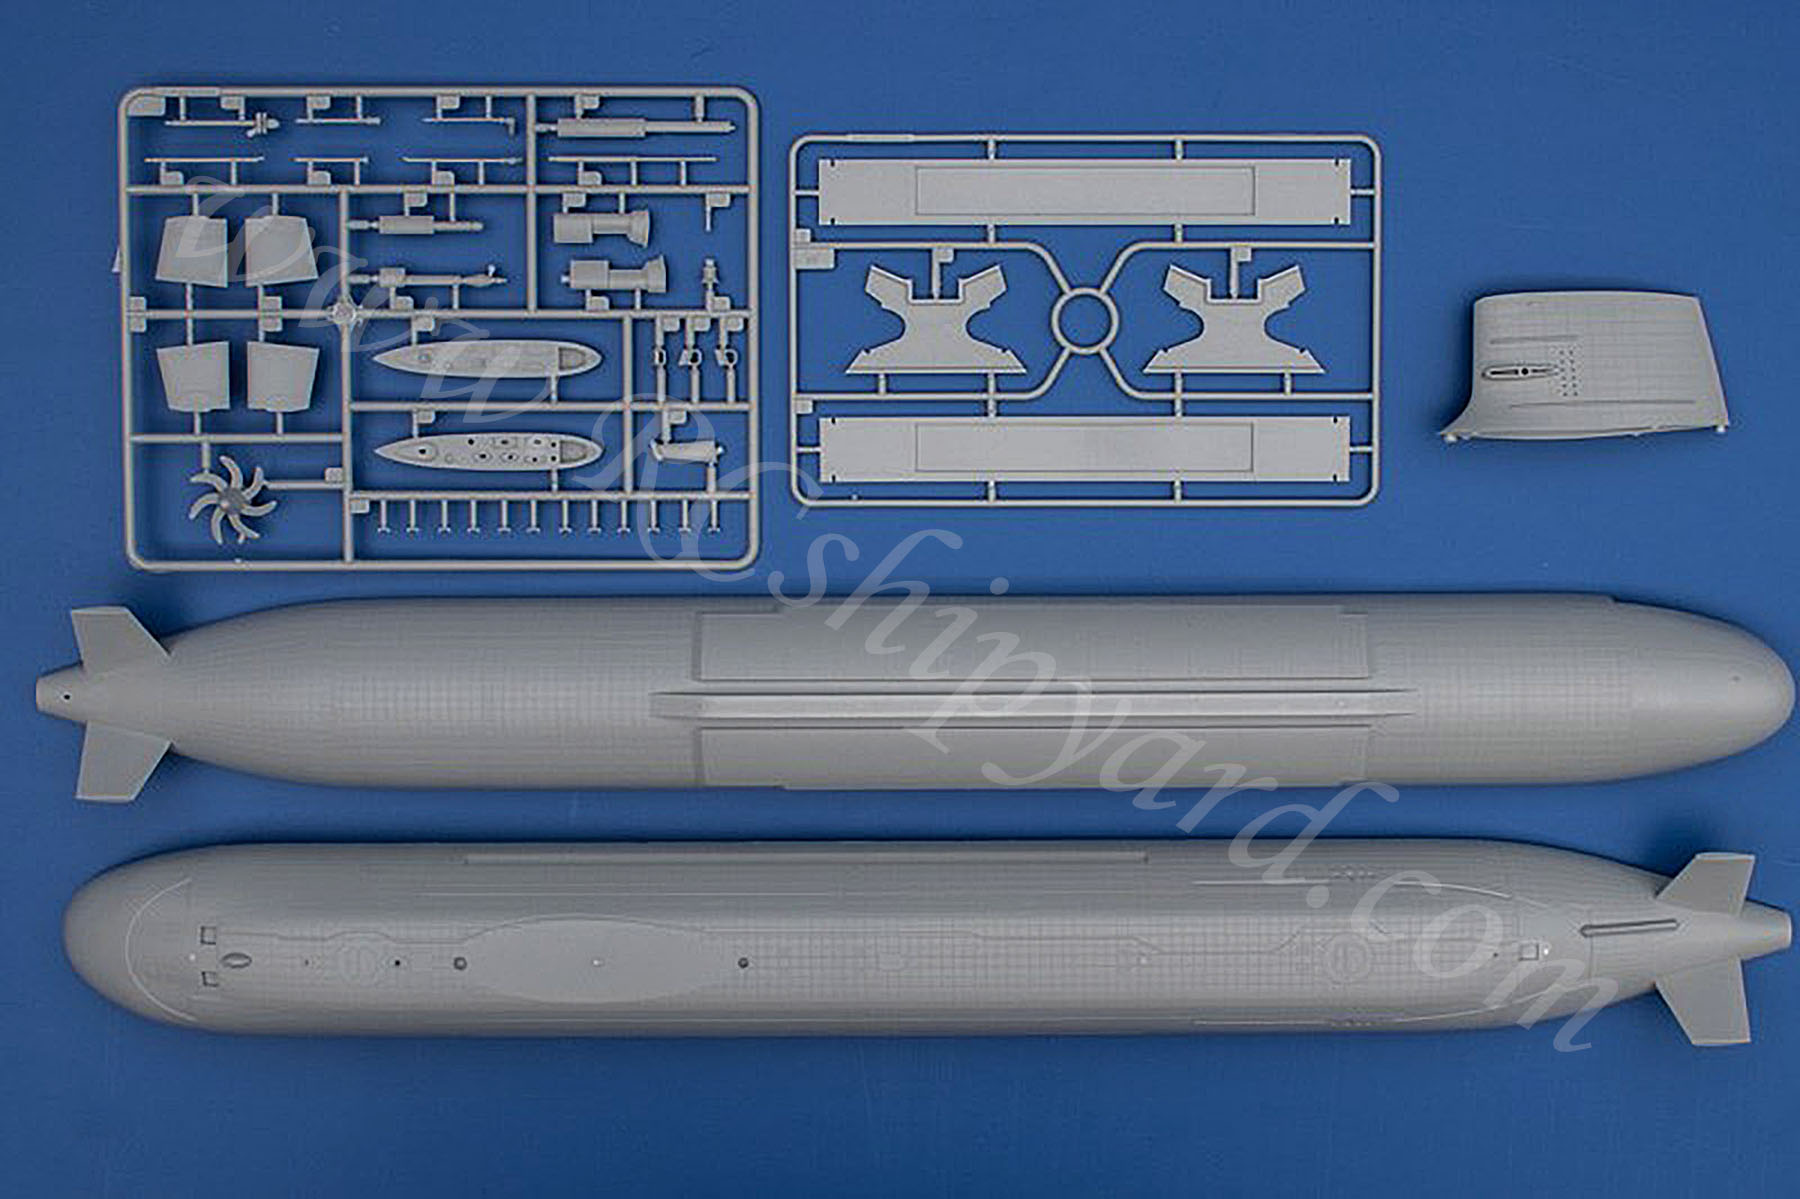
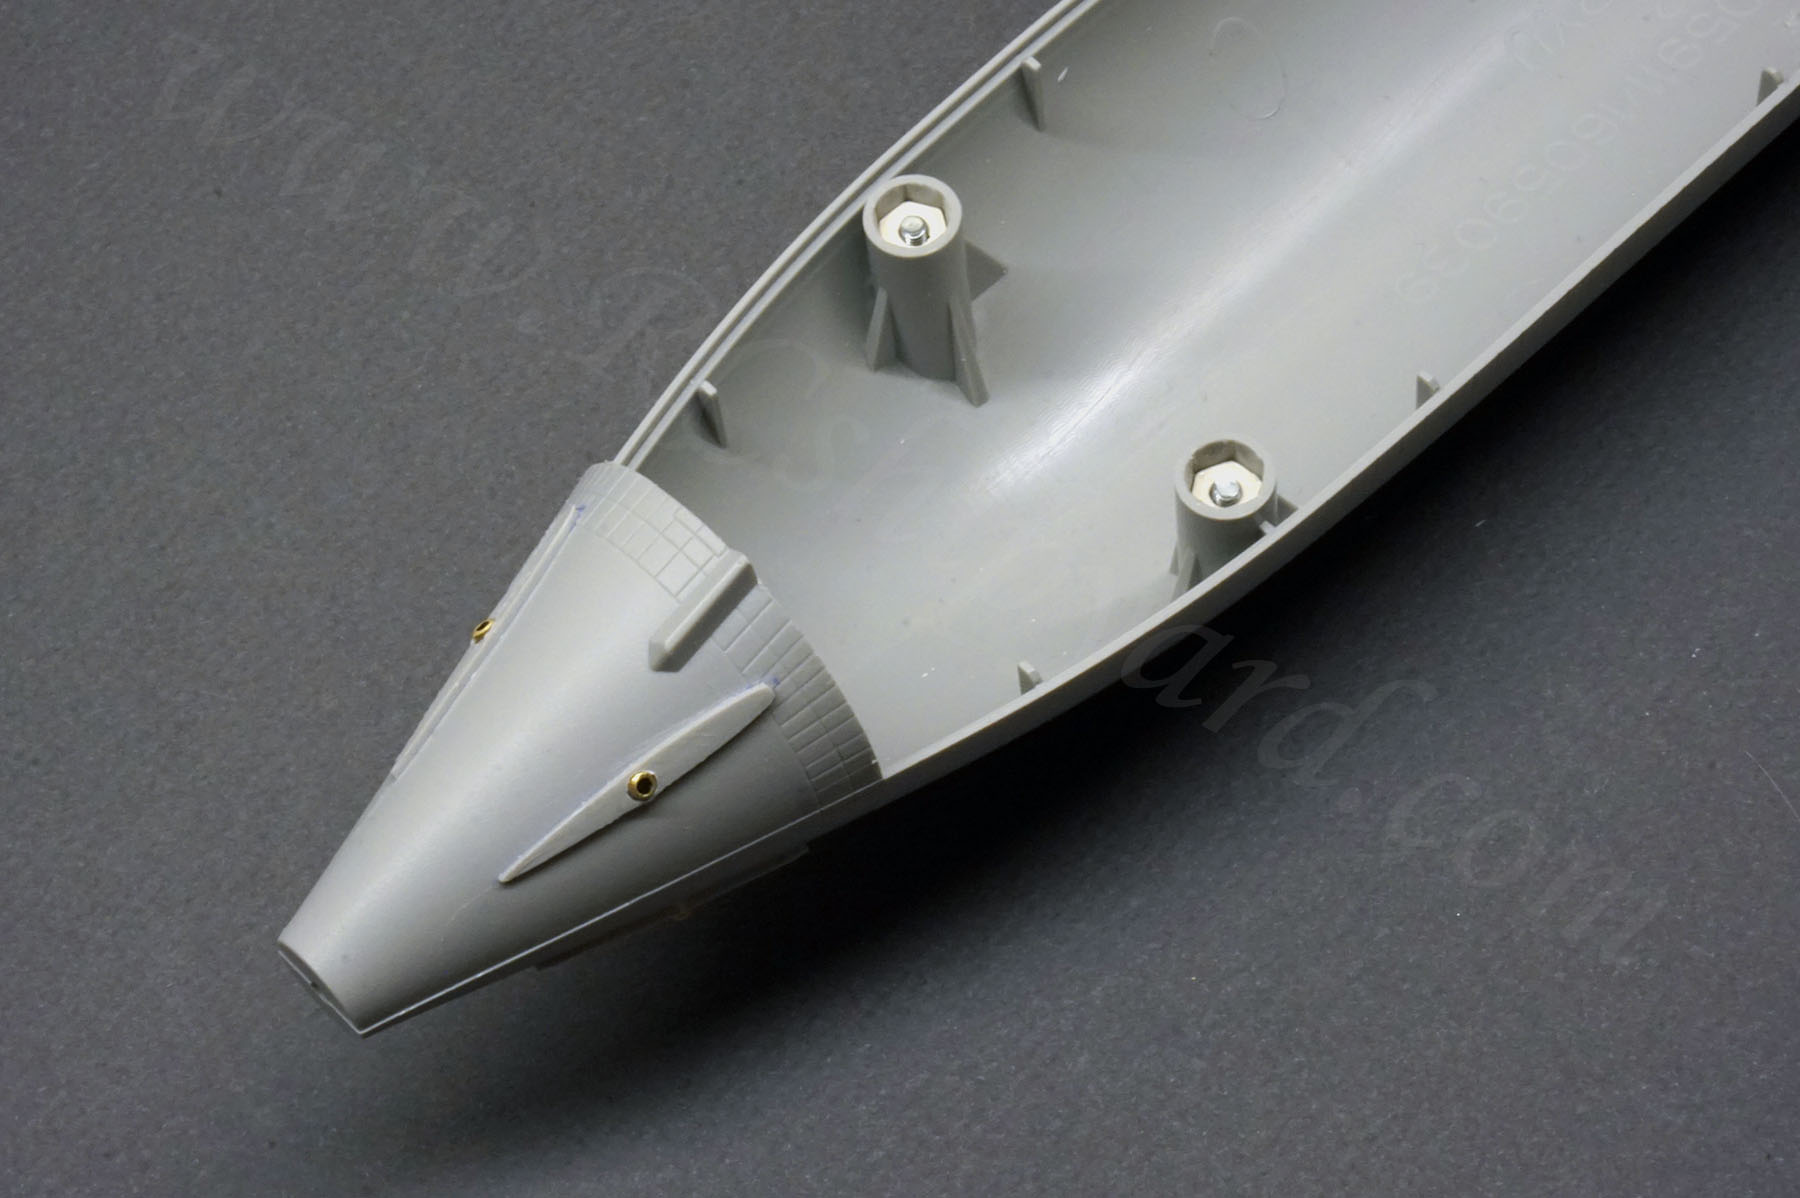
The only disadvantage worth mentioning, when comparing the Soryu KIT to the older Trumpeter submarine KITs, are the stern dive planes and rudders. They are now a non movable elements as solid parts of the hull. I’ll have to cut those off and make new ones to create a fully operational x-rudder system.
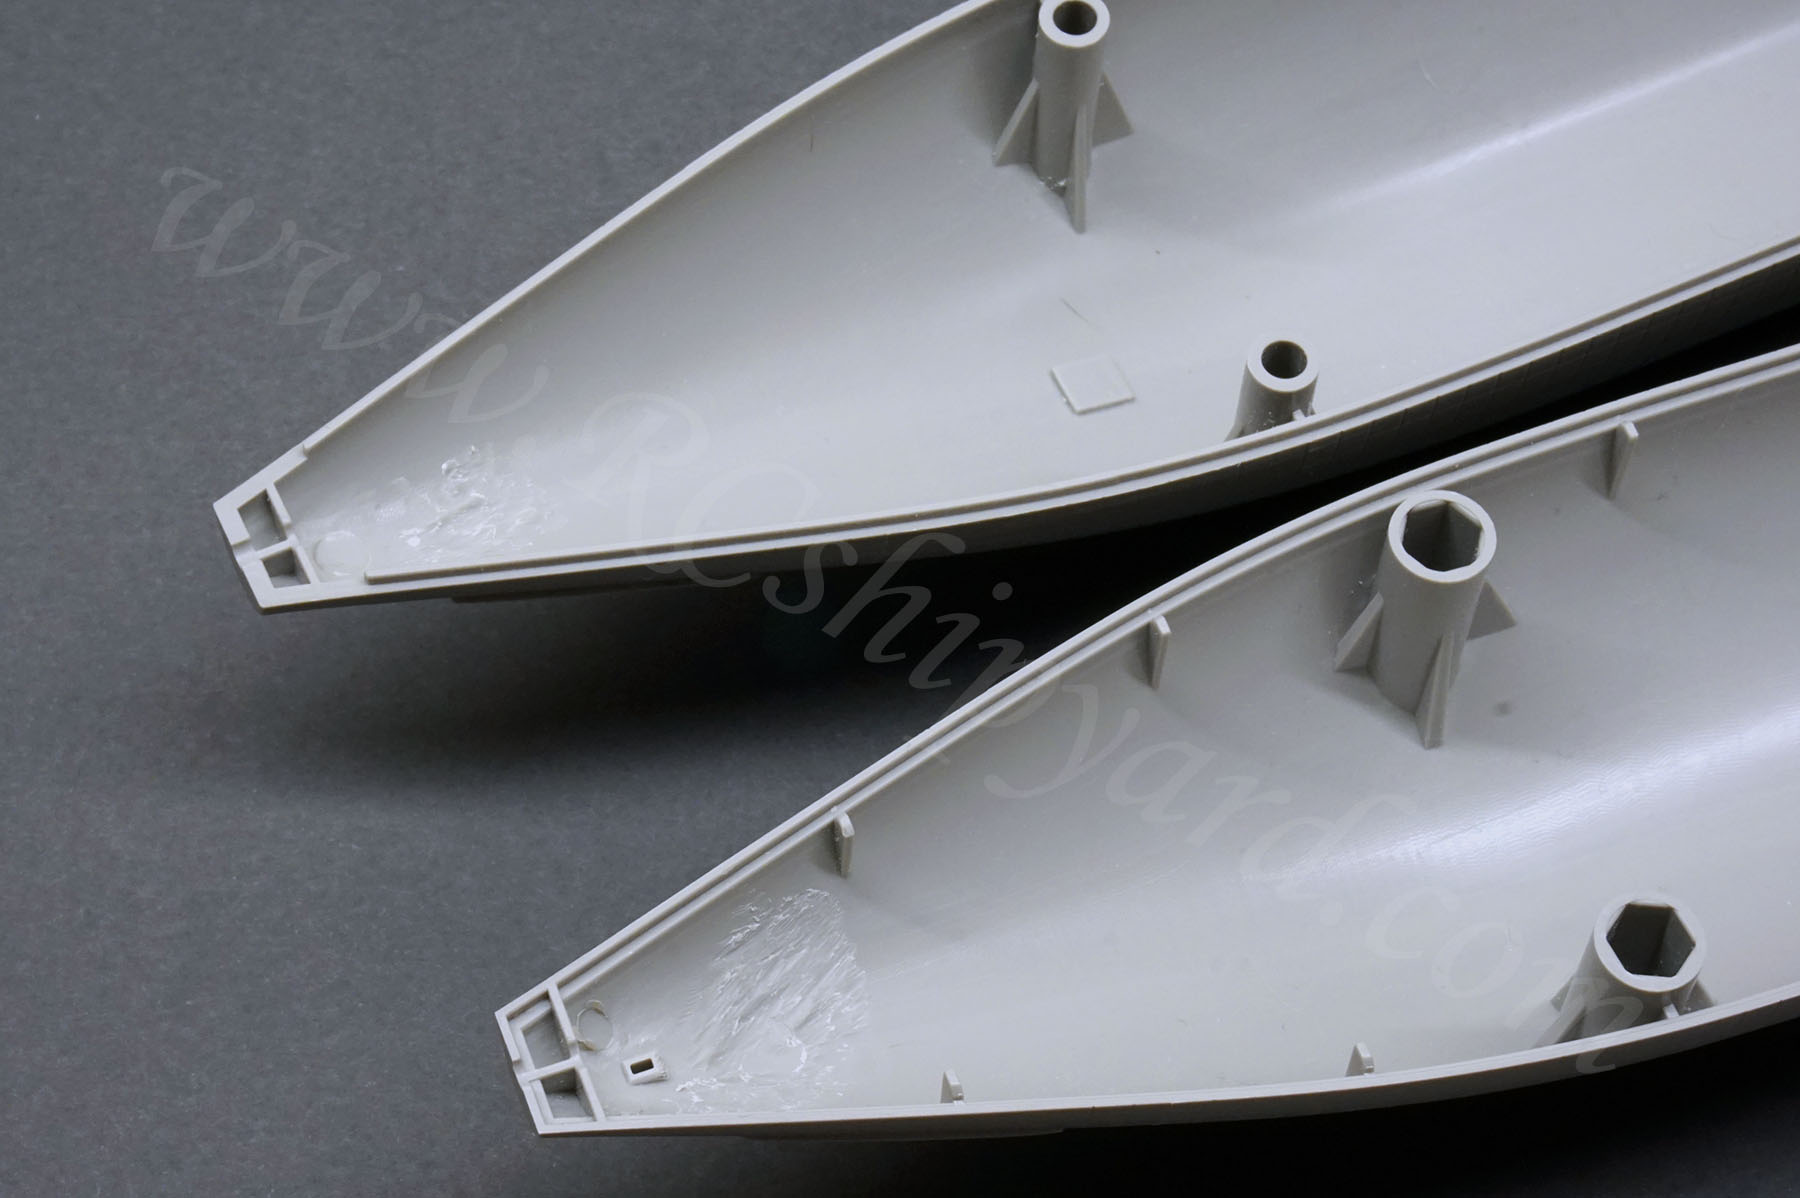
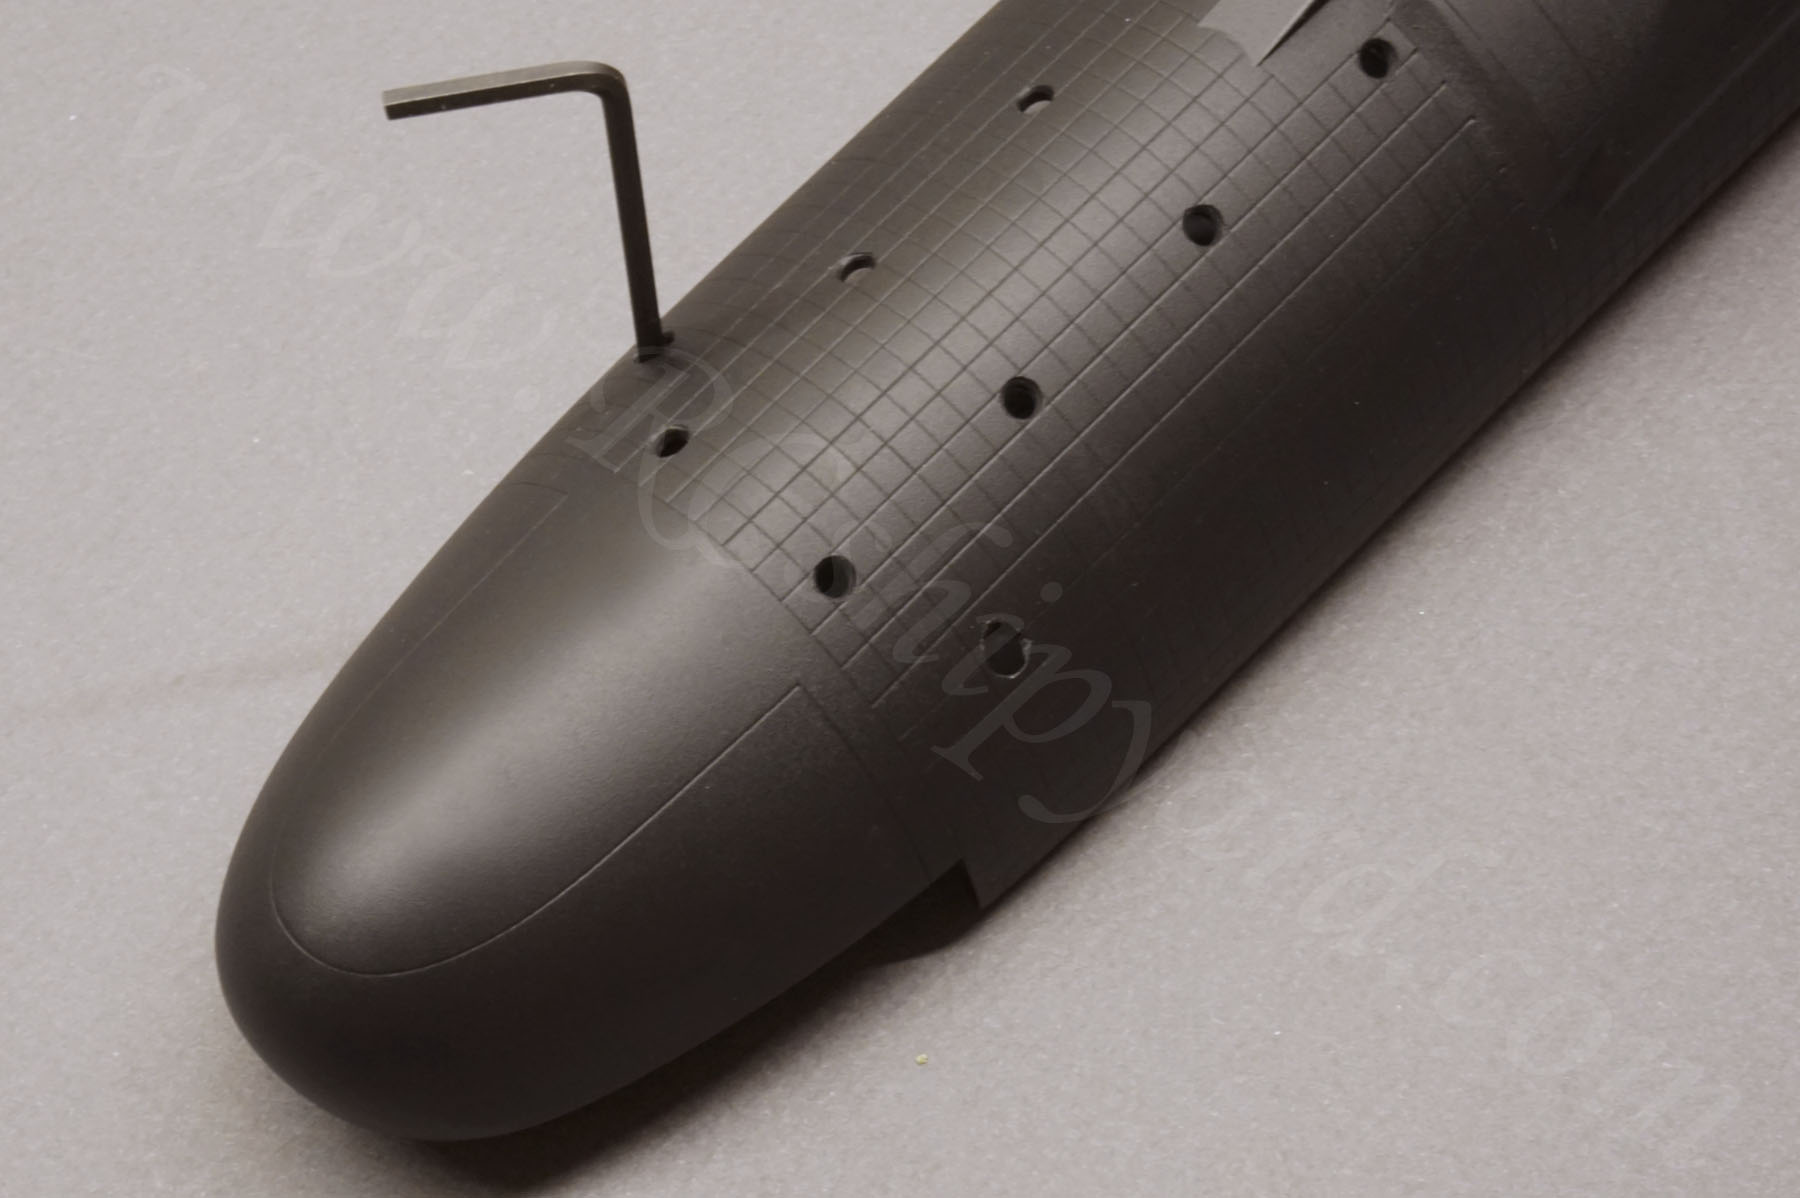
I started by taking measurements to check how much space for a WTC is available inside the hull. As you can clearly see, a WTC designed for the Trumpeter Kilo fits with ease and that was my first idea. Of course, before I was able to insert the tube and see how it fits, I had to cut off the pylons on the lower (and upper) shell. I have removed the three pairs in the middle, leaving three pylons in the bow and two in the stern as those might be handy for later use:
The stern pylon – the one in the middle needed most work, as I had to remove it completely leaving a flat, almost smooth surface. After all – the stern of boat is the place where the x-rudder mechanism will be and the space is very limited there:
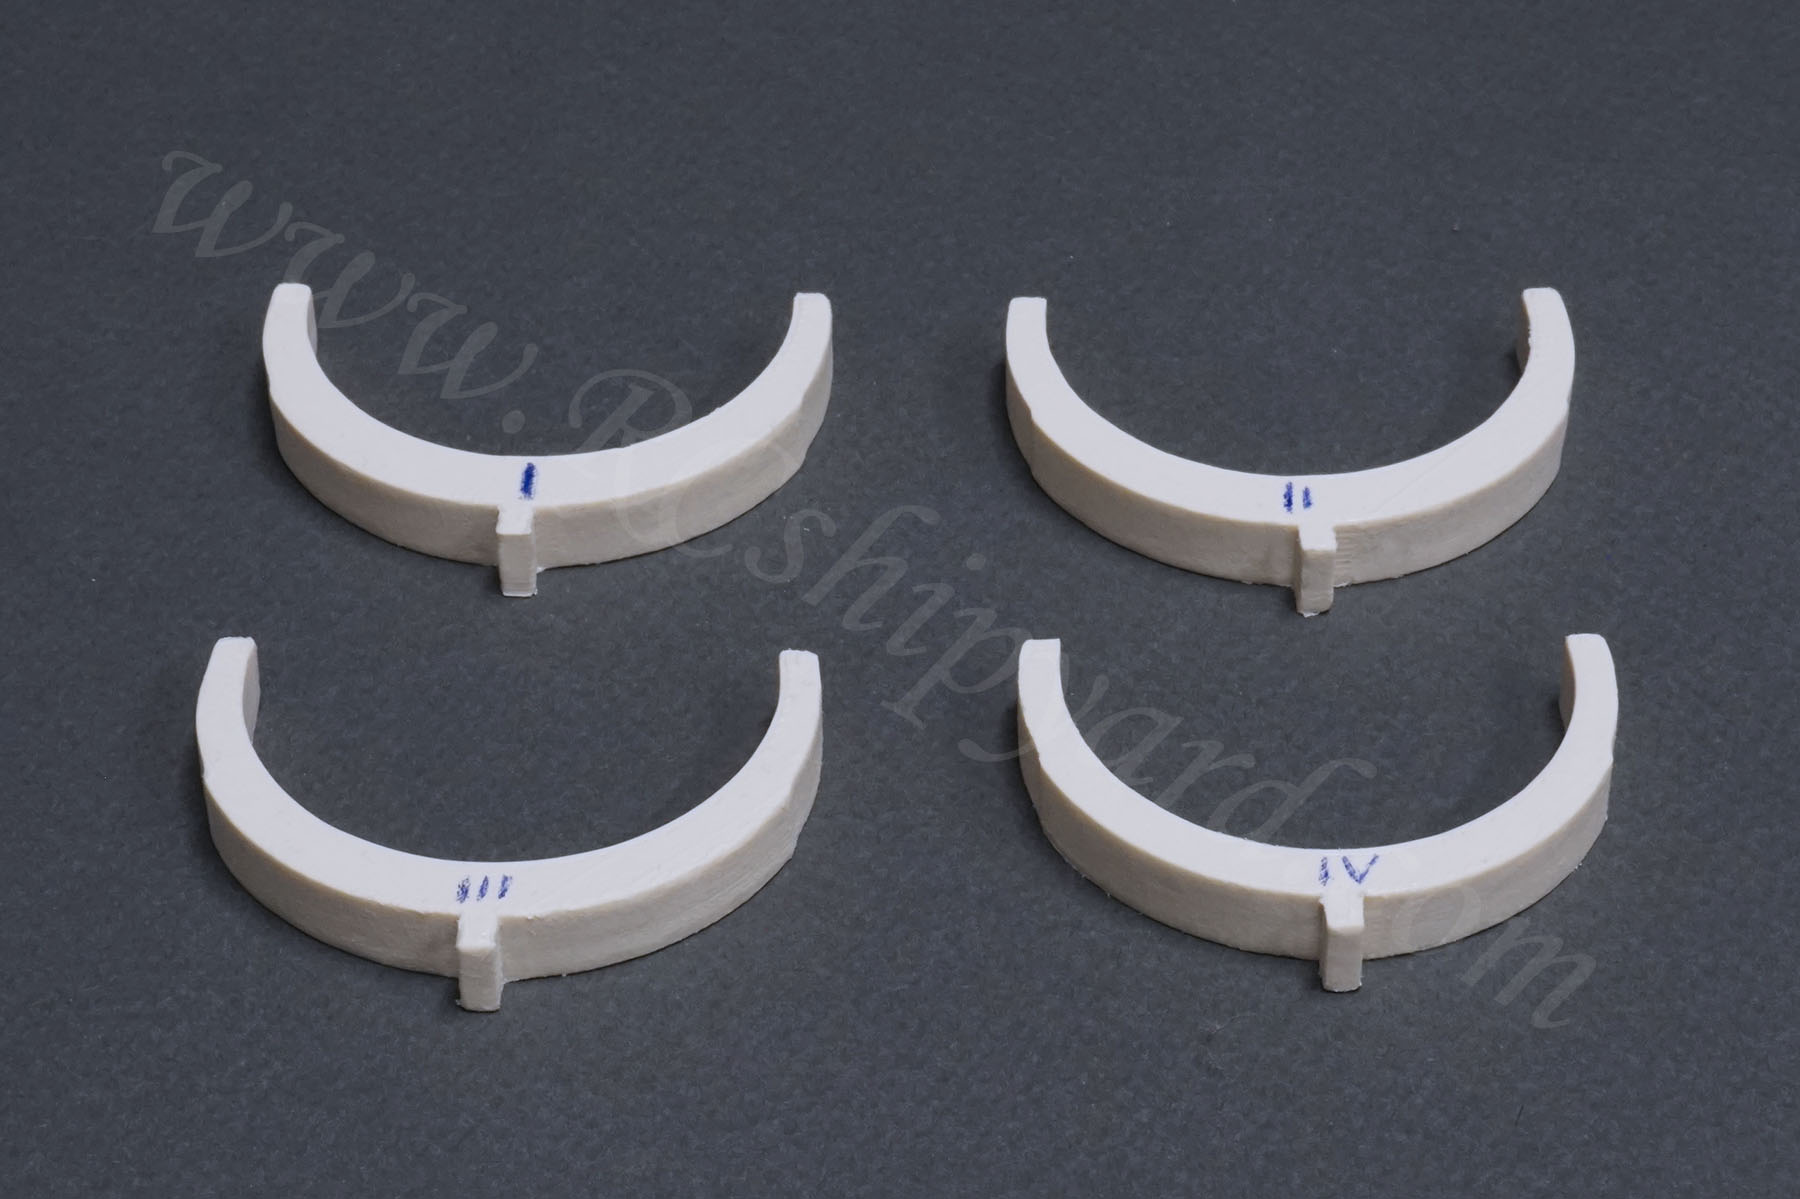
As I mentioned above, with the middle pylons removed the WTC tube can be easily inserted, but a proper installation of the WTC requires rigid mounting points. The next process was to develop a set of ribs which will allow a quick – “snap in” installation of the tube. The only difficulty with that was that the hull diameter varies from bow to stern. This caused that each rib is in a slightly different size then it’s neighbour – hence the numbers.
Now it was time to deal with the plastic dive planes/rudders. As I already said, new Trumpeter models have those as a solid part of the main hull, so I had to carefully remove them. After some work I was very pleased with the result. I intentionally left about 2-3 mm of material from the old planes to allow myself an easier installation of a brass bearing for the dive/rudder planes shafts.
Drilling can be a little tricky, but you don’t have to worry to much, if you don’t do it perpendicularly with the extruded flat surface. The hole itself is not that important, what’s important is to glue the brass inserts in perpendicularly, but that’s quite easy as you can always place a rod into them which you can hold while the epoxy cures.
Cutting the hull!
When the brass inserts (2.5 x 1.5 x 3 mm OD/ID/H) are glued in, it’s high time for the most stressful part of the hull preparation… Or is it? Well for sure it is, if you don’t have the right tools! But I have and if you don’t – you can always get them from me!
I have experimented a lot with saws for plastics and gained quite a lot experience. A proper cutting tool is 50% of the success, the other 50% is the right guiding rail for it:
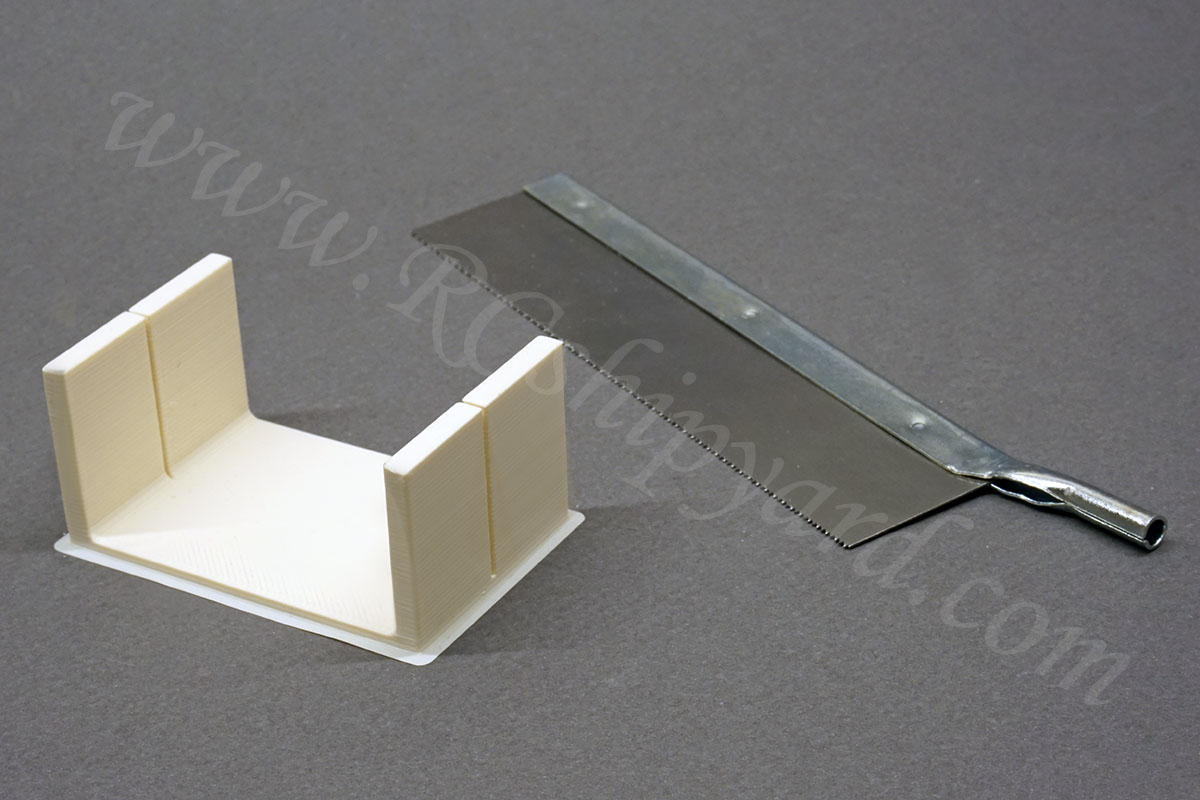
The saw is only 0,36mm/0,014″ thick, while the slot in the guiding rail is 0.4mm/0.015″. It makes things a lot easier

For a straight and clean cut I had to glue in the rail to working bench temporarily with hot glue. Then the hull was levelled and glued to the rail with some hot glue too. Small amounts of hot glue are a great solution when you want to make something stationary for a brief time and it’s very easy to remove after – it simply peels off.

Cutting in progress. It took about 10-15 minutes of rather slow movements without much pressure. It takes some time, but…

… the effect is perfect!:
That’s a clean thin line, right?!
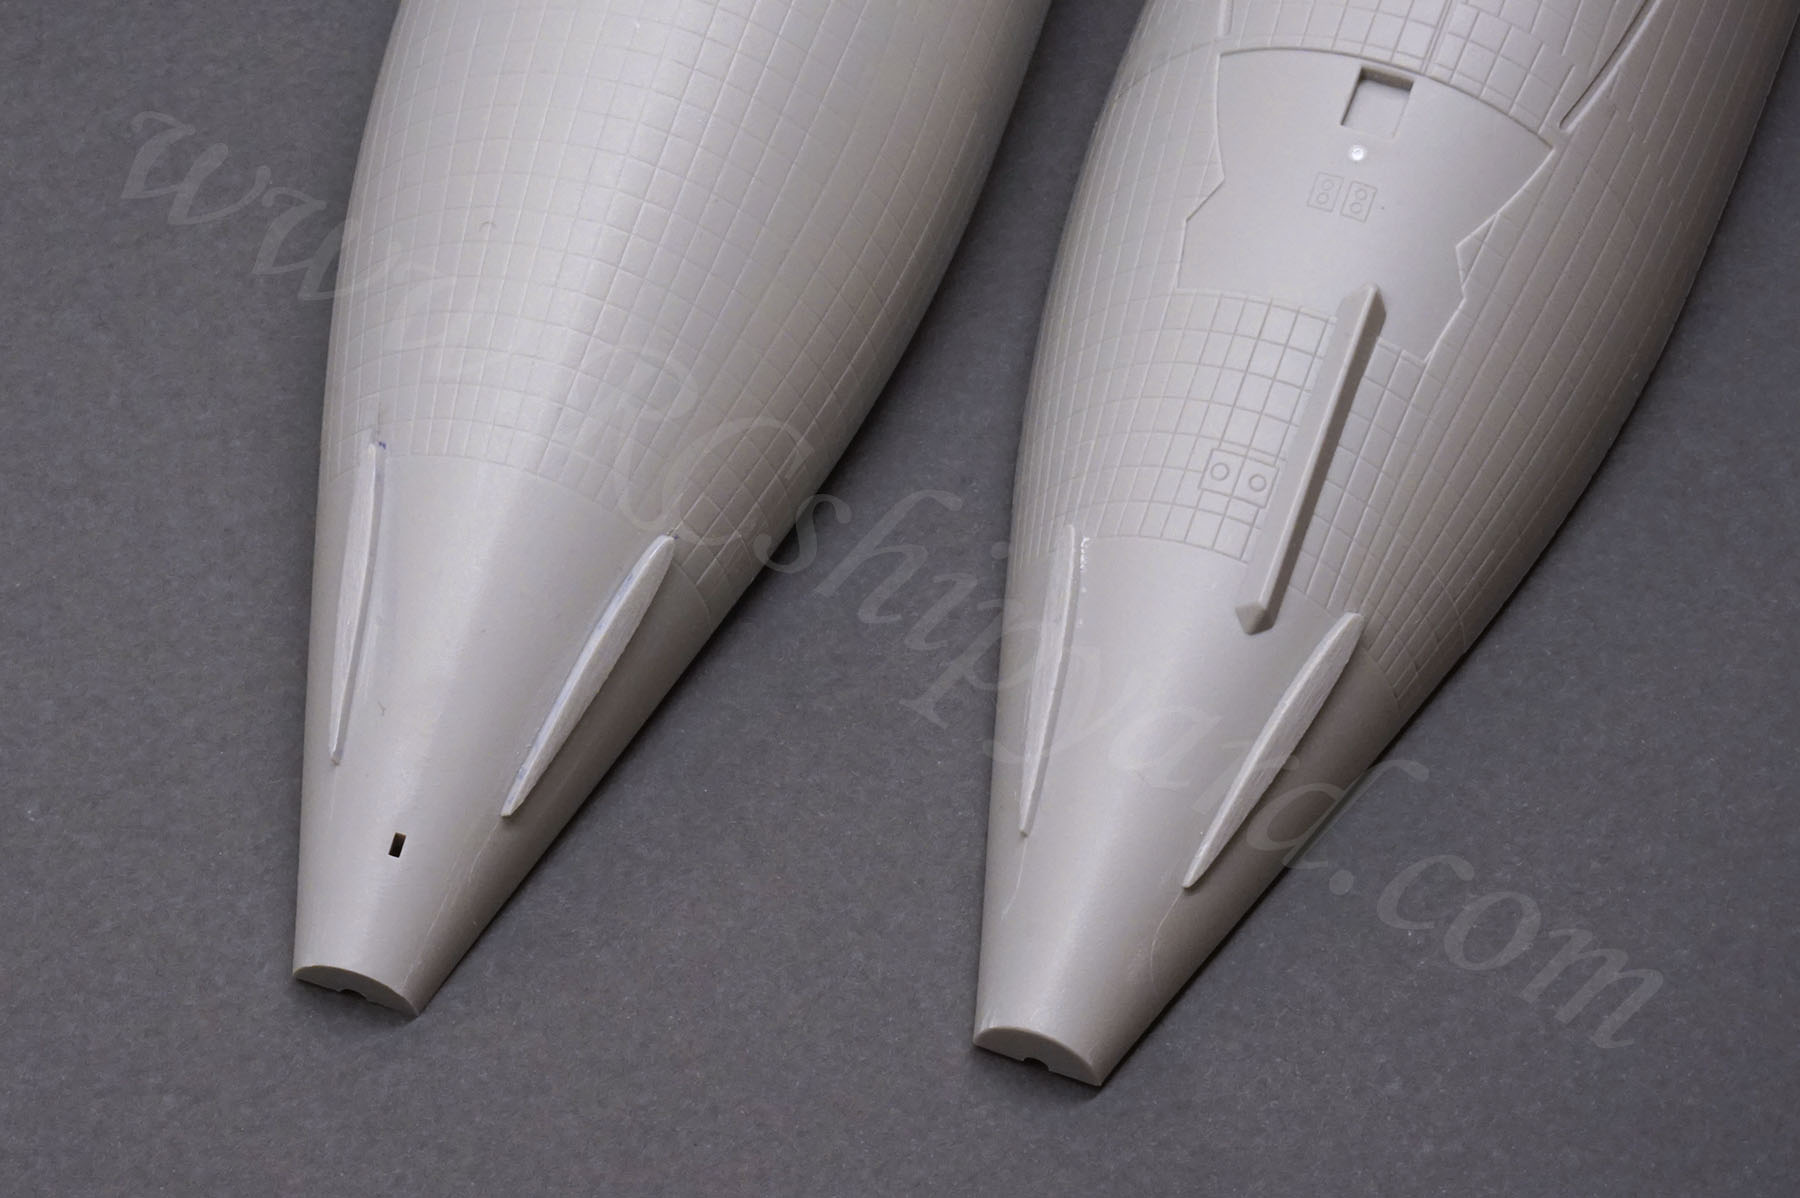
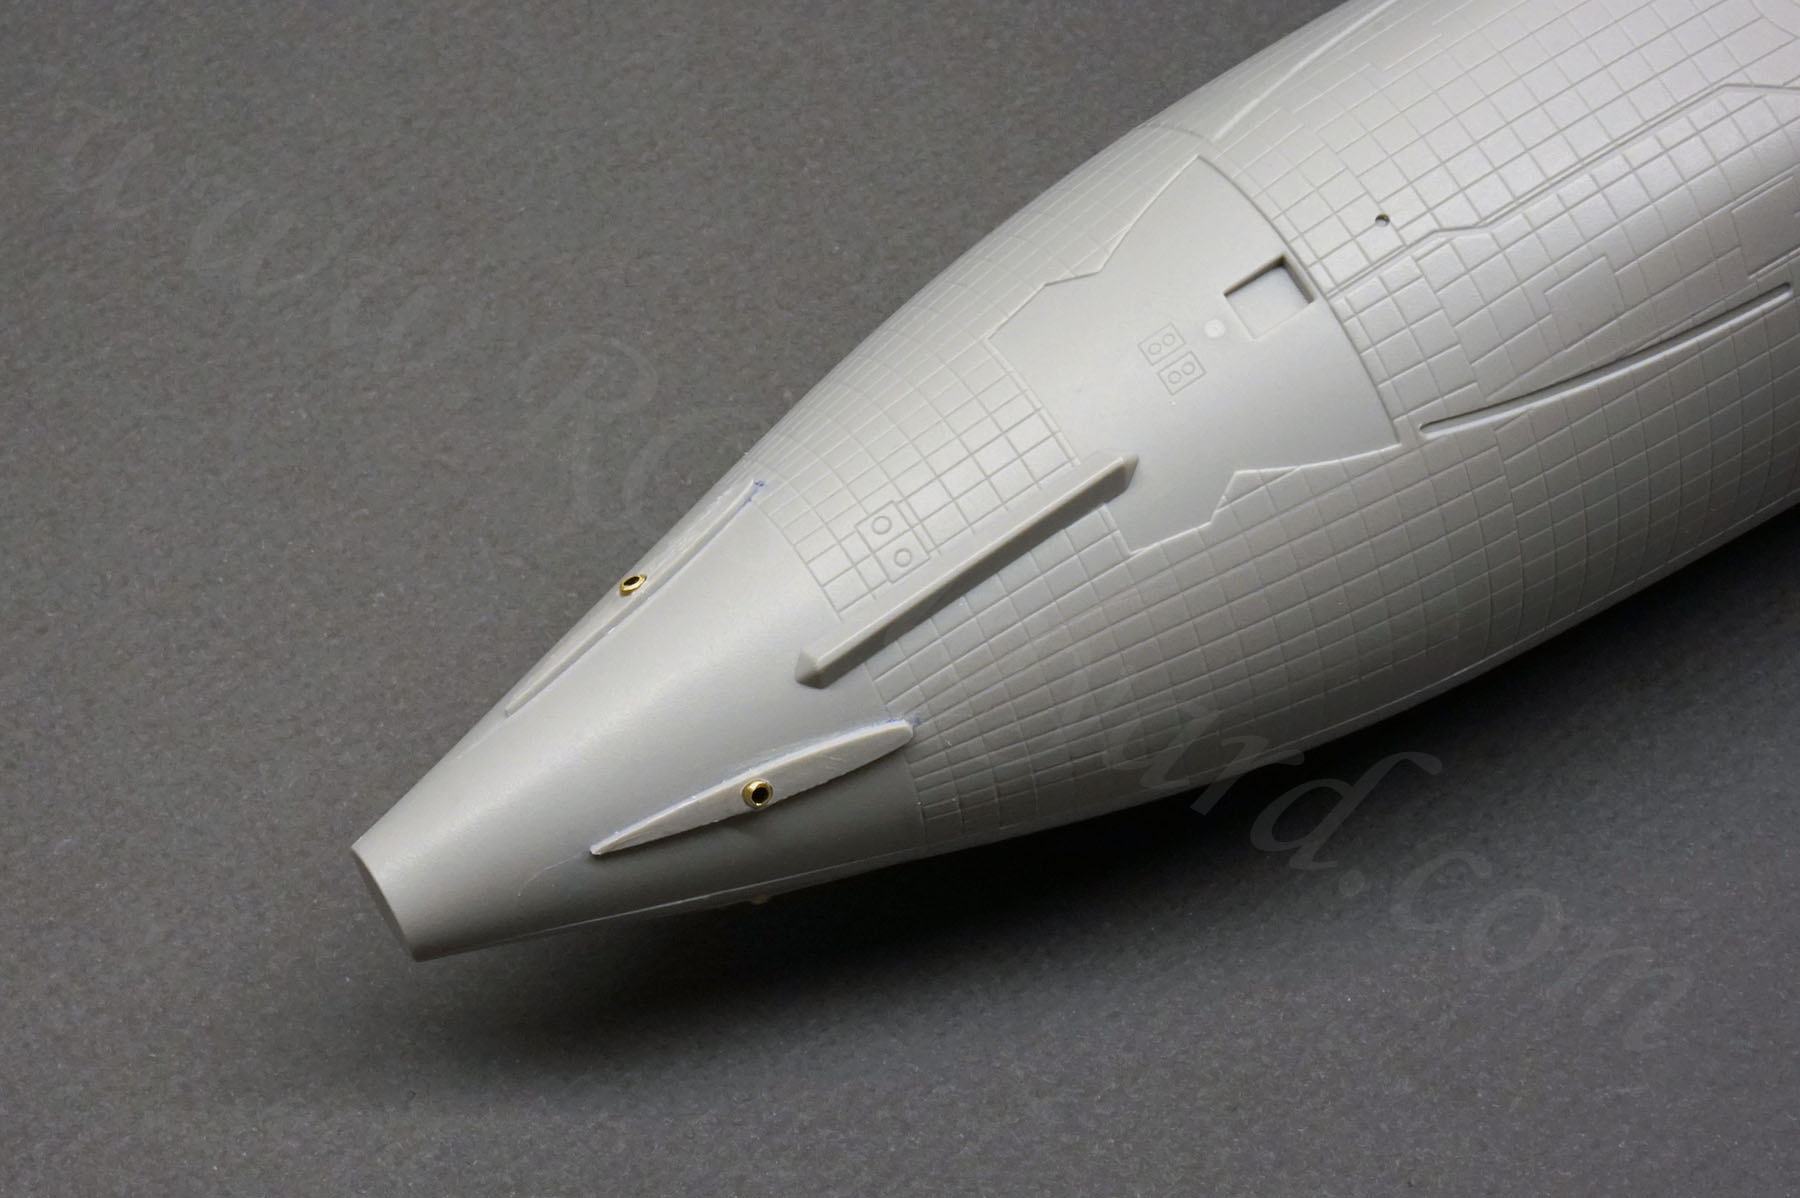
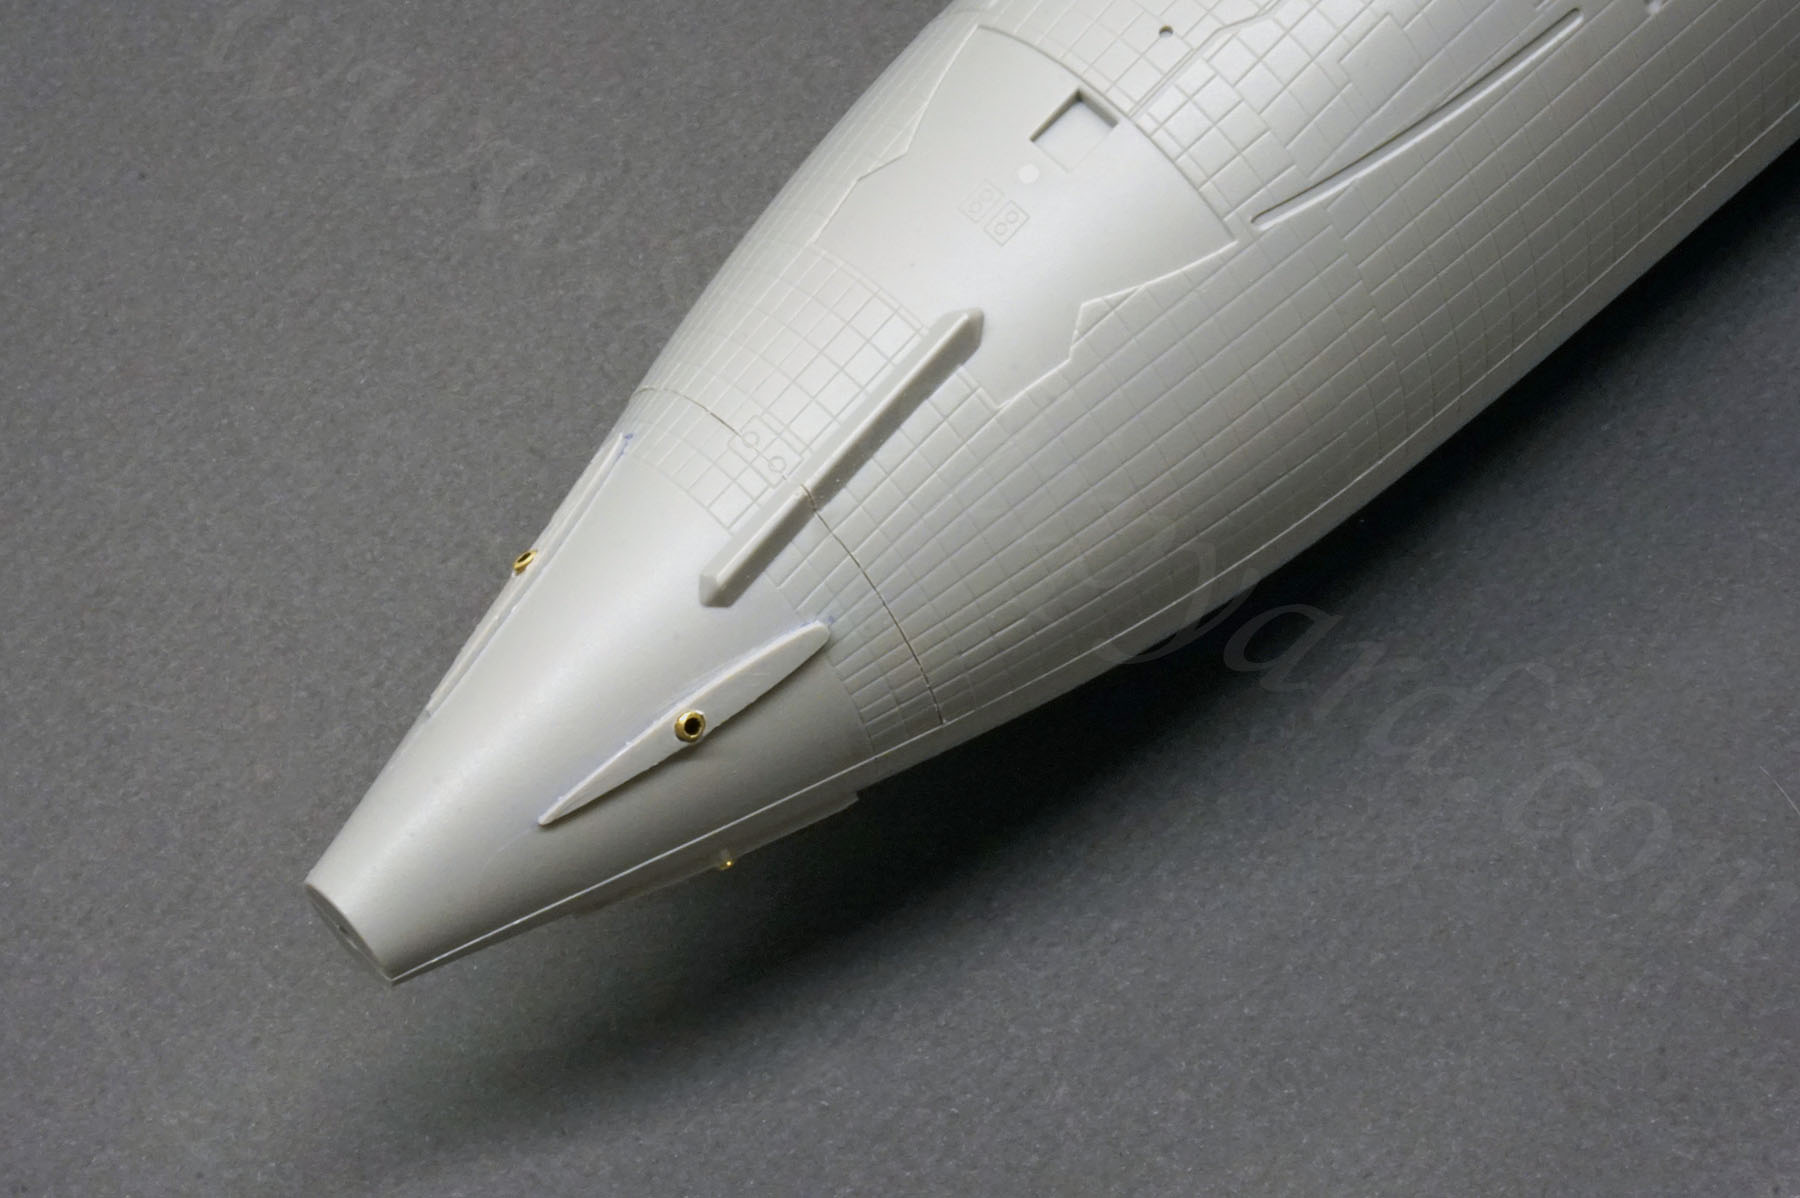
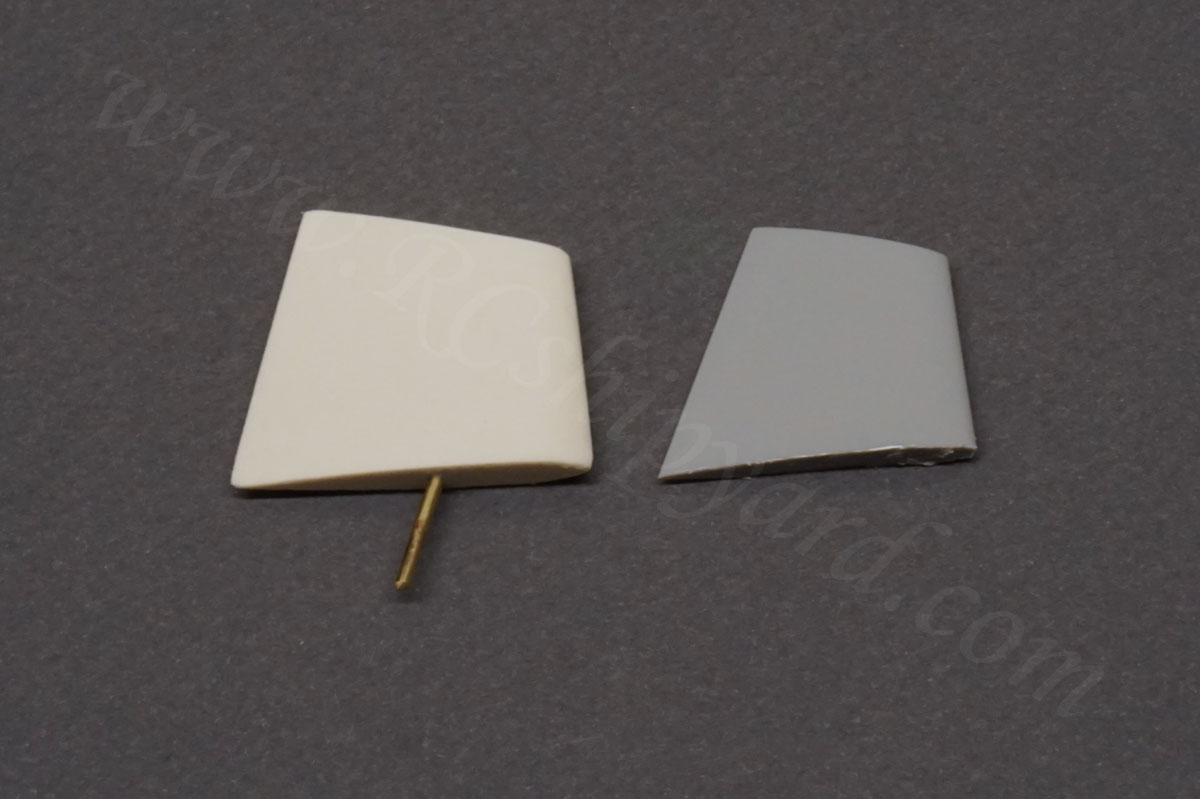
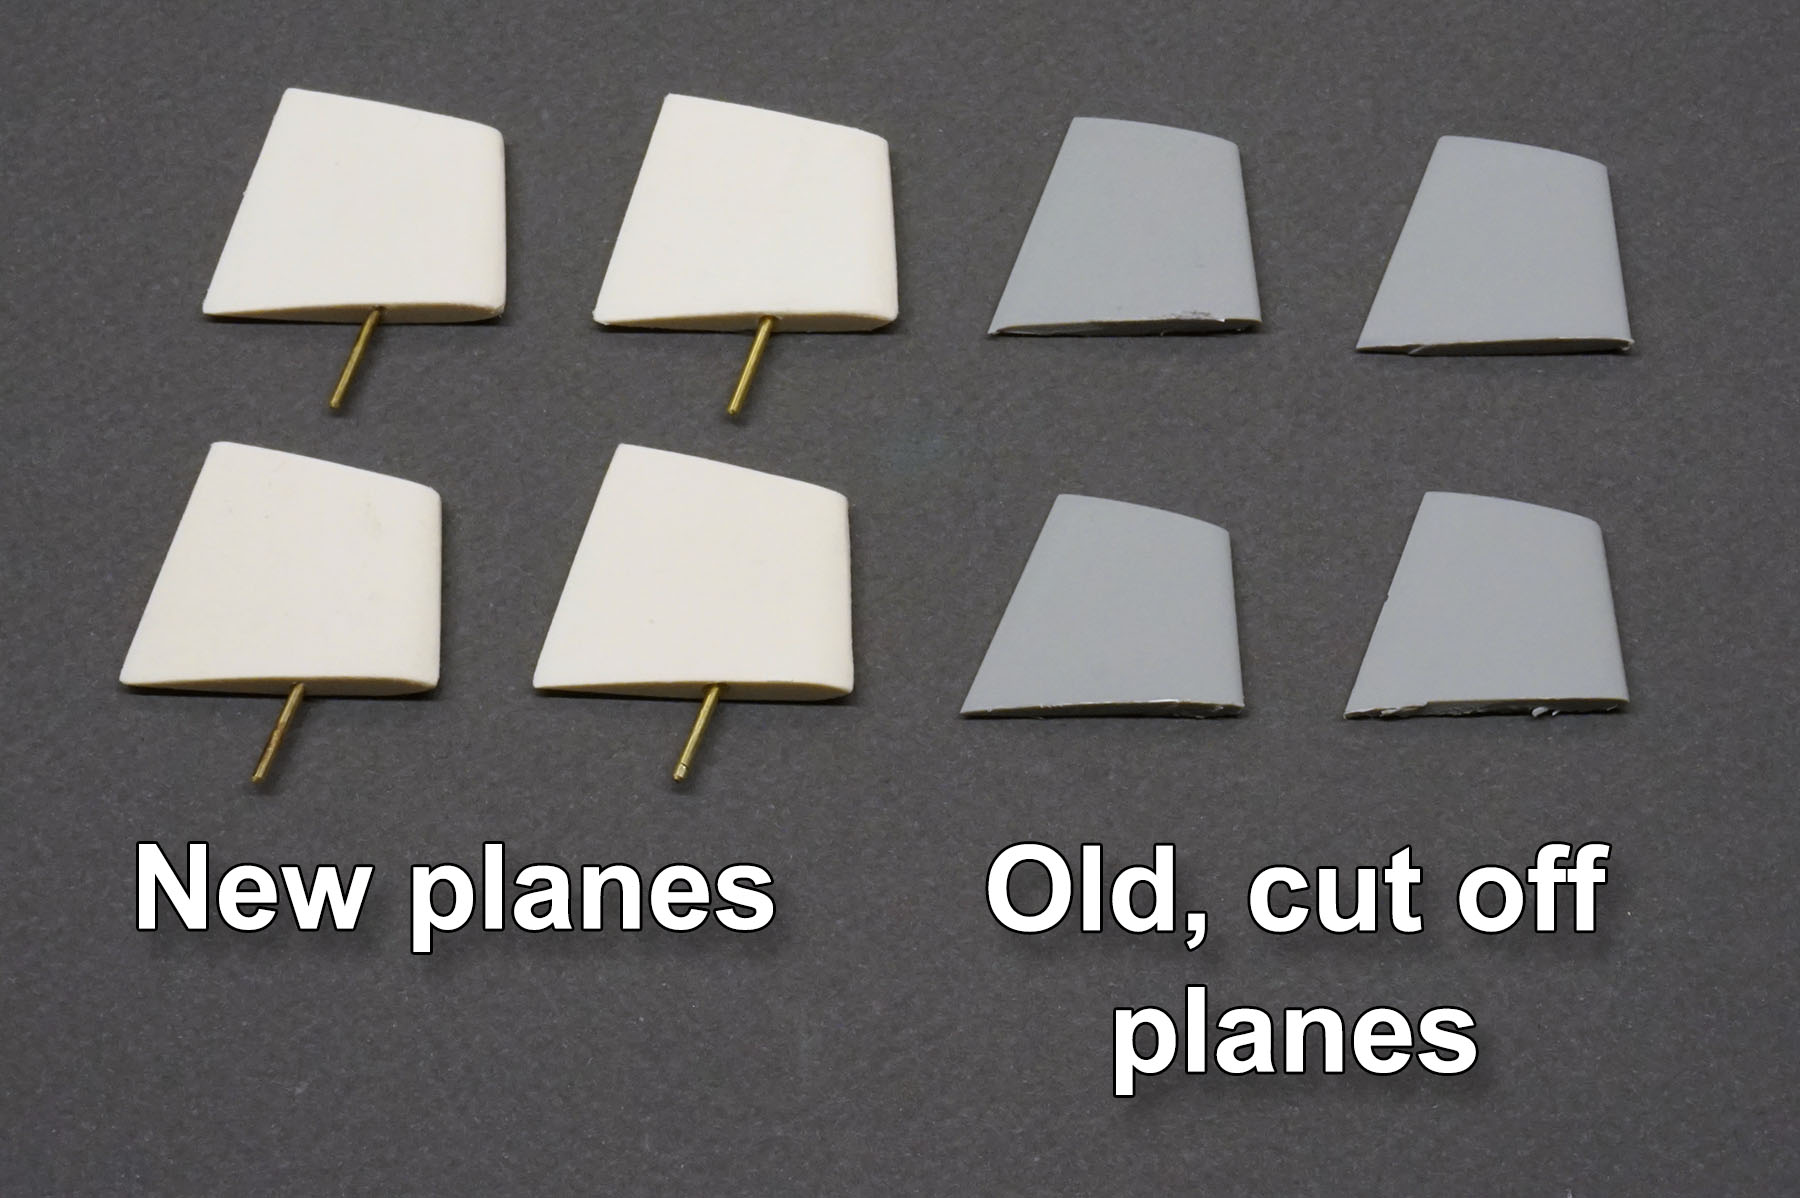
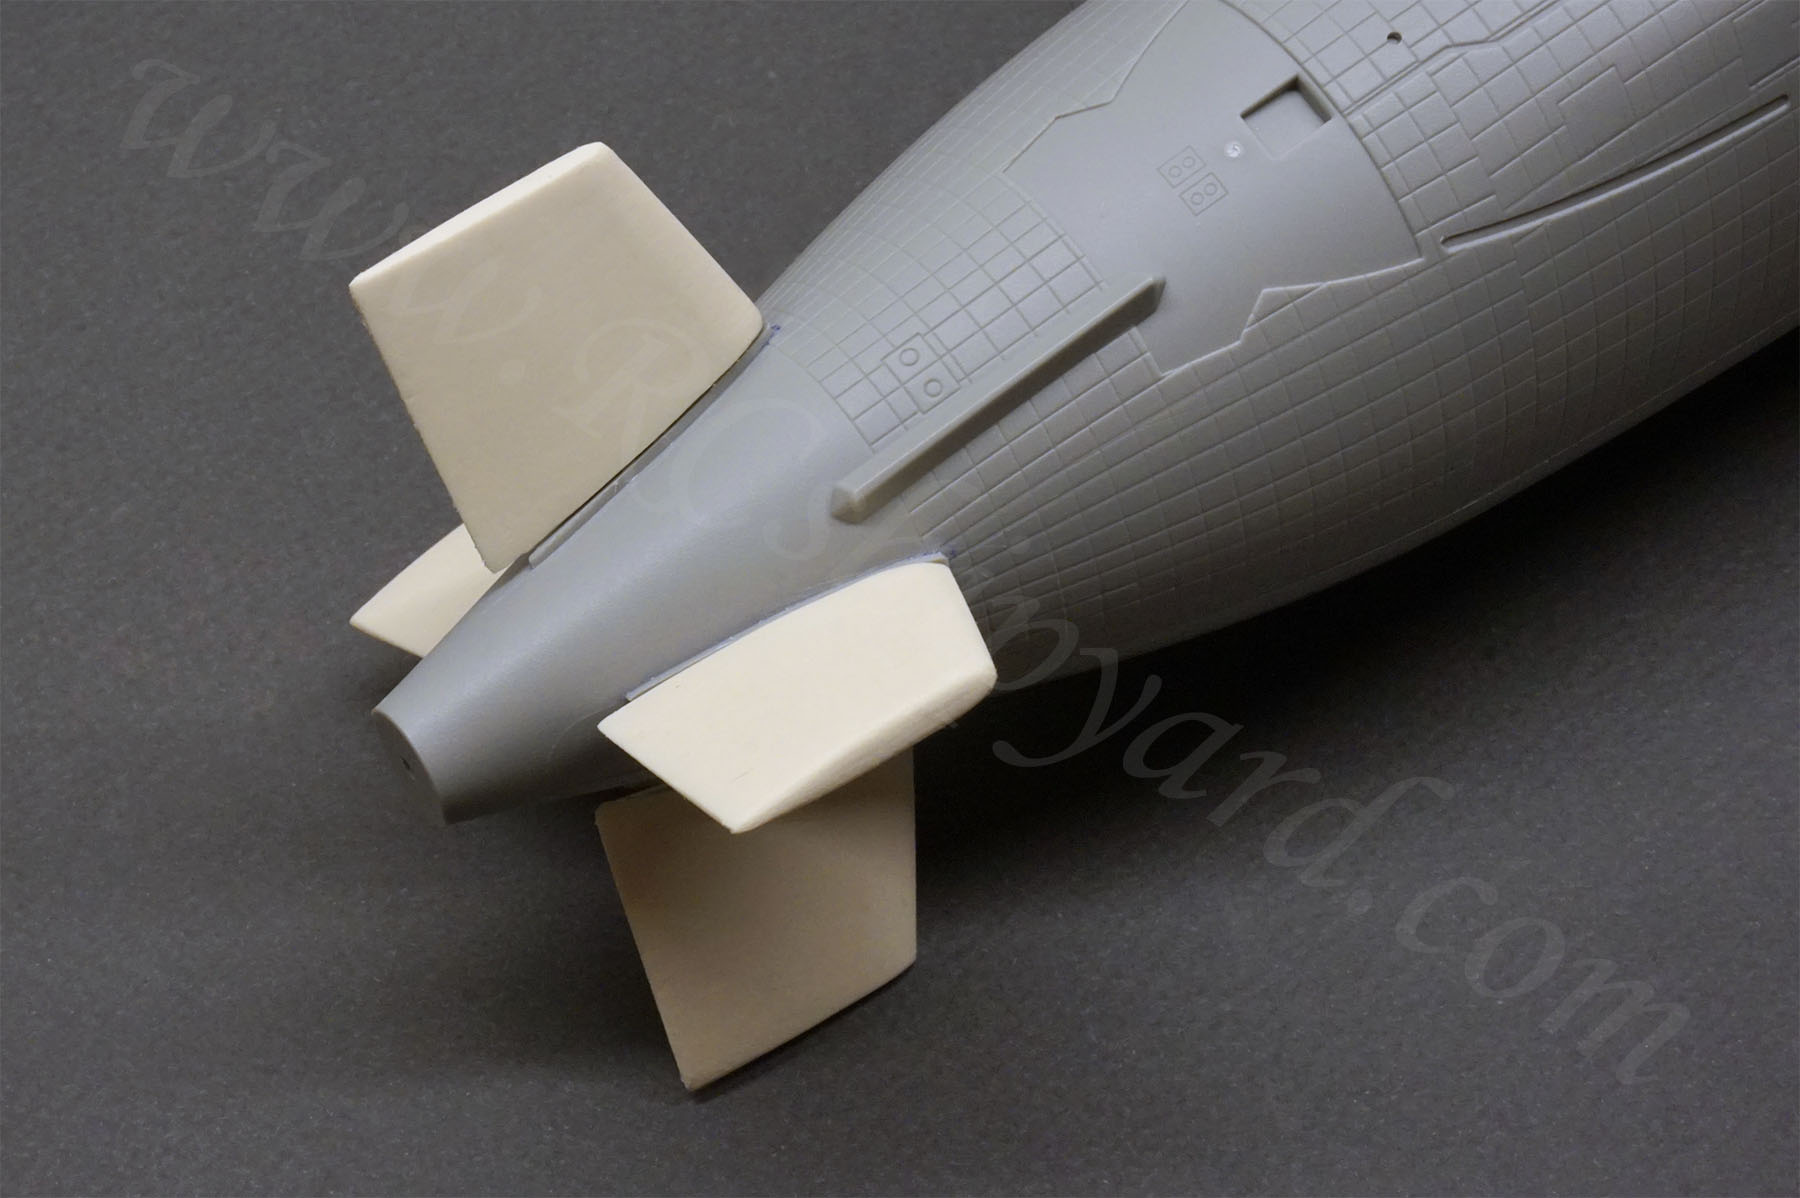
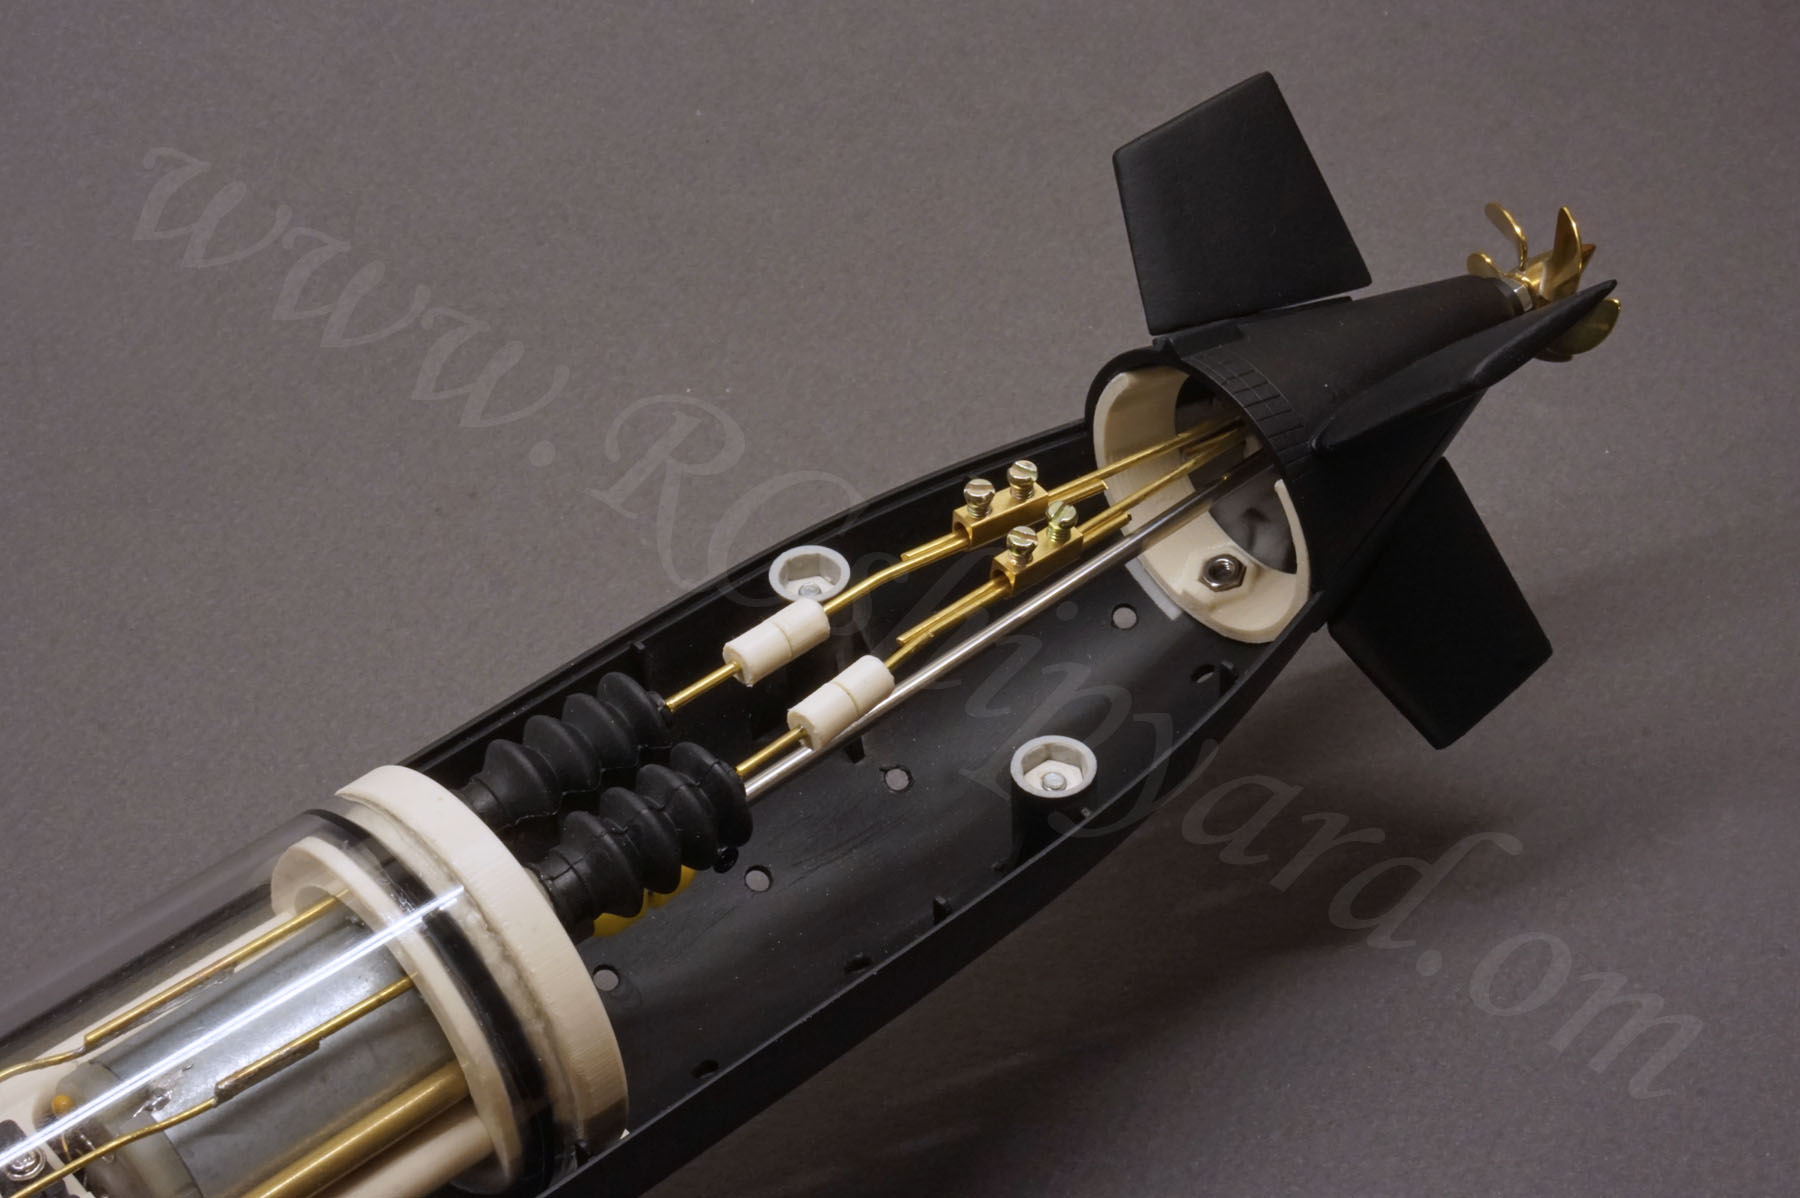
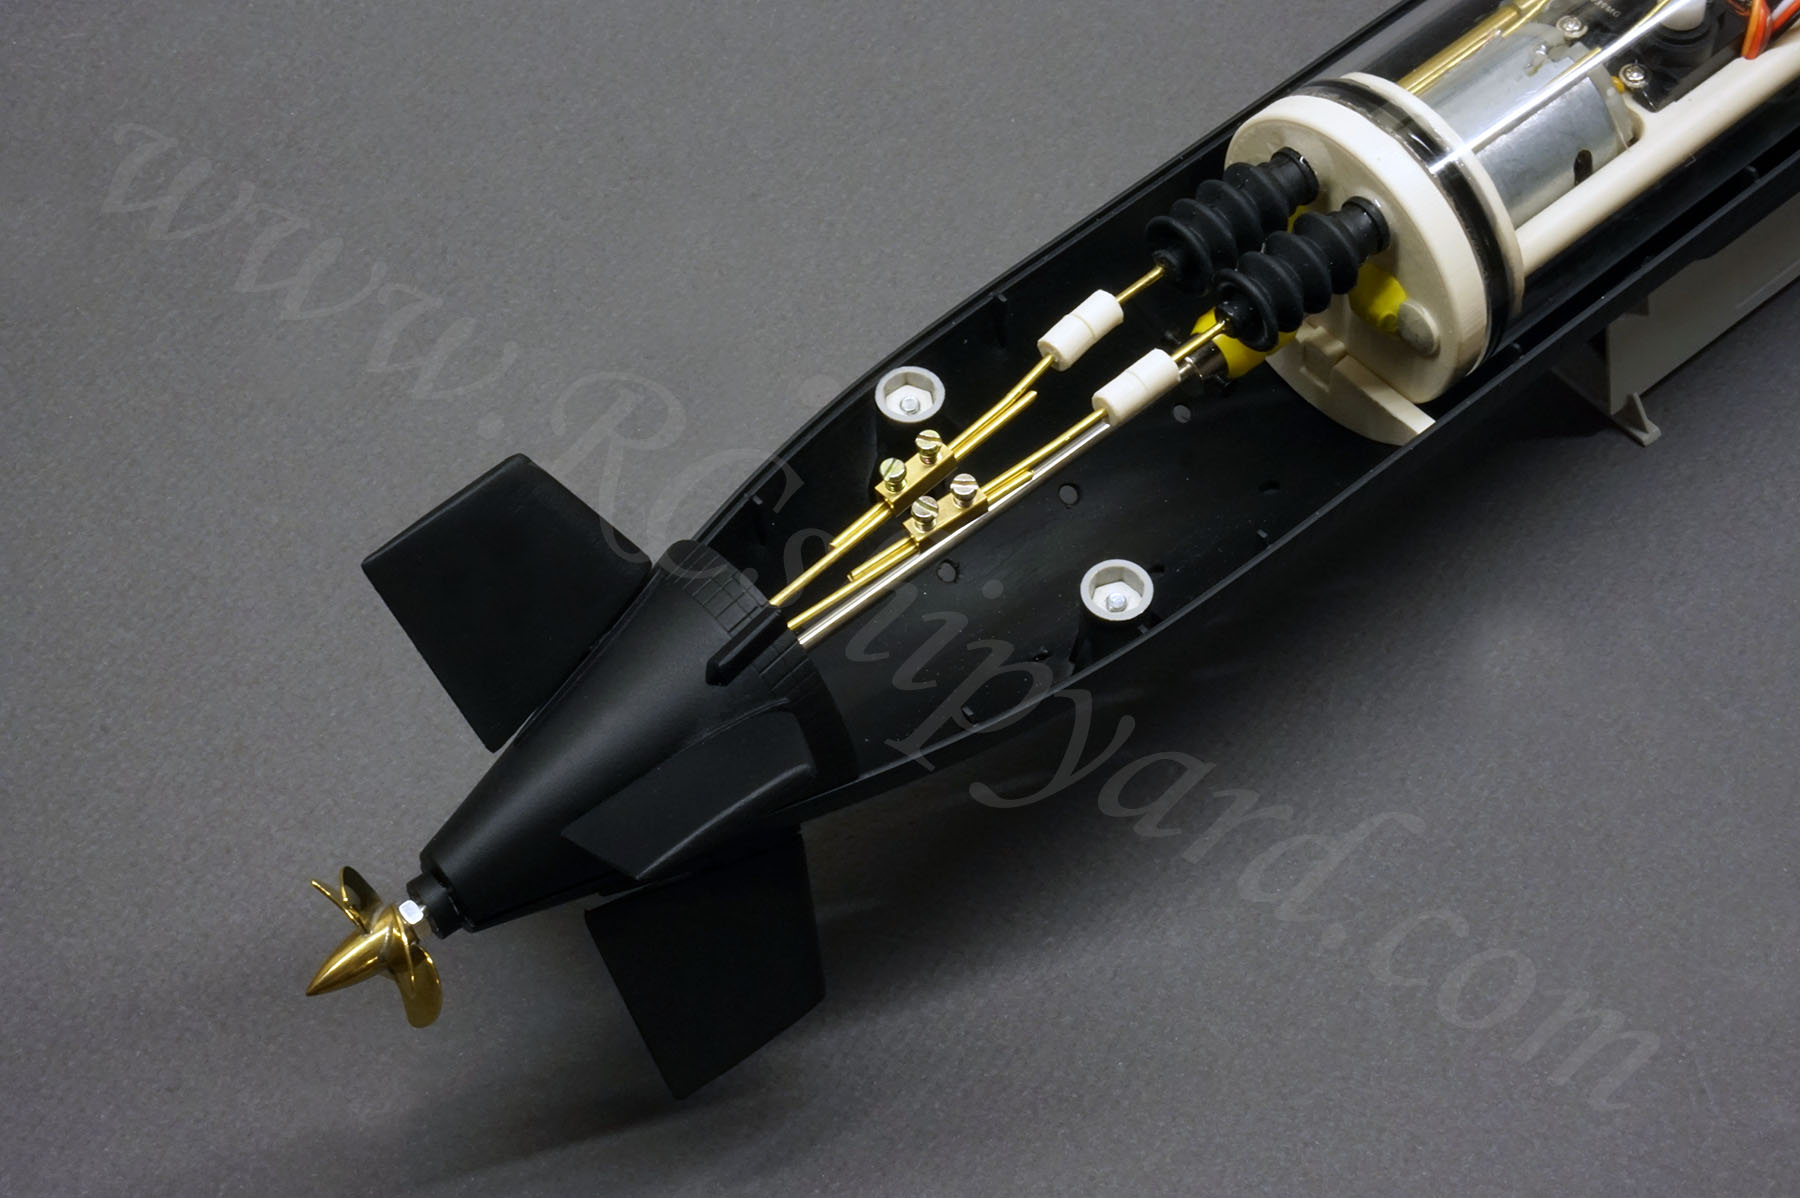
Diving Planes:
The original planes which I had to cut off where no use so, I designed and manufactured my own. The new ones have the same shape, but are slightly bigger as in my experience it’s always a good idea to enlarge the planes if you’re making a RC conversion. The rod is a 1.5 mm in diameter and fits the brass inserts – “bearings” glued into the hull perfectly.
Fitting the new dive/rudder planes:
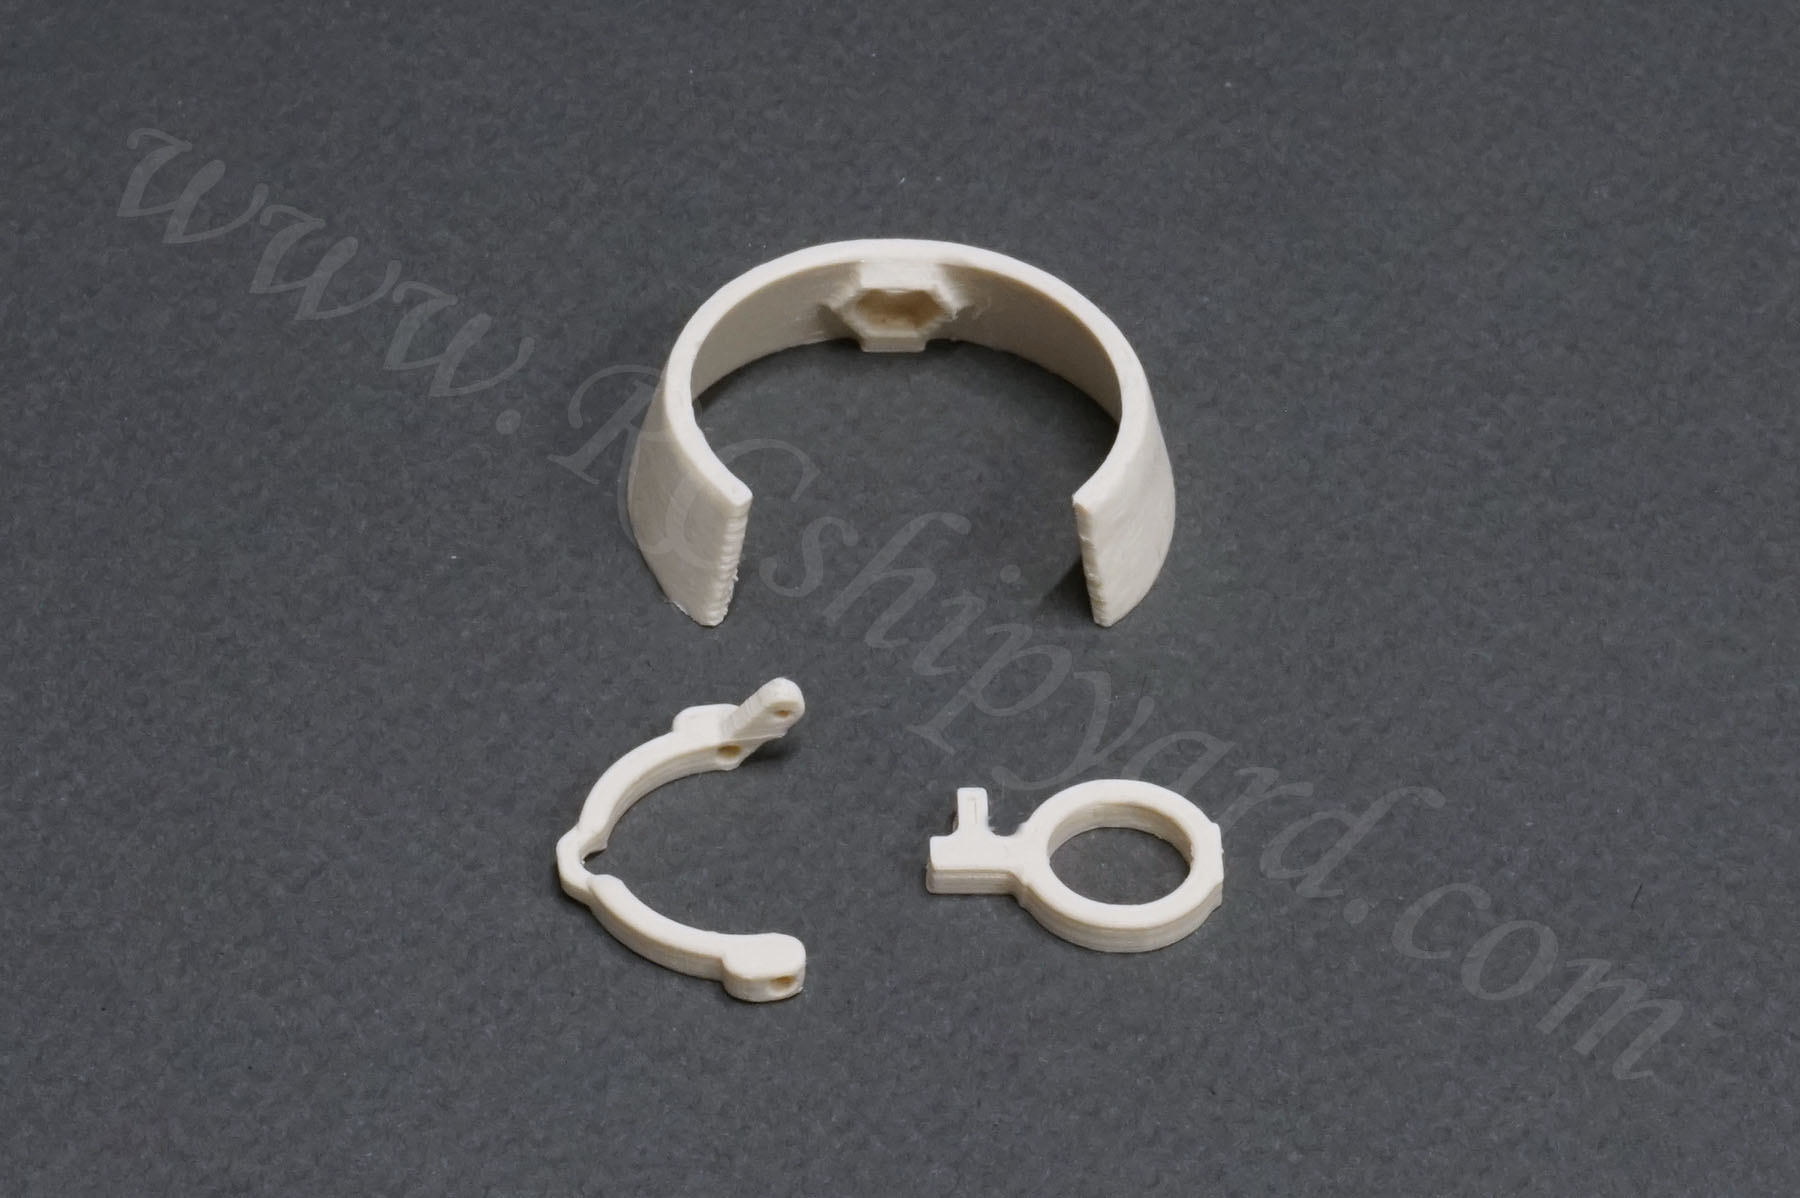
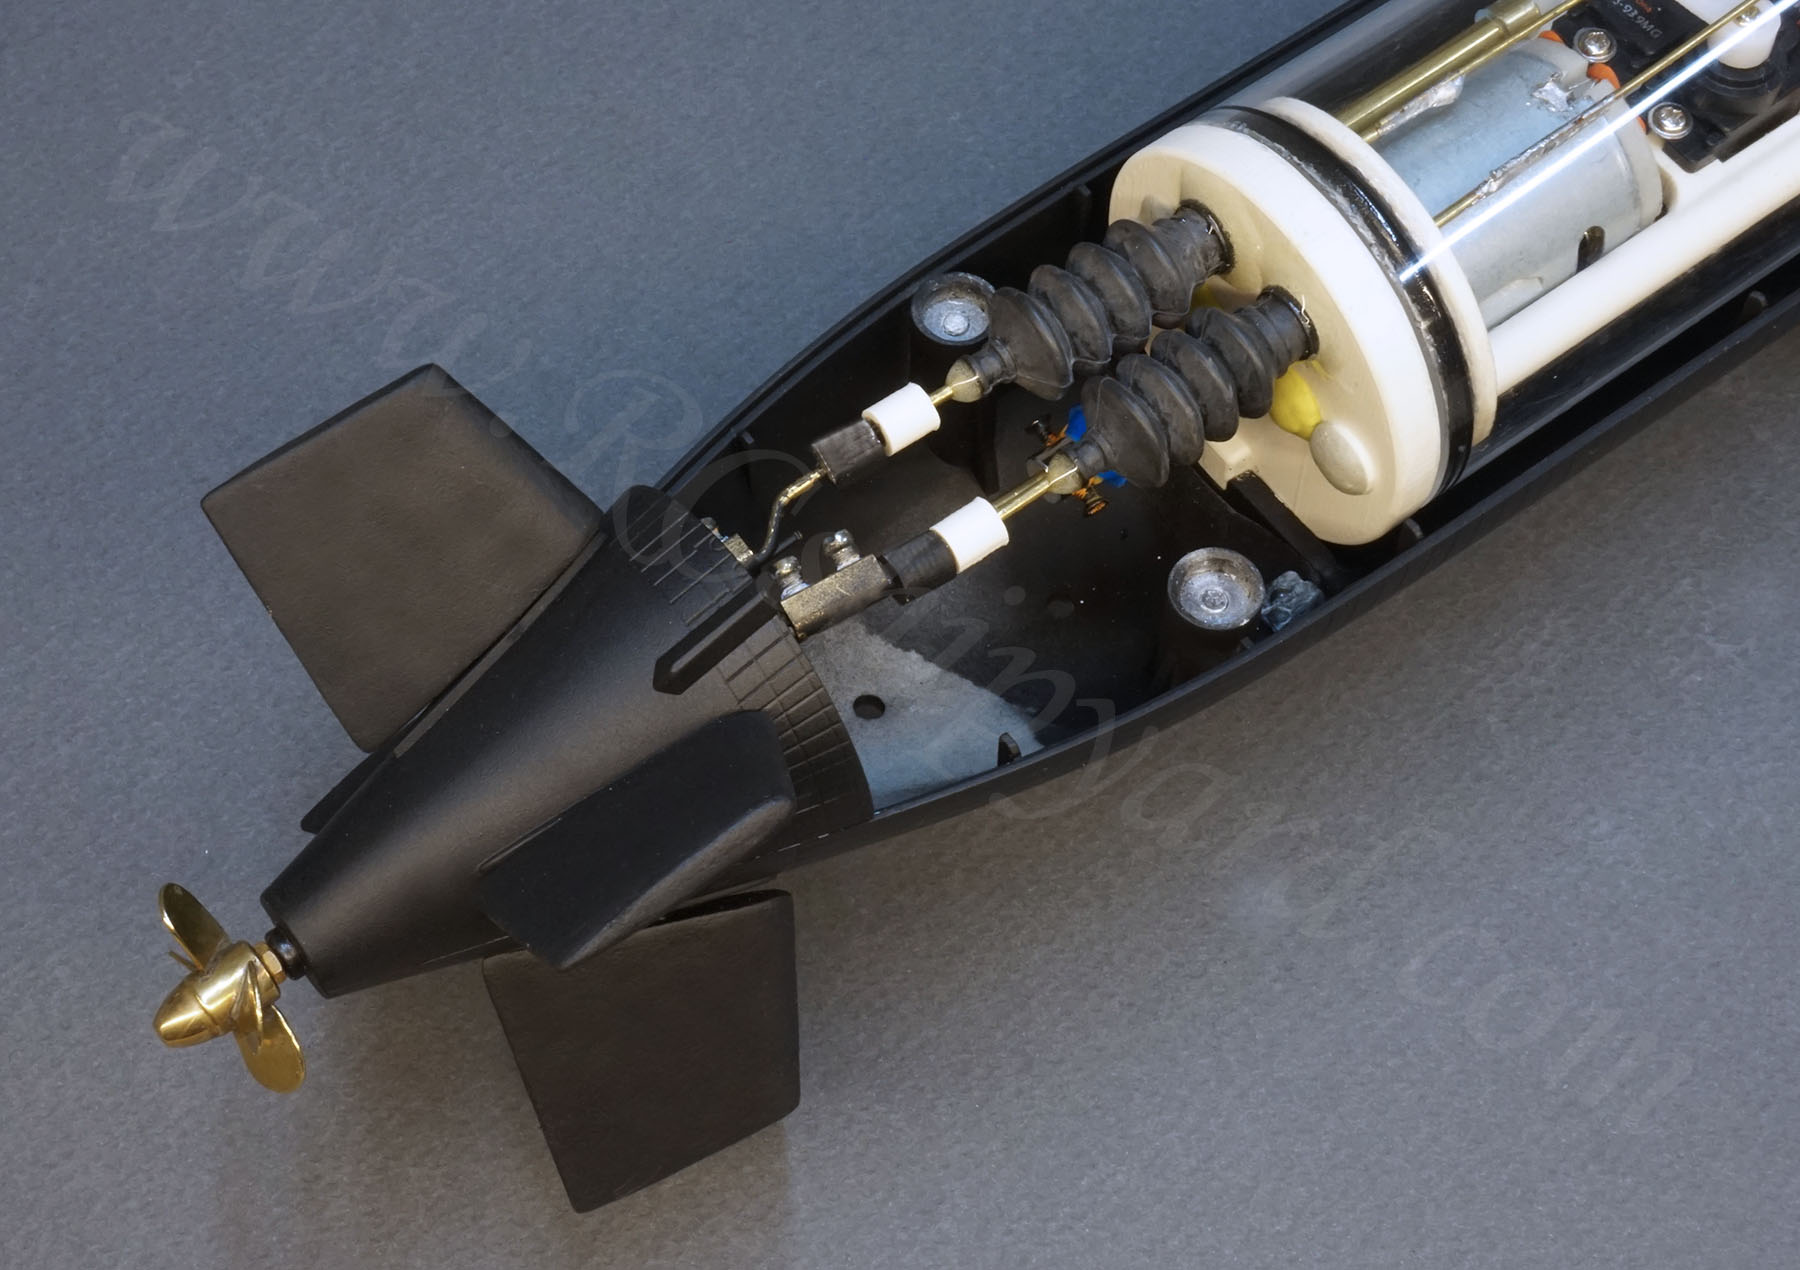
X- rudder mechanism:
X-rudder type of steering is a system where all four planes are used to dive/surface and to turn the submarine. You need a proper mixer in your radio called “elevon” or a you’ll have to program a custom one. X-rudder complicates the hinge system a little causing the thing to be a little time consuming, especially when you’re designing and manufacturing it from scratch, but in the end – if it works like a charm and you’ll love the manoeuvrability it gives!
1. General rules how the planes operate and initial design:
Different colours shows which planes are connected to the same pushrod and servo. People often believe that X-rudder system requires four servos. That’s not true. It requires only two, but it also requires a mixer. Mixer can be a separate piece of electronic which you connect between the two servos and the two RC channels in your receiver or you can configure and program one in your transmitter (if your transmitter is a model with a computer).
2. The final design:
Final design in which I have optimized the shape of the pushrods and hinges.
3. Manufactured parts:
4. Assembly and tests:
As you can see the space is tight and narrow. The mechanism requires some fine tuning – I had to adjust the servo travel range and the length of the pushrods. Also the moon shaped ring which holds the top part of the hull required some more tension on the screw.
The final thing at work:
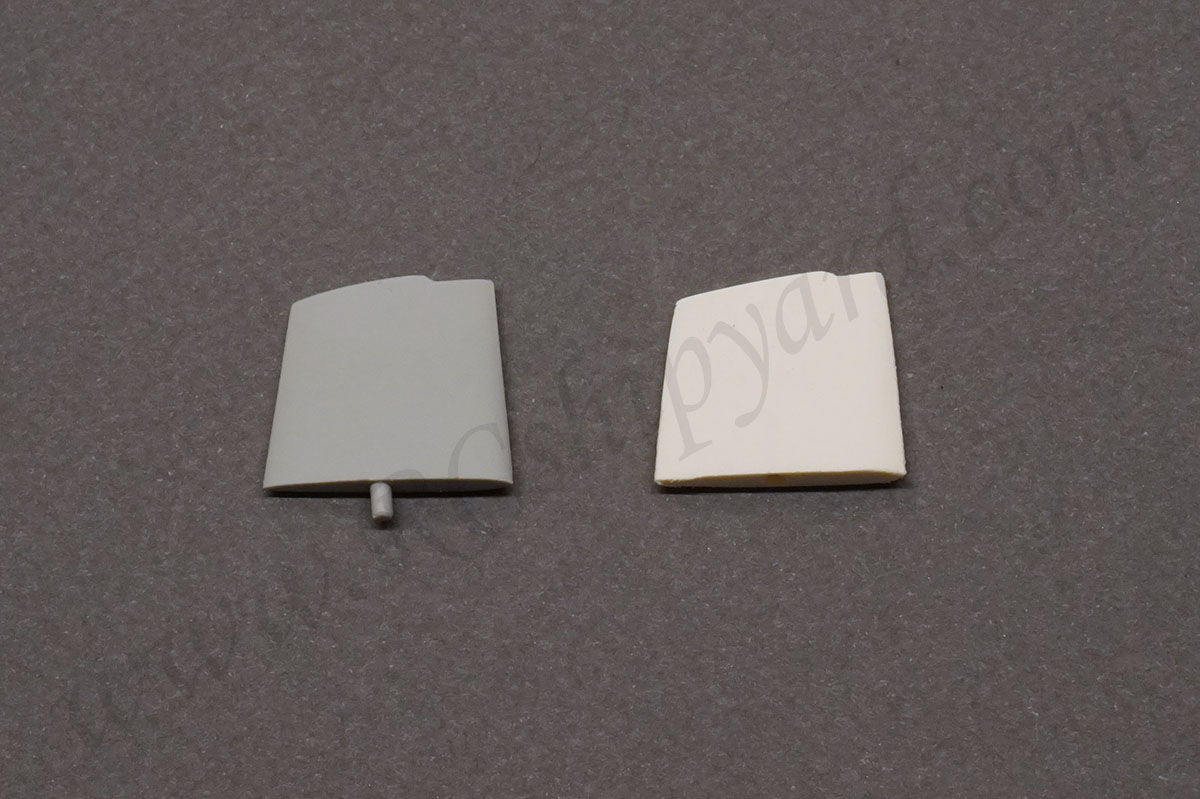
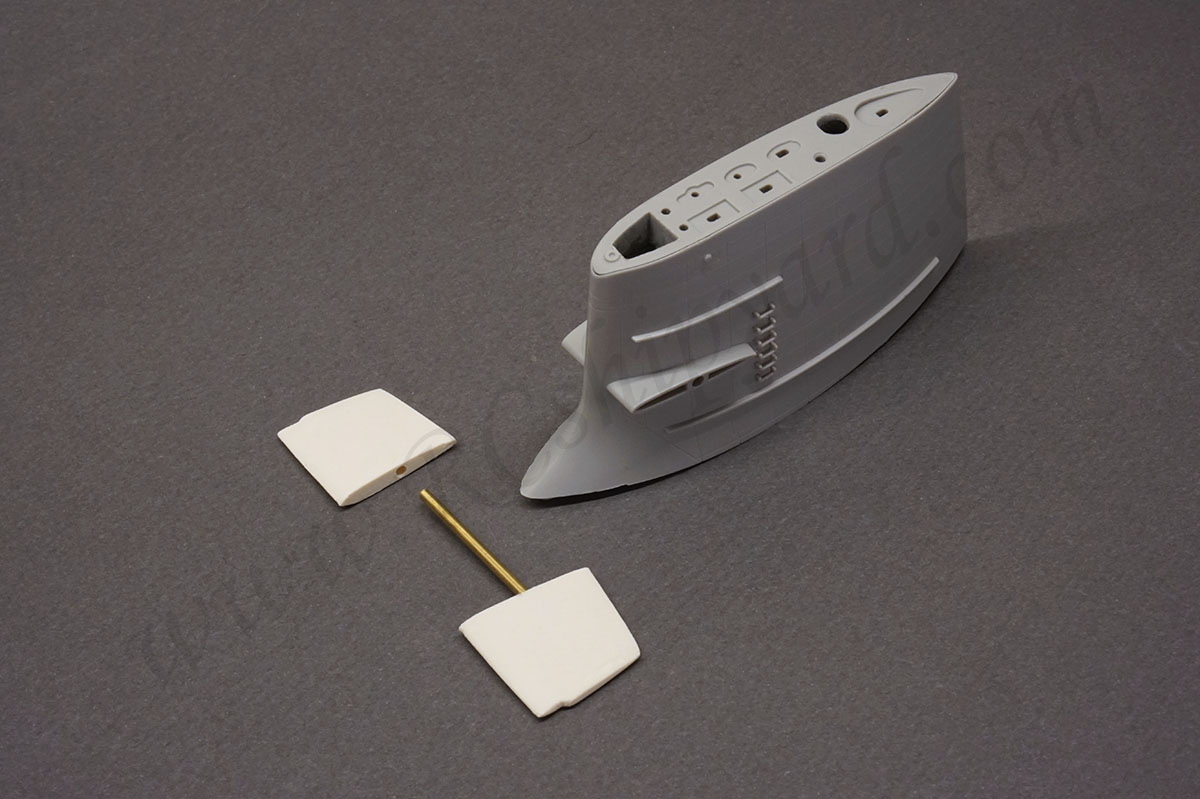
Fairwater planes:
The first version of my Soryu class had fixed fairwater planes and it was running fine, but I really wanted to have those operational fairwater planes. The original ones made by Trumpeter are nice, but their plastic “rod” is to fragile and short to allow for any RC use. That’s why I had to design a new set… As always.
Here you can see a ready made pair with a 1.5 mm rod attached…
…and the set mounted on the tower. Ready for operation!
Closing and opening the hull:
Every submarine model needs some kind of opening method for gaining access to the watertight RC compartment. I decided to stay with the Trumpeter way of closing and opening the hull – a cut perpendicular to the water line. I’ve decided that I’ll use the remaining pylons as “locks”. However the pylons where not designed to open and close regularly – they quickly became loose and the upper half would simply not stay in place for very long during a run.
So in the lower hull I’ve added a screw in each pylon, the screw is kept in place by a little white ring which you can clearly notice inside. The ring allows the threaded rod of the screw to move up and down:

The screw head can be accessed from the other side with an Allen key, the additional hole is barely visible. The screws head is bigger than the hole for the Allen key so it will never fall out. The smaller holes (pairs) in the center are flooding openings.
When you rotate the Allen key, the screw moves up and will grab a threaded insert located in the pylon in the upper hull.
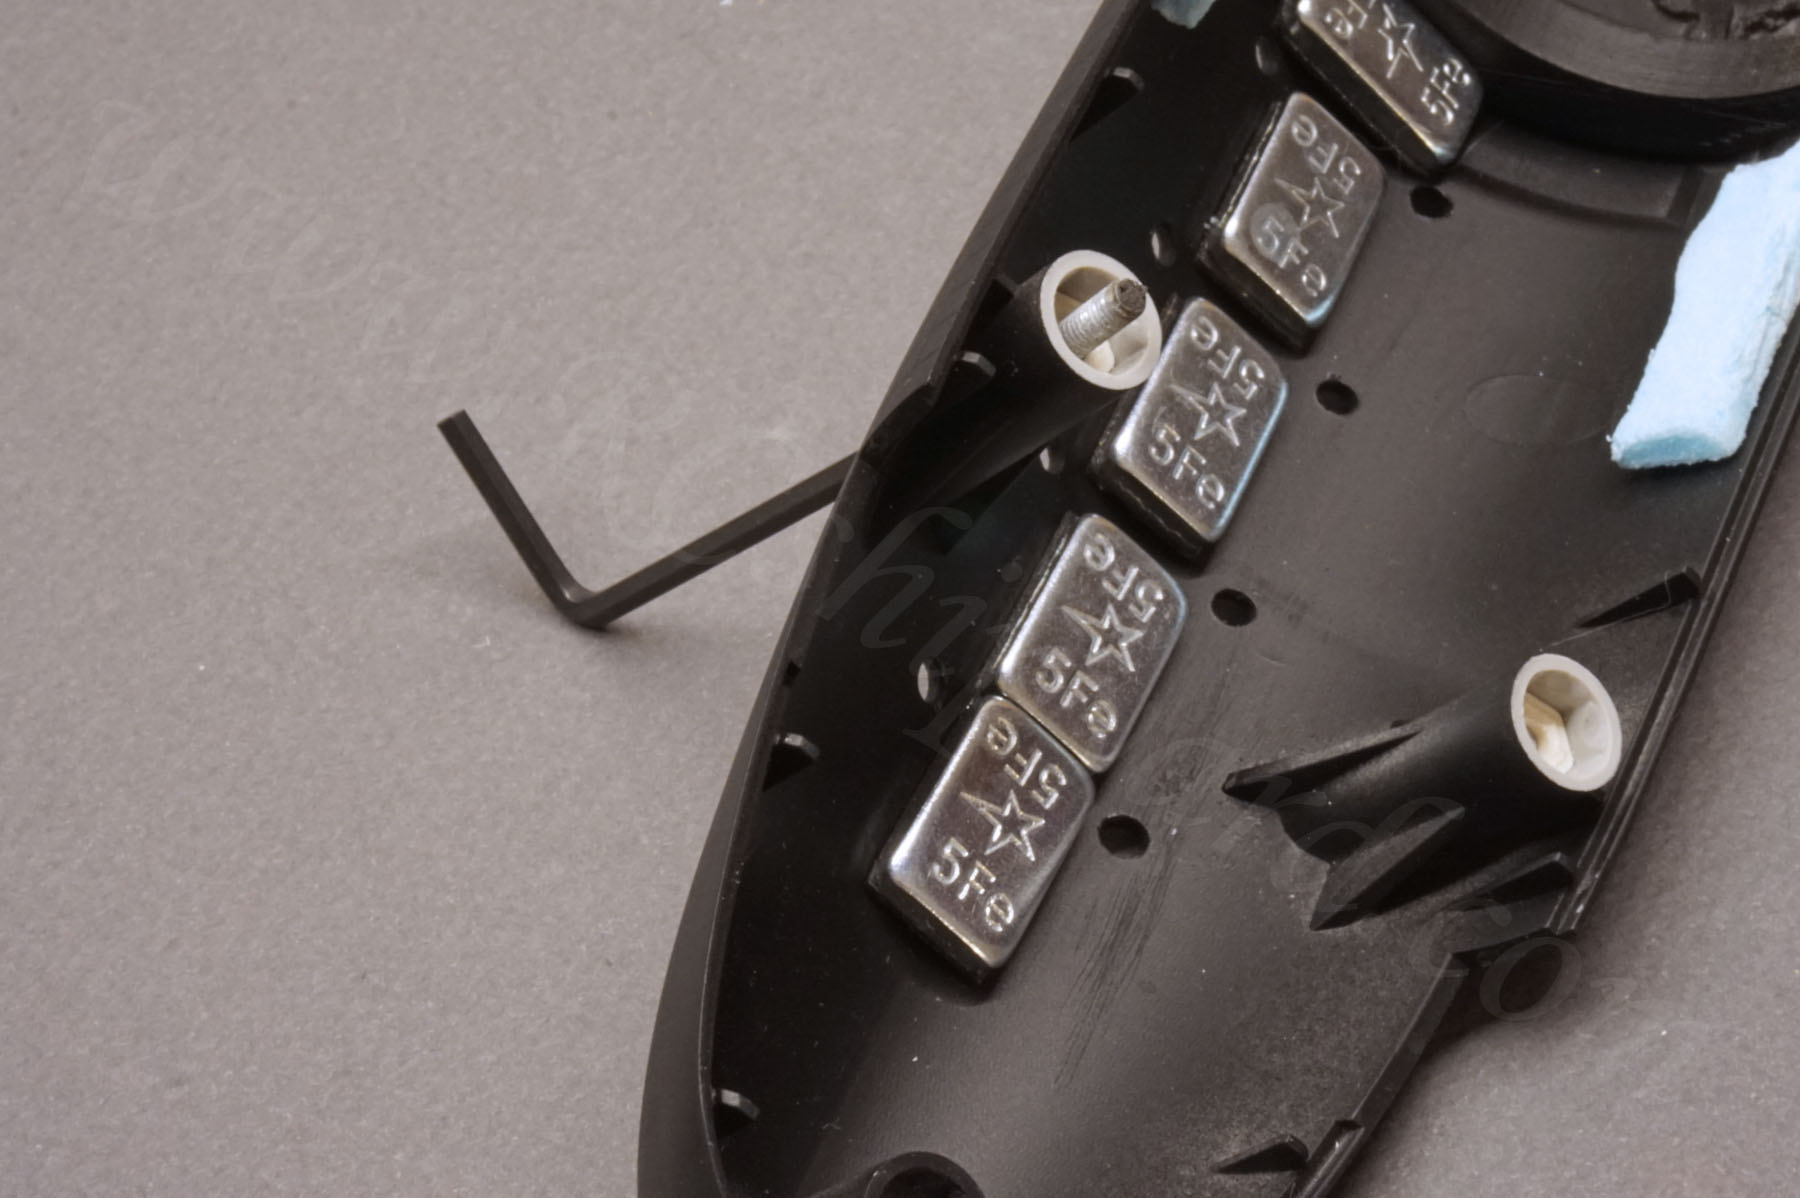
Here you can see the threaded inserts mentioned earlier. They’re made from brass:

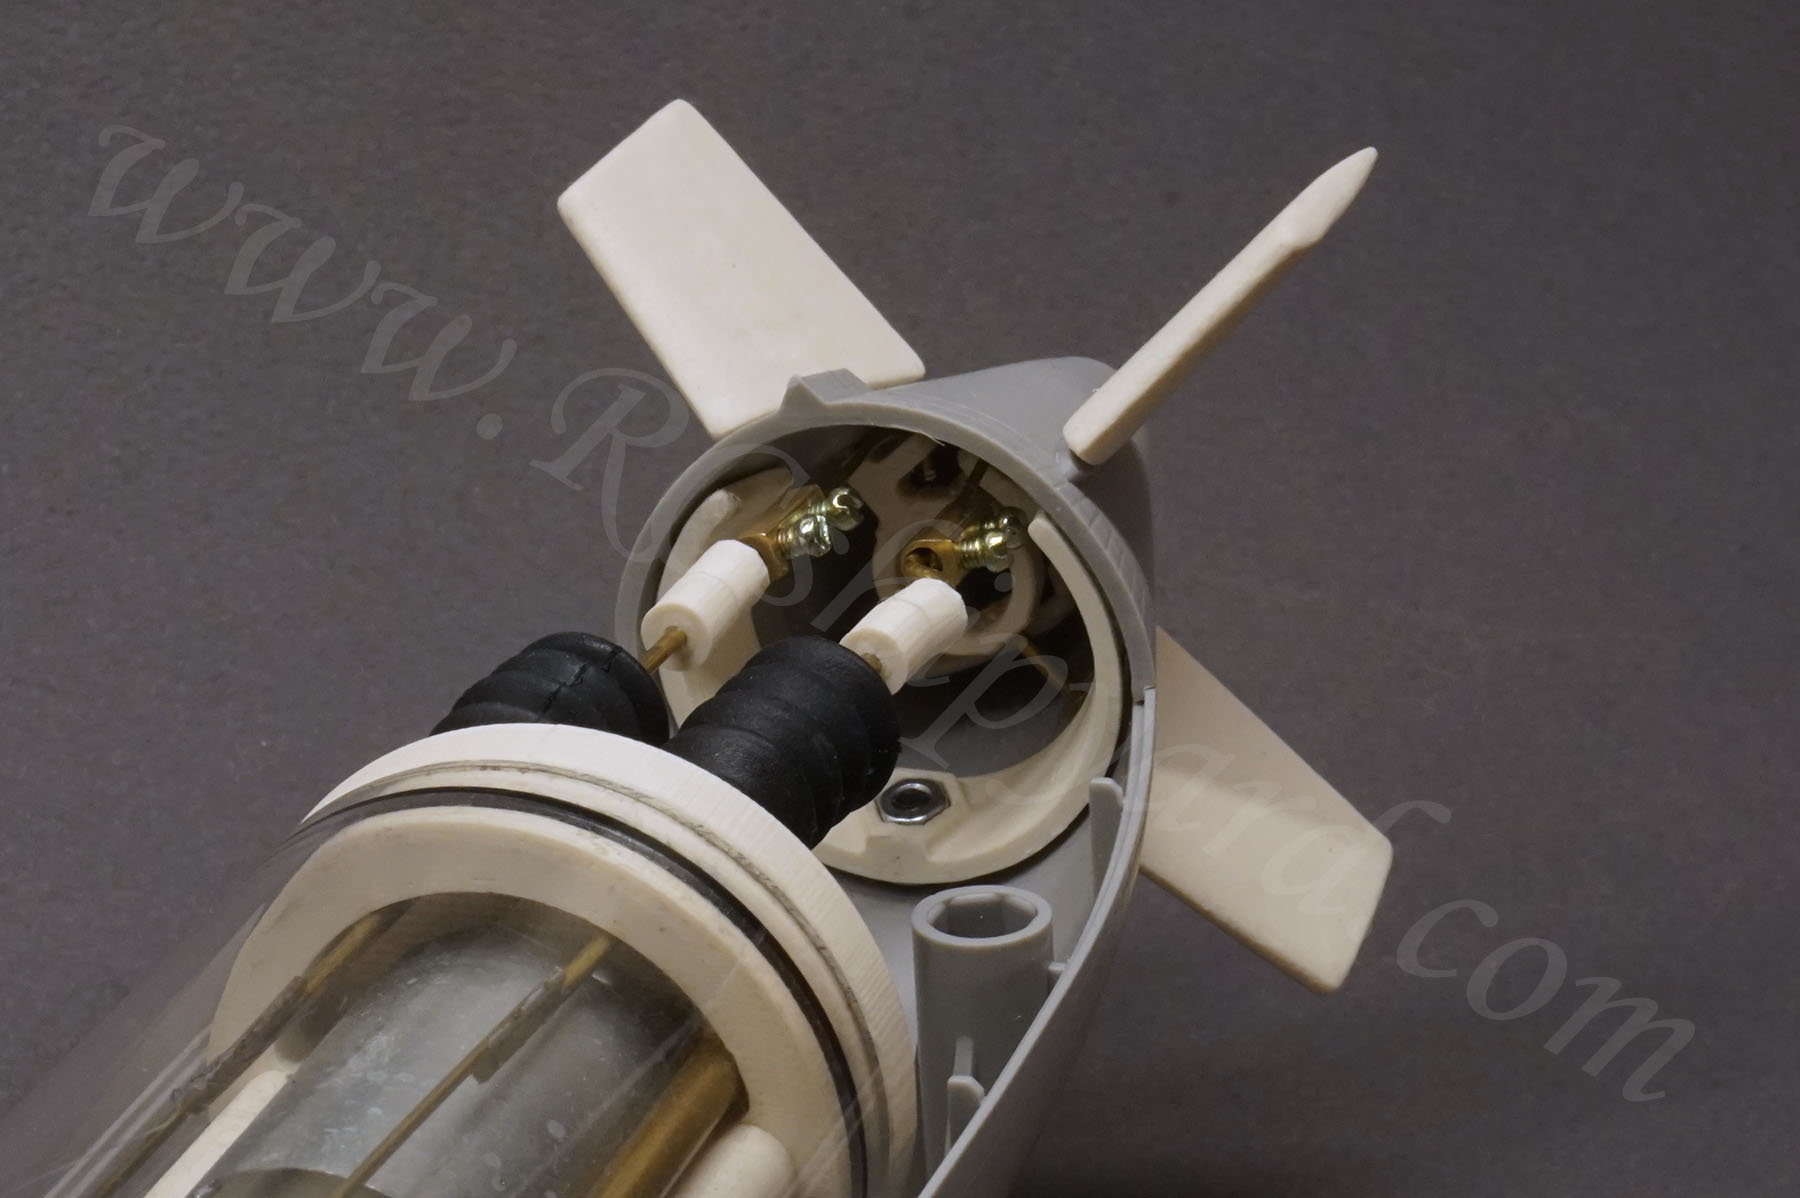
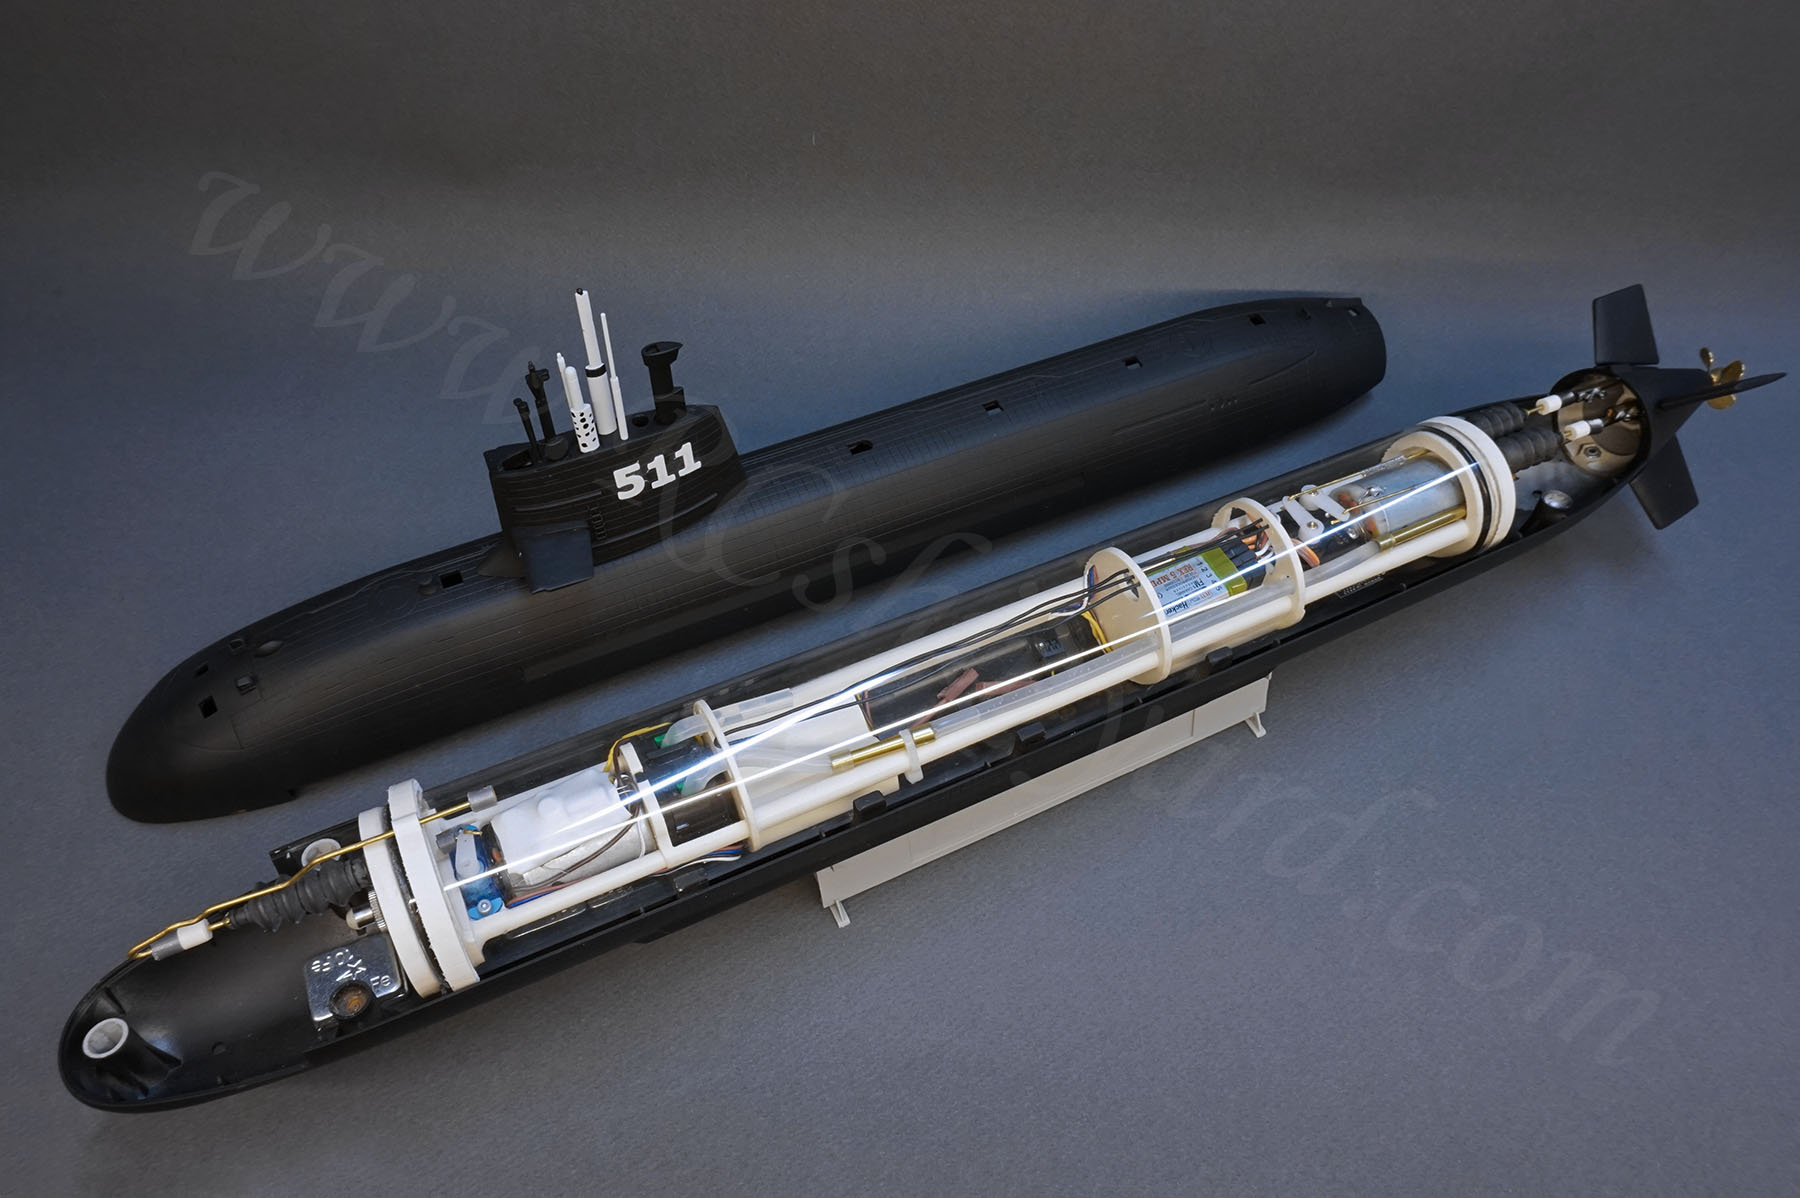
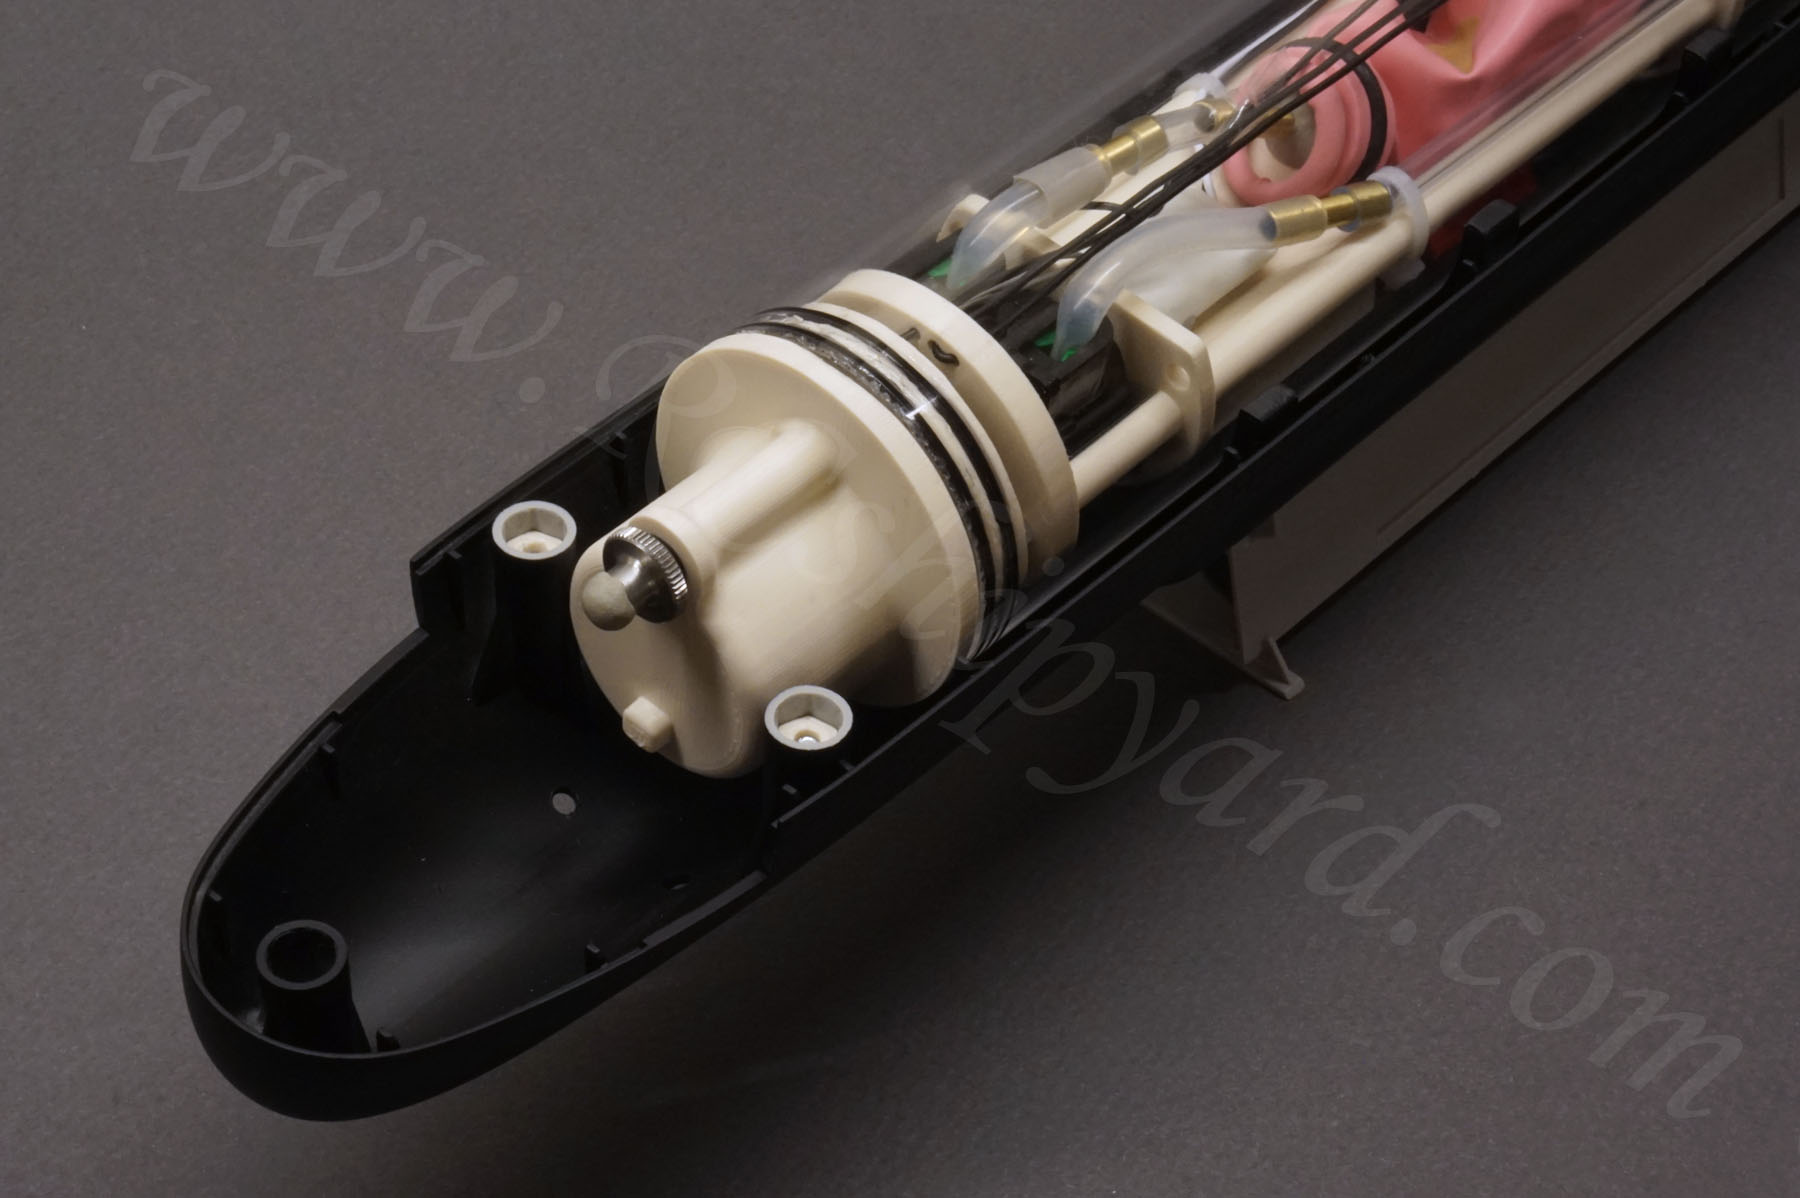
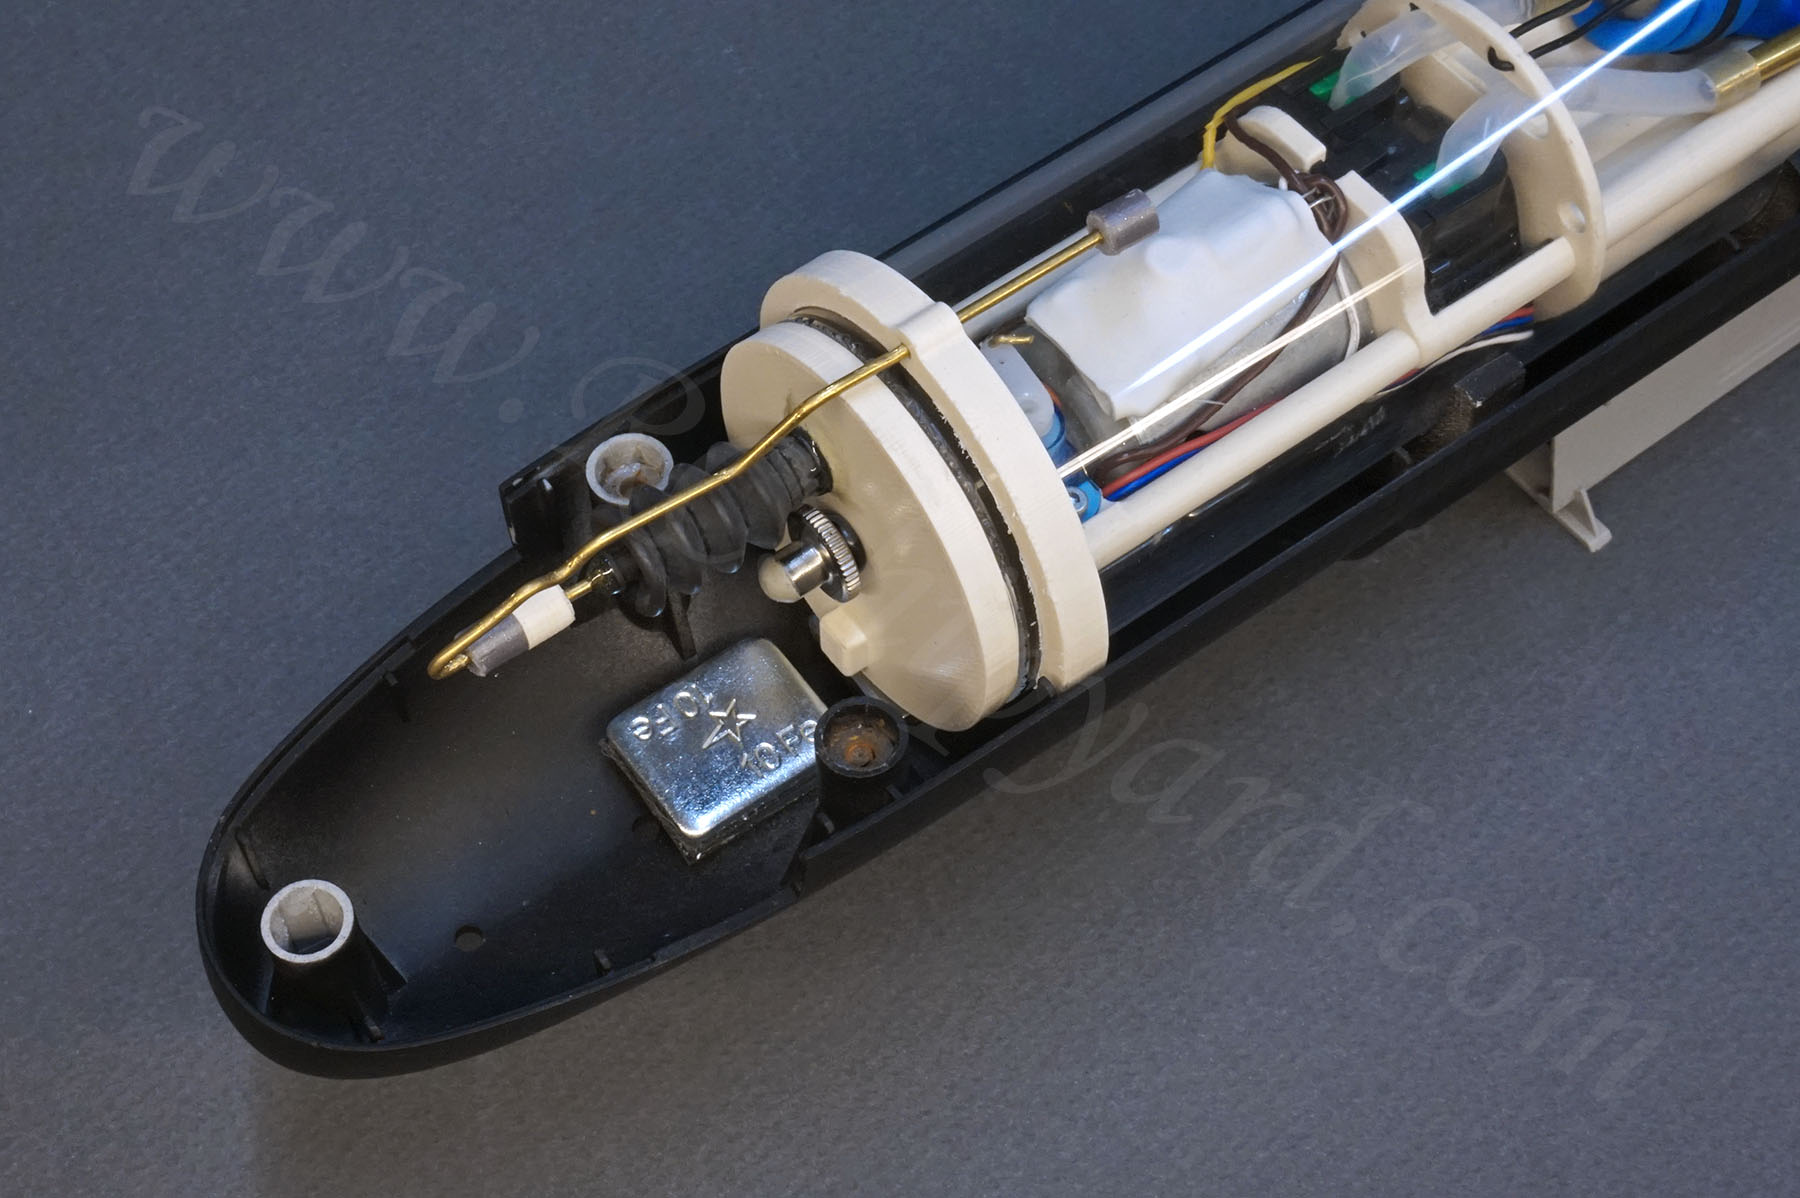
“Old” and “New” WTC:
You can’t really say that one of the WTCs is old and the other is new. One (“old”) is simply more of a budget option which you can use in two submarines – in the Soryu and Kilo, while the other is more expensive, but offers additional functions exclusive for the Soryu Class models only (“new” WTC).
The SS 502 Unryu with a WTC from the Kilo model:

The SS 511 Oryu with a dedicated WTC allowing operational fairwater planes:
The operational fairwater planes required a modification of the WTC. As I have written at the very start of this building thread – you can use the WTC from the Kilo in this model and it works fine, but then you have only operational stern planes. This is a X-rudder boat, so you cannot simply use an extension of the pushrod from the stern towards the bow (like in the Kilo model). For the operational fairwater (or bow) planes in any X-rudder boat you’ll need a third servo and the Kilo WTC is simply to small for that. I had to find some space for the additional servo and the lengthening of the polycarbonate tube was the only solution. This of course caused the change of volume and buoyancy of the cylinder, so I had to recalculate the size of the ballast tank and increase it’s size accordingly. Luckily It was all manageable and that’s how a third WTC type was born in my family of 50mm WTC tubes.
Difference in trimming with different WTCs:
I must confess, that the HUGE difference in trimming the boat with the Kilo cylinder and with the Soryu dedicated cylinder was a giant surprise me for me. After giving it second thoughts however – I should have anticipated it. Even when in similar size, the Kilo and the Soryu plastic KITs from Trumpeter are very different. The Kilo is an older model made from rather thin and soft plastic, while the Soryu is thick and stiff like a rock. That causes a huge weight difference of the hull. Soryu’s hull and parts weight the same amount as the parts of the much bigger Seawolf model!
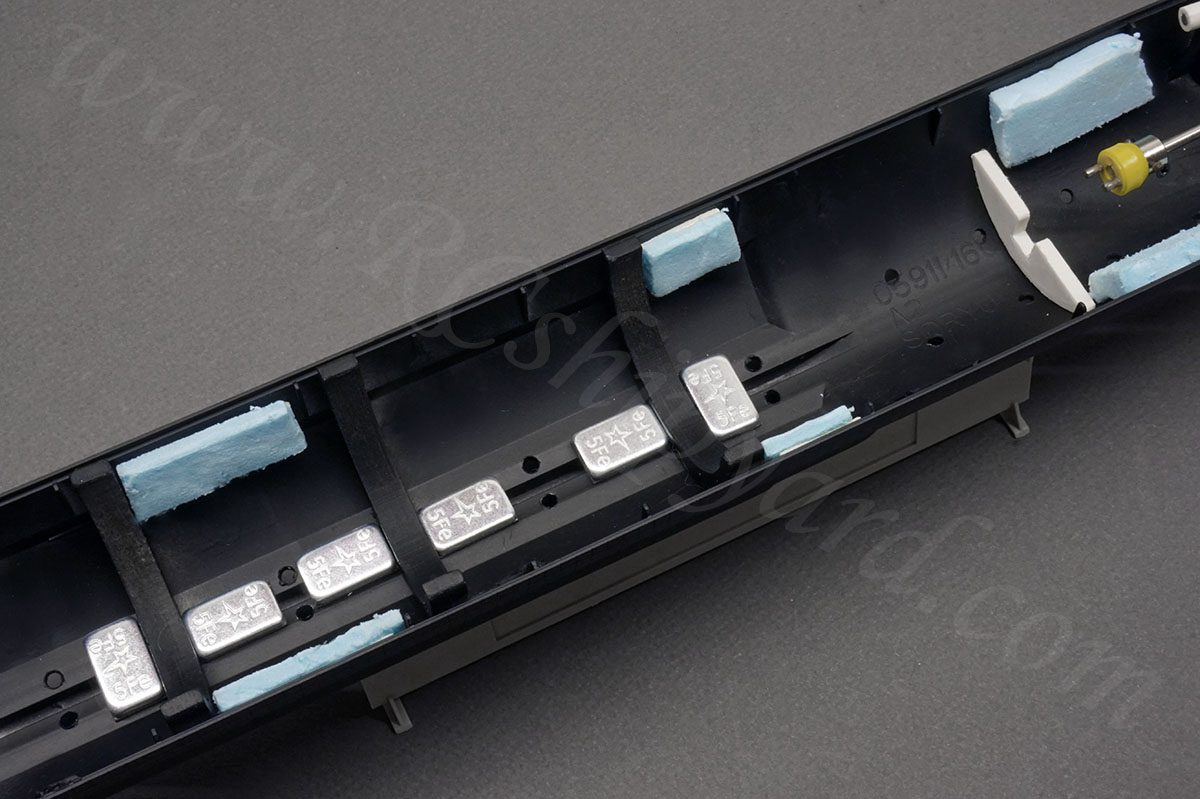
What this means? It means the better size of the cylinder for the Soryu is the longer one, the one with additional servo. The cylinder from the Kilo has not enough buoyancy on it’s own to allow a proper trim and hence requires foam in the hull (more work):
The inside of the model (SS 502 Unryu) with the smaller Kilo cylinder (upper hull):
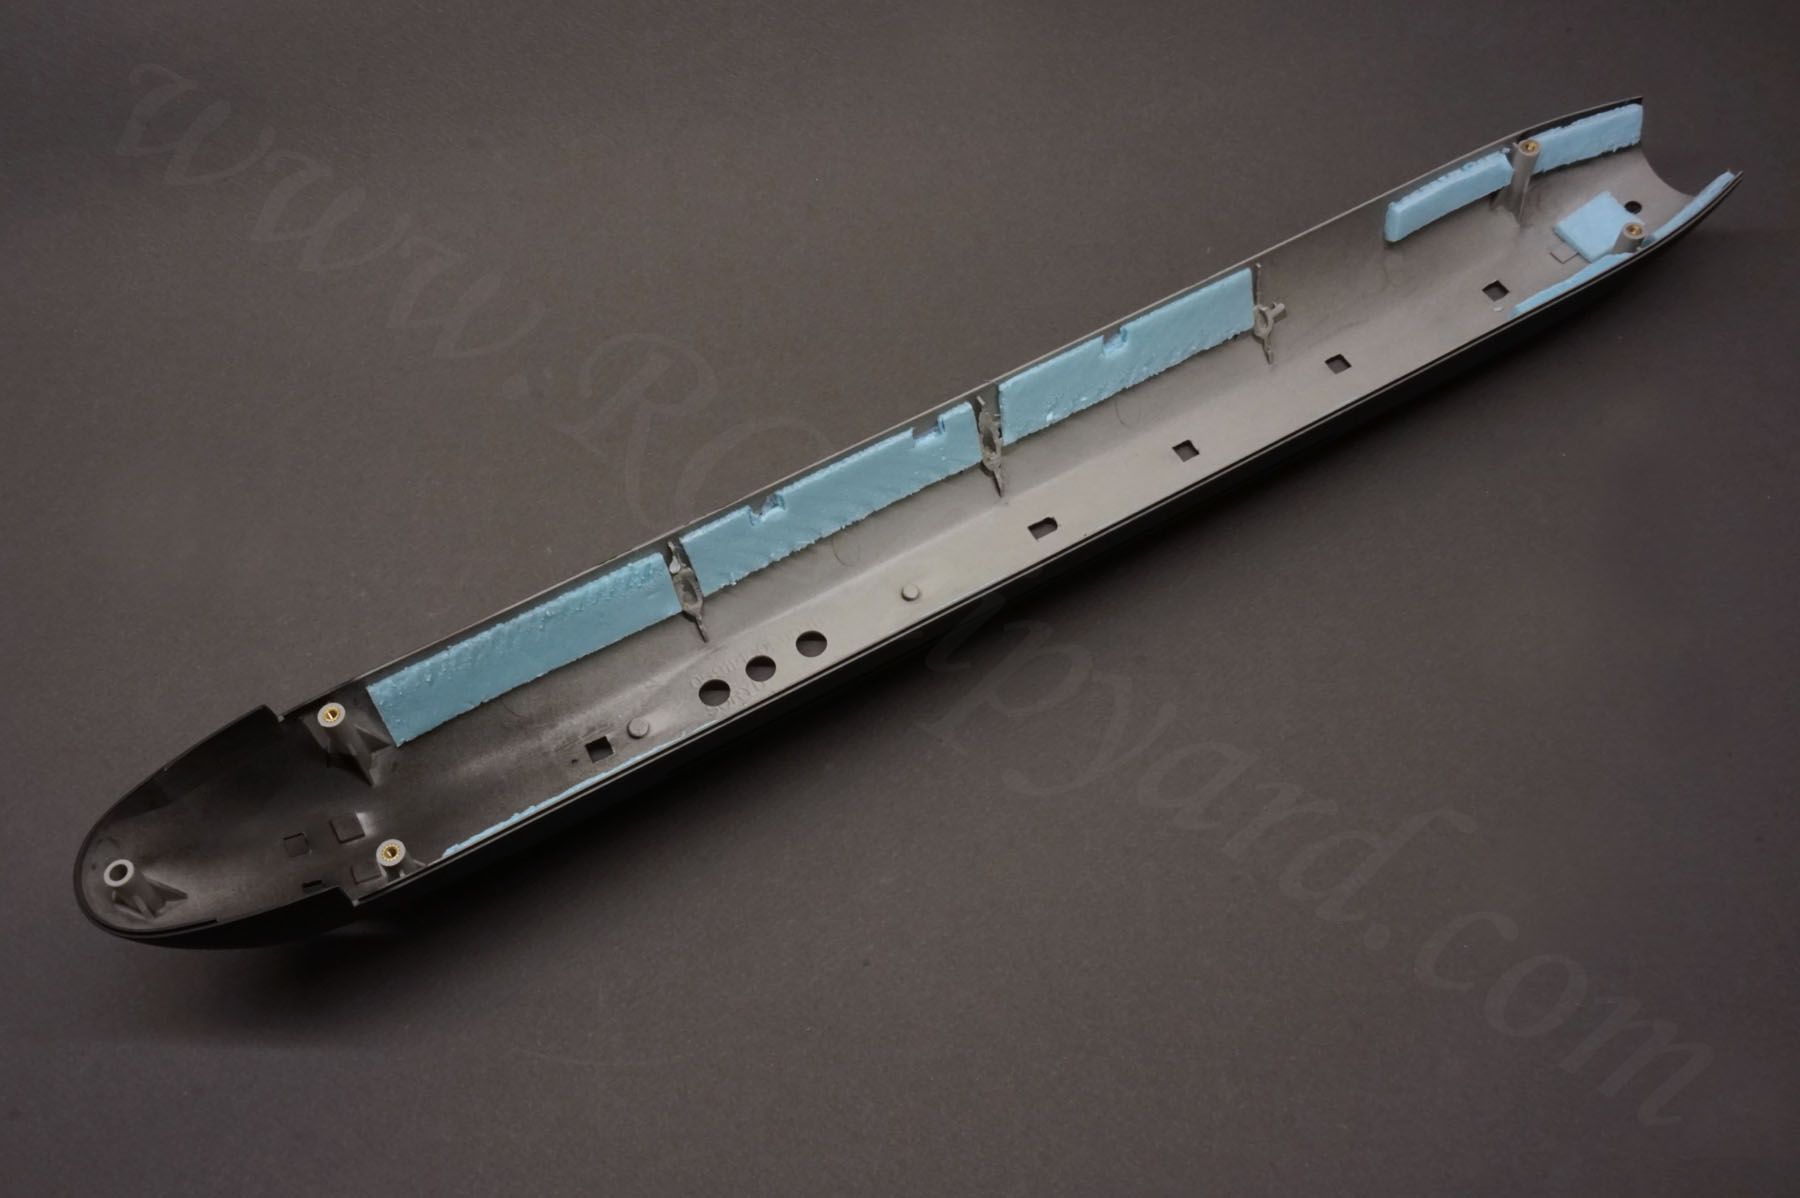
The inside of the model (SS 502 Unryu) with the smaller Kilo cylinder (lower hull):
The inside of the model (SS 511 Oryu) with the Soryu dedicated cylinder (upper hull):
Now because the dedicated cylinder is bigger in volume – it has a more buoyancy and a bigger ballast tank. Here foam was used only to correct the underwater trim of the boat (she was a little stern heavy while submerged).

The inside of the model (SS 502 Oryu) with the Soryu dedicated cylinder (lower hull):
No foam here.

Finished models:
The SS 502 “Unryu” with the Kilo cylinder:
The SS 511 “Oryu” with the cylinder dedicated for the Soryu Class models:


Maiden Voyage of the SS 511 Oryu:
Maiden voyage of the SS-502 Unryu took place 10.10.2019 in one of the local ponds. The initial trim was not bad, but the model required additional ballast to stabilise it during the surface runs.
Maiden voyage of the SS-511 Oryu took place 14.10.2020 while I was on holidays in the countryside. The boat required minor ballast relocation from stern to bow to level it.
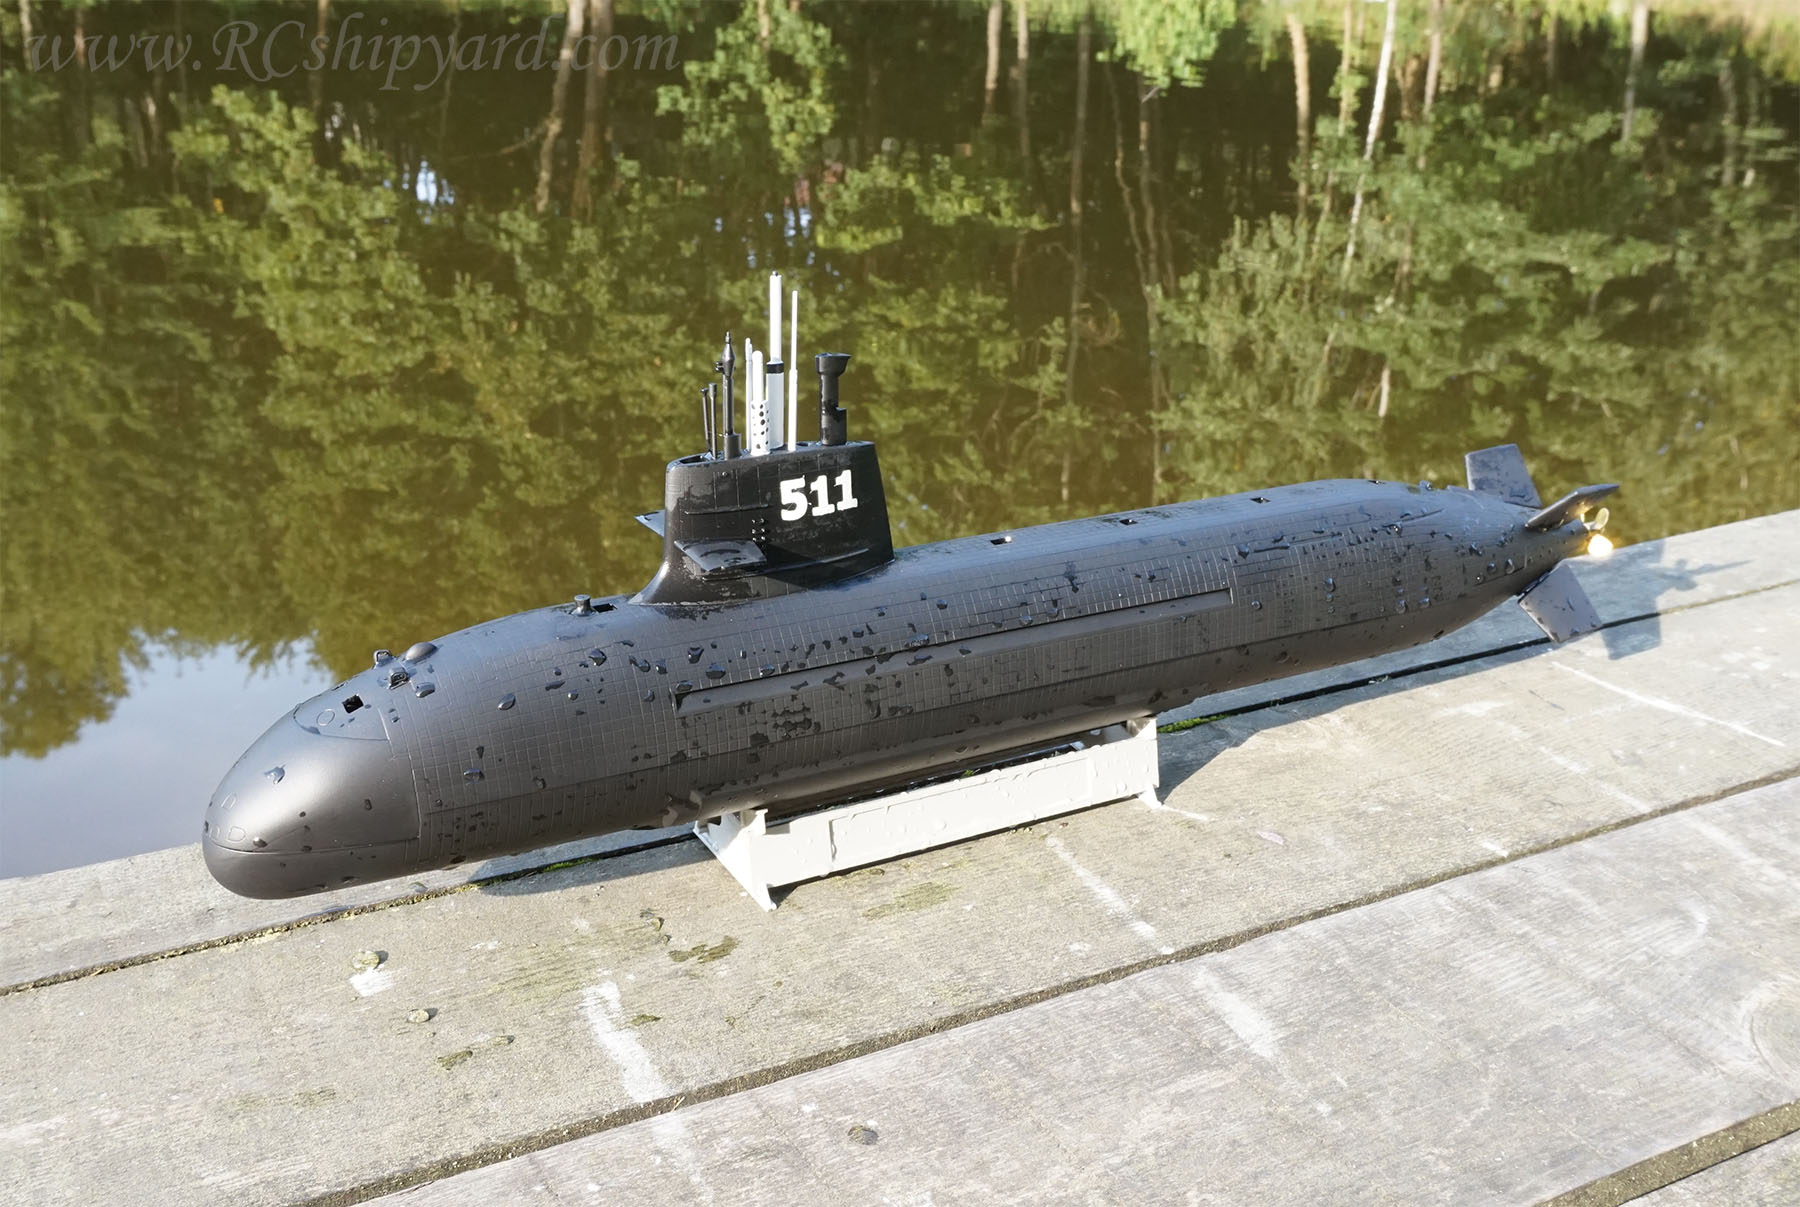

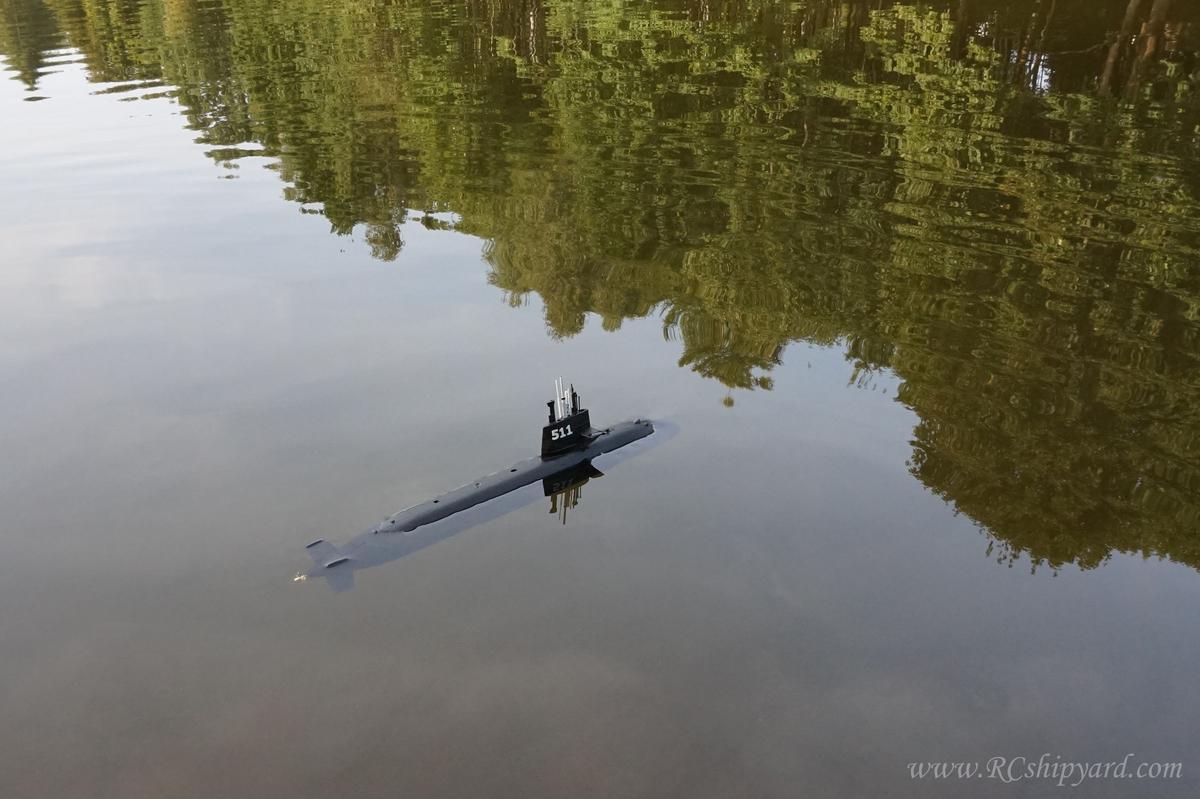
For a model this size, this thing is super stable both on the surface and submerged. It’s also very precise when it comes to setting it’s depth. With a dedicated WTC, which has more buoyancy and a bigger ballast, you can now move the model vertically almost at any speed and stay on any desired depth (at least until you loose eye contact with it).