
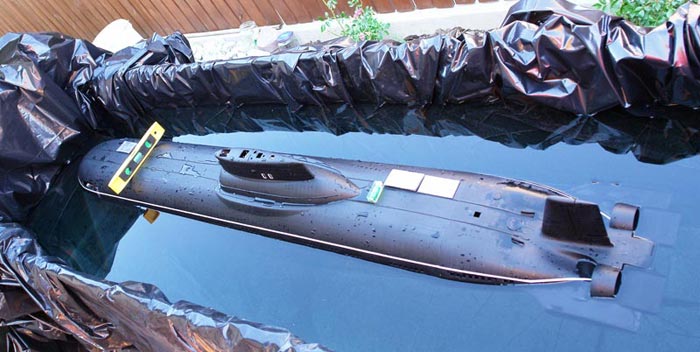
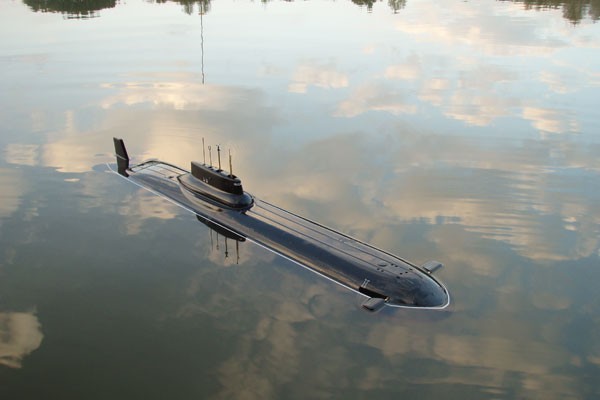
My first Engel Kit, bought after a long and difficult conversion of the Revell Type VIIC 1:72. I wanted to have a model with lots of room inside for additional systems and experiments. For some time I was reading about the Engel piston tanks and was impressed by their quality and capabilities.
During the year 2008 I went to Germany to one of the model gatherings and after seeing those models with my own eyes I was sure that I don’t want one. I NEED ONE!
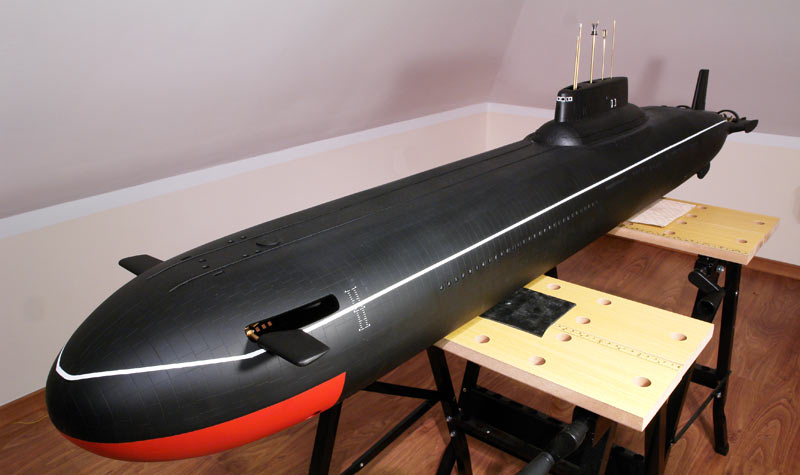
The measurements are impressive:
- scale – 1:100
- length – 172 cm
- beam – 22,8 cm
- displacement – 21 kg / 22,6 kg
Clip from a one of the runs:
Build:
Built start: 29.08.2008.
Built finish: 10.07.2010
Last update/modification of the vessel: 15.06.2016.
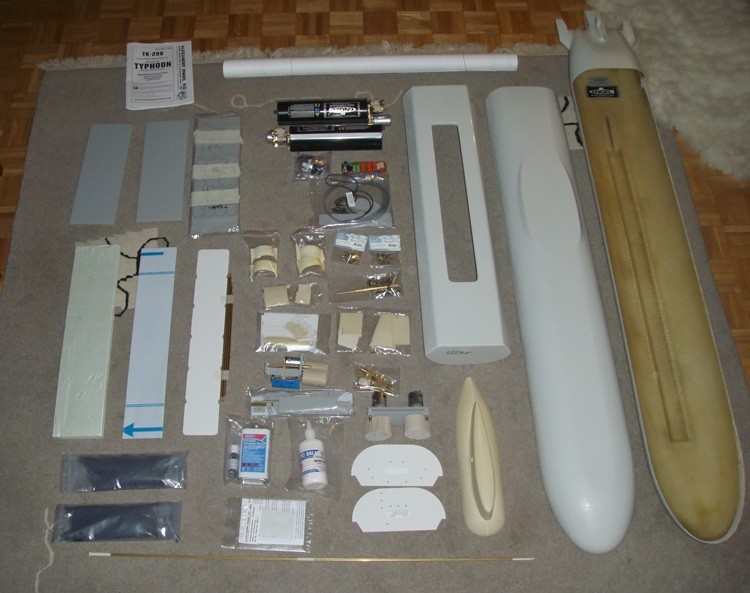
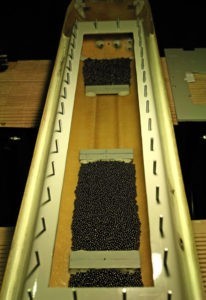
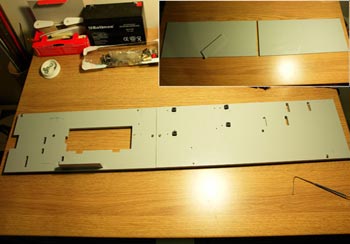
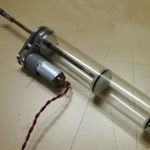
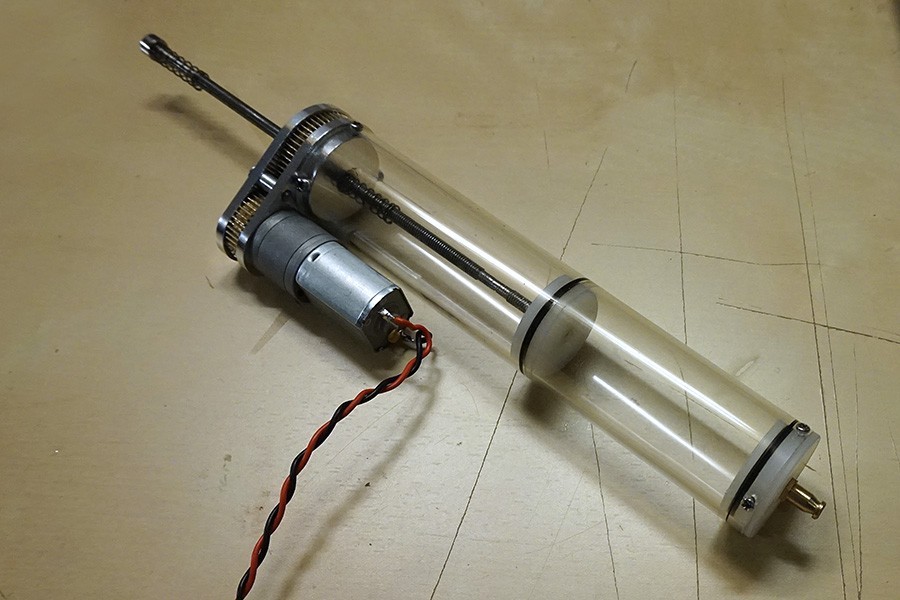
The Kit consists of many elements. The obvious ones are the large laminated hull (upper half and lower half), the sail – which was made as a polyurethane resin cast and the middle deck which creates the dry section. The middle deck is made out of reinforced laminate. Lots of grey plexiglass for the elements inside, geared drives – two, as the typhoon has two propellers, rudders, dive planes, lots of switches, retract mechanism for the bow dive planes, uncountable amount of tubes, wires and screws. Two Raboesh scimitar propellers also included. The crown jewel of the kit are two (0,825 litre each) Engel piston tanks with a TAES microprocessor driver.
After analysing the kit contents I’m absolutely sure that currently (year 2008), I have no conditions to make a scratch build model in such a quality. I don’t posses the heavy equipment necessary for it – lathe (which I have very limited access to) or CNC and there is also a problem of buying elements which are sold in bulk, not mentioning a proper place for all the resin works…
There are legends about the turning radius of this model, so my vessel will be equipped not with a single bow thruster, but with two such units – bow and stern one. The kit will have retractable bow dive planes and periscopes of my own mechanism design, not the one from Engels). I’ll finally have room to experiment with the torpedo systems, trimming ballast tanks and additional electronics.
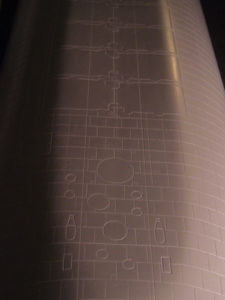
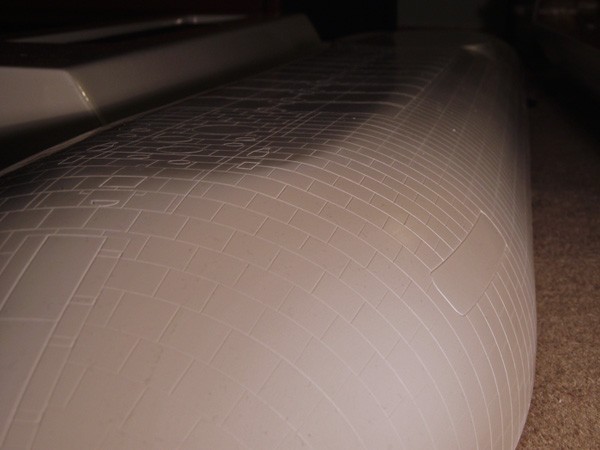
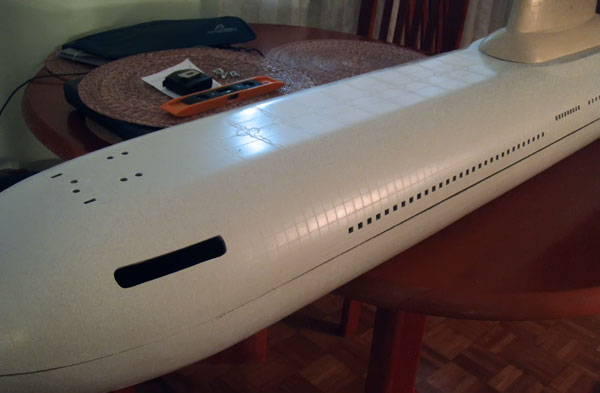
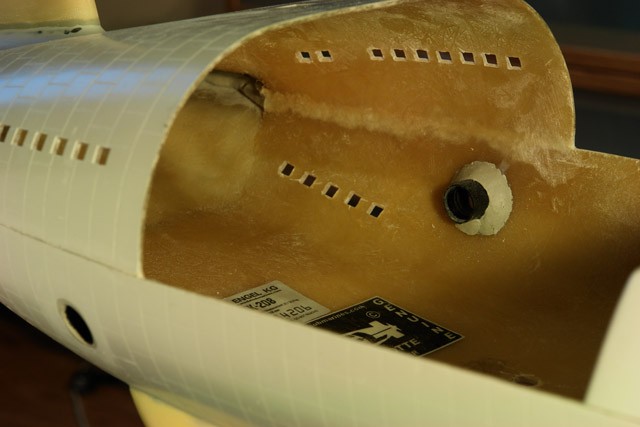
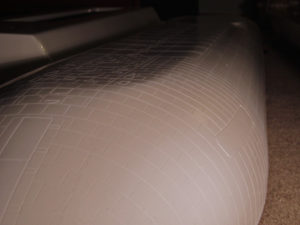 Details of the hull and tower are astonishing. The amount of work needed for cutting out the flooding and venting holes is a little scary. Especially when you look closely at the thickness of the laminate.
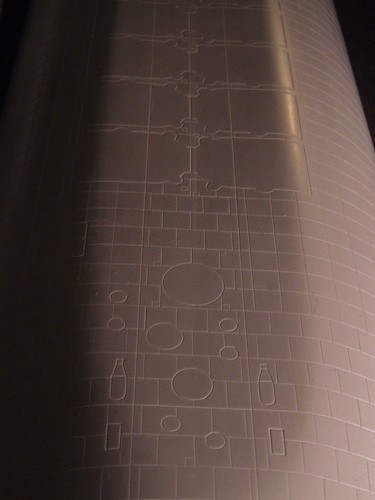
Cutting out the vents and the flooding holes:
Few days of work, 3 files completely destroyed, calluses on my hands, lots of dust everywhere and one of the sides is finally done – something like 1/2 of the venting holes. The thing is thick as a concrete!
Slots for the retractable bow planes were much harder to cut then I imagined, as my diamond cutting discs diameter was to small. I had to use the normal ones, as those were the only with a diameter big enough for the job (at least for my Proxxon). I bought something like 10 of those and used almost all of them! Normal discs are simply not suitable for that, but in great quantity they did the job.
As you cans see below, there are lots of slots in this boat. I wanted to have all of them in the same shape and size. That’s LOTS of work! I had to drill each with a small diameter drill first, then slowly use a bigger and bigger drill until the size was adequate for filling the hole down into a squared shape by a hand file.
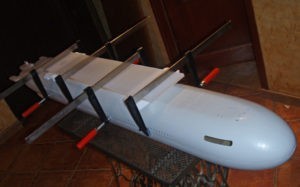
“Stern works” – nozzles, rudders and dive planes:
Glueing the stern elements all together is a nice and peaceful job actually. Still requiring a bit of precise measurement, but in general – it’s a fun thing to do. The tunnels need to be glued in and sanded down for a nice smooth fit, while the rudders had to be additionally reinforced by screwing them down to the hull itself. Additionally you need to instal brass bearings for the moving parts of the planes and rudders. Everything needs to line up and move smoothly. Yet the job is fairly easy cause of the size of the model – lots of space to operate your hands.
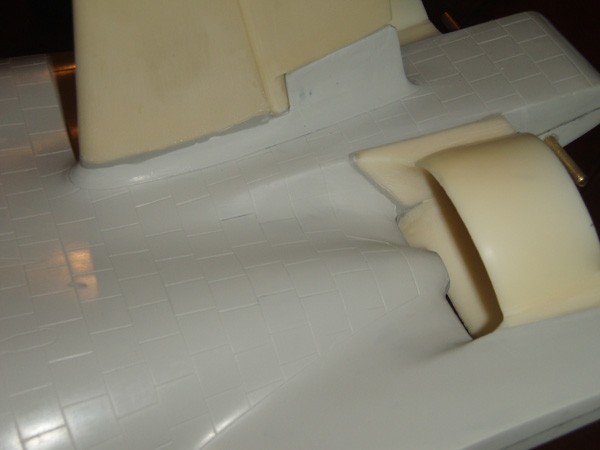
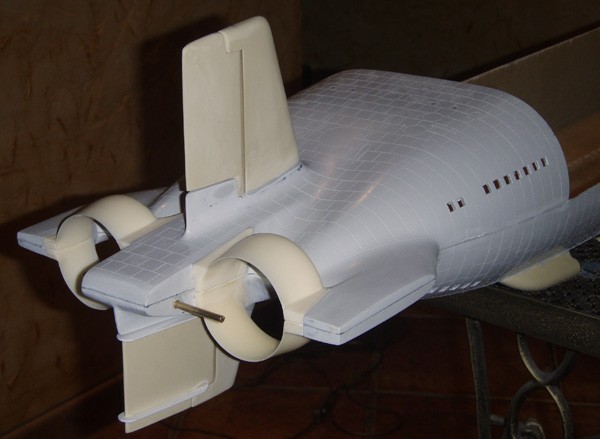
All the surfaces had been sanded down to a nice smooth finish and will look like a single element after panting. The photo on the right shows the insides of the stern. It’s important to remember to mount the stern dive planes first, then the lower rudder and the upper rudder at the end. It will make a lot of things much easier as after fitting all those levels for the servo pushrods space becomes harder to navigate.
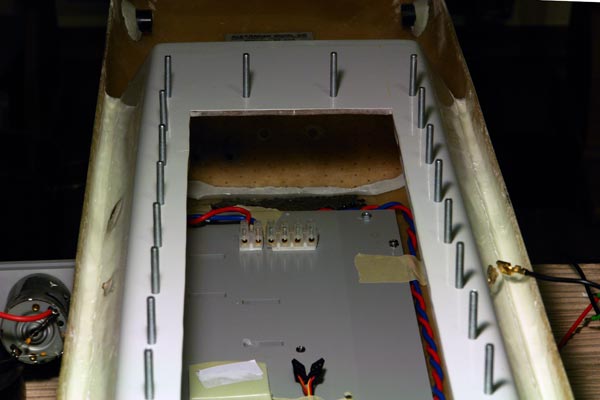
WTC – Water Tight Compartment:
 The original design of the WTC is clean and nice, but it doesn’t mean that it cannot be modified to become even better. At first I did everything according to the manual. The middle deck is made out of laminate reinforced with steel bars, so the drilling process can be tough! I didn’t like how it looked in the the end – as Engel has designed it. The seal was dangerously close to the edge, the metal lid was a real pain to mount or remove too…

 SO I MODDED IT. I’ve cut off all the bolts with an angle grinder. Then bought myself a cheap electric fretsaw, threw away the included rubbish blades and bought some expensive and high quality replacement blades. That’s the right combo, believe me. I’ve made the opening wider by 2omm on each side (40mm together) and lengthen it by o 140mm. On the left photo above, you can compare the cut of element with the new opening. It’s so much better! The aluminium lid has been replaced with a transparent polycarbonate.

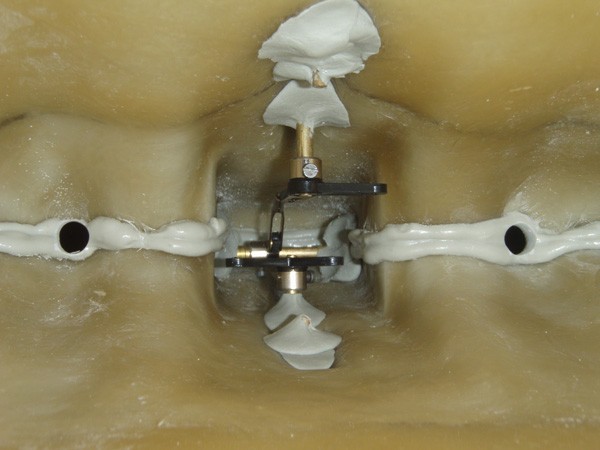
 View from the back side of the middle deck. Each of those 34 bolts has be seal with resin. The same goes with every brass tube for pressure sensor and the dive tanks.

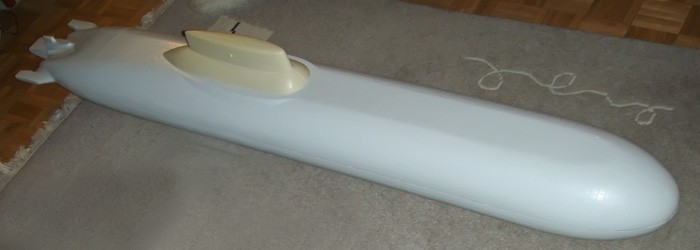
Fitting and glueing in the middle deck:
My middle deck came quite twisted. I was worried how I’ll make it fit the lower hull and will it be watertight. Cutting a bigger opening didn’t help, just made things worse, but also made the whole thing softer! Keeping the thick polycarbonate window tightly fitted to the middle deck for some time, did real wonders! For the process of gluing it in I kept both things together, just made sure to cover it with some paint foil in case spilling resin on it.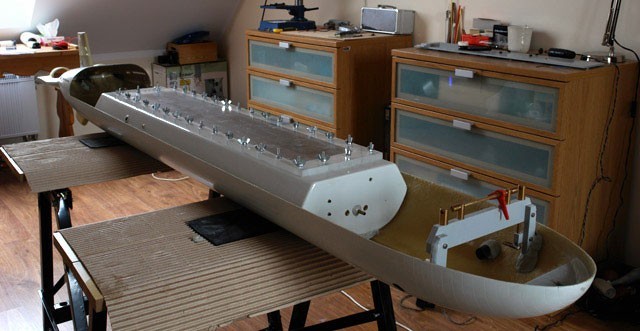
Fitting in. The front of the middle deck had to be raised while the back – lowered. On the photo above, you can also see the frame of the bow dive planes being fit in – I will write about that element a little later.
 While glueing the WTC in (filling the gaps between the middle deck and the lower hull with resin mixed with microballon) there was no time for taking photos. You have to pour the resin carefully and then squeeze everything together to get a nice straight fit of all 3 elements later: the lower hull with the middle deck and the upper hull which partially “slides” into the lower hull. It’s a good idea to make few time trials before the actual work as yo can do it only one time and corrections are not possible. 15 minutes is a bare minimum for the job. I did work with the resin before but not with such a volume of it…

… and in the end I used a little to much. Still it’s better to use to much, then use to little and risk the thing to break during a run in the water.
Frame of the bow dive planes.
 Installing the frame for the bow dive planes is something which requires some additional care and precision. First off all, the planes need to slide through the slots of the upper hull. The second important thing we should remember is that, if we won’t be precise enough and the dive planes will lock themself in the extracted position, we will have cut them off to get access into the WTC! It’s not even worth saying that the twisted frame would cause the dive planes to work under an angle and make the running of the model submarine much harder too! So extreme precision is recommended – measure twice, do the job once.
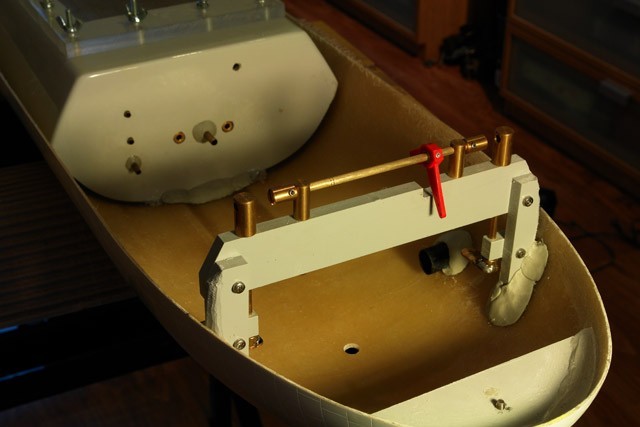
Retract mechanism of the bow dive planes:
(the “wet” part of the mechanism)
 The retract mechanism for the bow planes is always a great idea. It keeps the planes safe while in transport and when launching (or removing) the model in the water. When it comes to the Typhoon, it’s also essential as it allows for removing the upper hull. With the bow planes extracted it’s impossible to open the upper part. Assembling and soldering everything all together is quite a lot of work, but it’s also one of those pleasant and relaxing works.
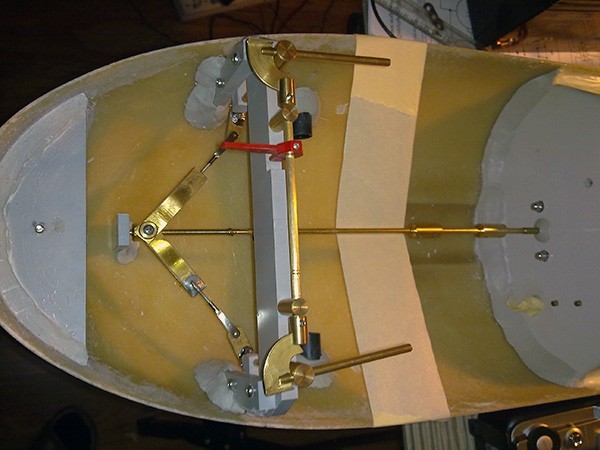
 My intention was to cut out the hull slots for the bow planes as small as possible and that forced me to even a greater level of thoroughness, but I don’t regret that. Bellow you can watch a short clip from the very first initial tests of the mechanism. The servo which moves the bow planes up and down is being disconnected from power when in “retracted” position. The mechanism also does not allow for retracting the planes, if they’re not i neutral position.
In the clip, the servo which will move the planes up and down is already working, but it’s still not connected with a pushrod. I wanted to make sure that everything is wired correctly, before the final assembly.
Side thruster openings
The model will be almost 2 meters long and with a weight of 22kgs. I was pretty sure that the rudders and independent propeller control will be not enough for decent manoeuvrability. The decision was made about equipping the Typhoon with 2 side thrusters (bow and stern). The water inlets/outlets have been carefully drilled and connected with a 12mm plastic tubes. The tubes had been connected with the bow thruster units with a PVC tubing. From the outside everything has been smoothed perfectly.

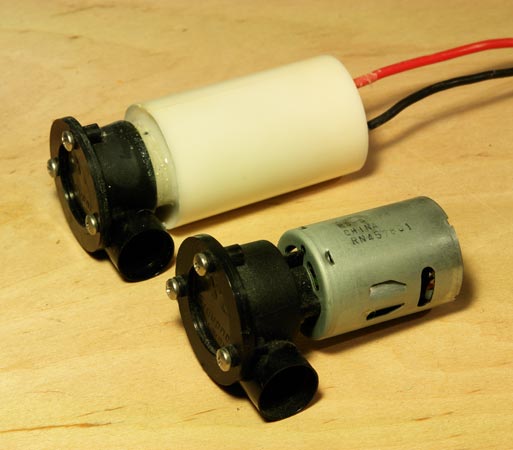
Side thrusters – units
Both side thrusters are an item produced by Graupner. Powered by brushed 400 class 7,2V motor and designed as additional manoeuvring thrusters for large scale models. In my Typhoon there will be two of those (the original vessel had four). There will be two operation modes available. The first one will help to turn the vessel and even allow to rotate it fully without the help of main motors. The second mode will help to dock to the lakes shoreline – it will move the model sideways. The neat thing is, that both of them are being controlled by a single speed controller (15A), but one of the thrusters has an additional piece of electronic, which ‘reverses’ the direction of the motor when activated. The thruster operation mode is going to be selected by a switch on the radio transmitter.
Both bow thrusters have been placed in the flooded part of the hull. They have been sealed permanently. On one of the photos you can see an “out of the box” unit next to a sealed one. I’ve used quick resin and epoxy. Two photos on the right show the units already mounted in the stern and bow part of the hull.

 |
 |
||
| “Rotating mode” – Thrusters working in the opposite directions. | “Docking mode” – Both thrusters working in the same direction. | ||
| You’ll find more about the mods helping to manoeuvre this beast in the further part of this thread called: “Radio Mixers” |
|||
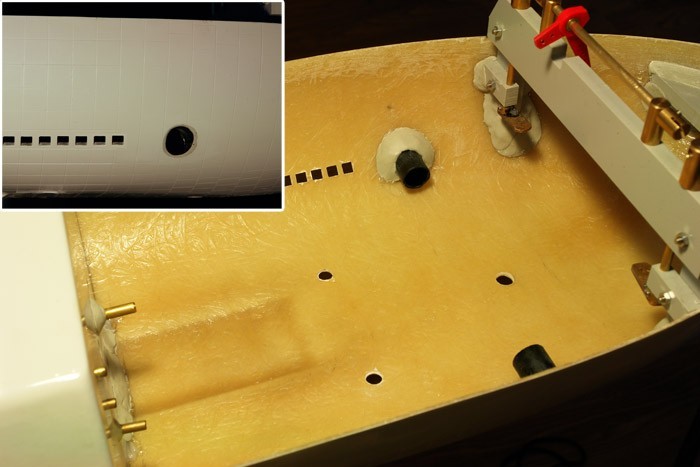
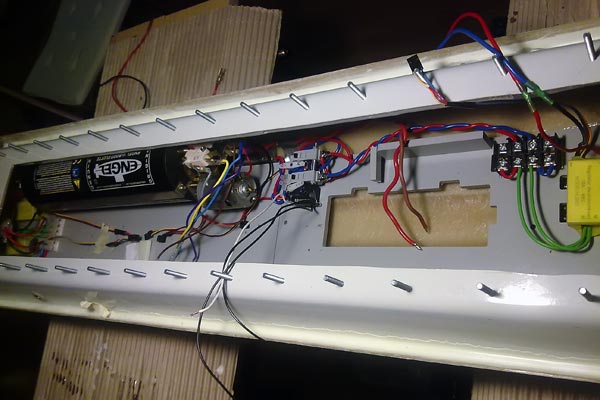
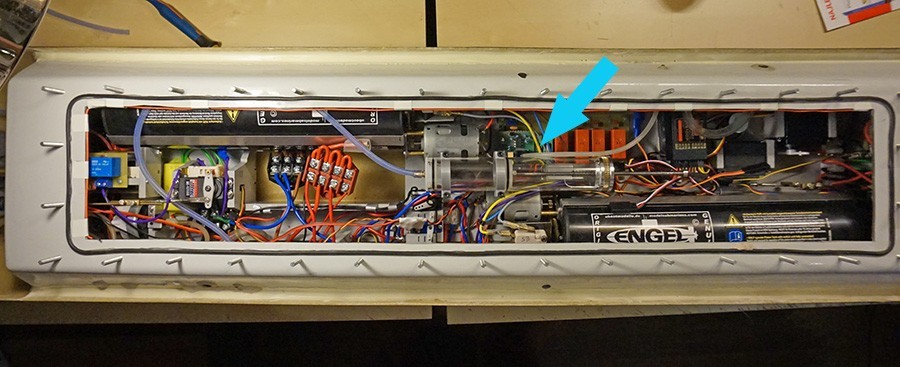
Inside of the WTC
 The work inside the Water Tight Compartment I had to start from measuring the proper amount of the lead ballast – 4kg of it. Then I divided it into 3 equal parts and glued them in place with resin into 3 out 4 segments of the submarine. The 4th segment you leave empty as it will hold the lead acid battery which is heavy already.

My Typhoon was one of the first ones including a new tech carrier. It was much easier to use then the old grey plates of plexi which you had to drill yourself, without any measurements or mounting points. I’m glad for that, as I like my models tidy and clean with all the electronics and wires inside.
Electronics
TAES – microprocessor based driver for Engel piston tanks with a static depth control.
 Taes is the brain of the models diving system. It controls both piston tanks and it’s the highest possible version of the driver sold by Engel (edit: IT WAS in the year 2008) It controls two piston tanks of total volume of 1750 ml. Except standard commands like “fully flood the tanks – 100%”, “empty the tanks – 0%” it’s also capable of “flood the tanks up to 95% (neutral buoyancy)” and also something which is called “static depth control”. It allows the model to hover on the desired depth at full stop, with an accuracy of about 1ocm. In addition the system has been equipped with a pressure switch which is a safety feature not allowing for model to dive deeper then then 1,8m.
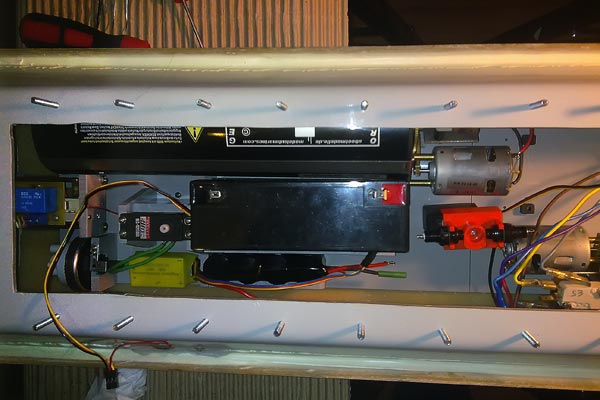
Main drive – two propellers controlled independently
 Two 60mm 7 bladed scimitar propellers are powered by two independent 600 class motors. Each with 1:40 gear drive. Each motor has its own Electronic Speed Controller 15A. Both of the motors can be controlled by a single stick on the radio. It’s also possible to turn off one of them or turn on the automatic mode. Automatic mode is something I came up myself – the more you turn the rudder, the more one of the motors will slow down and initially stop. It’s a great help when manoeuvring such a big, heavy model.
Additionally you can trim each motor independently in case there would be a great difference in their efficiency, which would cause the model to turn.
Retractable bow planes mechanism – the dry part.
 The retract mechanism is a complex mechanism consisting of two parts – the one in the flooded hull which I already described and the one in the dry section – it’s drive. It’s a linear actuator with additional switches turning off the power to the bow plane servo when the planes are in retract position.
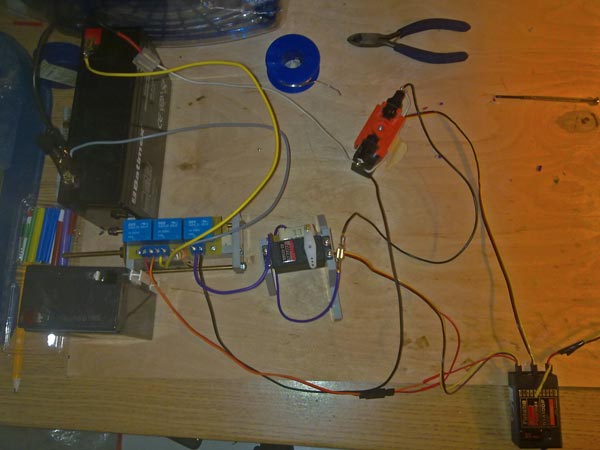
“Polarity switcher” for the stern manoeuvring thruster.
 One of the things I really want to have in this model is the possibility of using the manoeuvring thrusters in both: docking and rotating mode selectable by a radio switch. So, I have constructed a simple servo operated switch which switches the (+) wire with the (-) wire and the (-) with (+) wire of course. There so it changes the direction of the motor for the stern thruster. No need for additional ESC, radio mixer or a proportional channel (switchable channel is enough). The idea has only advantages as I’m already low on fully proportional channels and have plenty of the switchable ones, I’m also low on available mixers as I’ll need all four of the for independent propeller control. A “Polarity switcher” needs only one single switchable channel and does the job marvellously.

Magnetic switch – low budget version.
 Model submarines have rather complicated structures – especially the hermetically sealed WTCs. In case of the Typhoon you need to remove 34 nuts, which keep the polycarbonate window in place and seal the dry section. If you want to turn on and turn off the model, you’ll need to remove those every time, except if you have a magnetic kill switch!
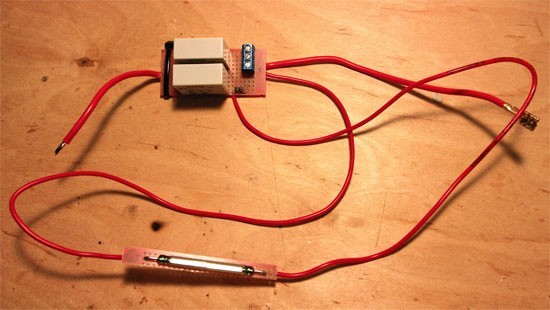
Switches like that are available in German and American online stores for submarine model makers. However, they do have two great disadvantages! First one is the price, which is ridiculously high, while the other is that there are no units with separate RX (servo – 4.8V) battery and the main drive battery (6V or 12V) lines. The sellers idea is to buy two… Really mean way of making business…
That made me thinking, so I’ve constructed a simple, two line, magnet operated switch. The max current for the 4.8V line is 5A, while 32A for the main drive battery (6-12V). It’s basically the mechanical equivalent of the market available units, yet cheaper and with two separate lines.
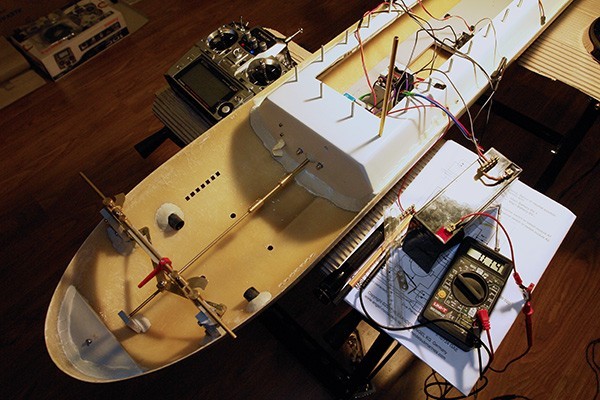
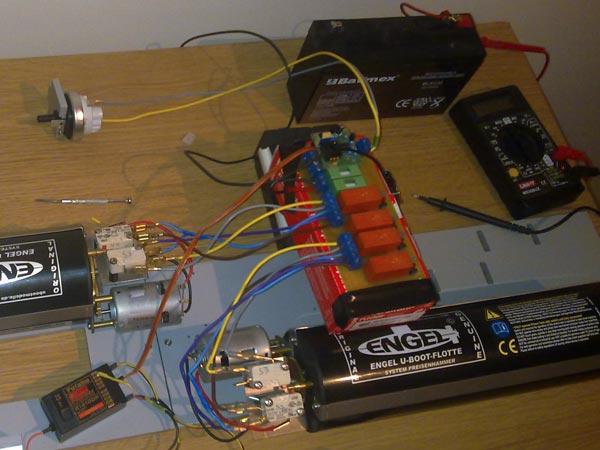
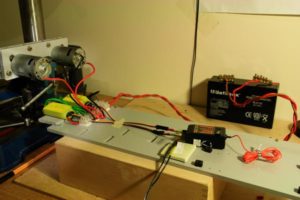
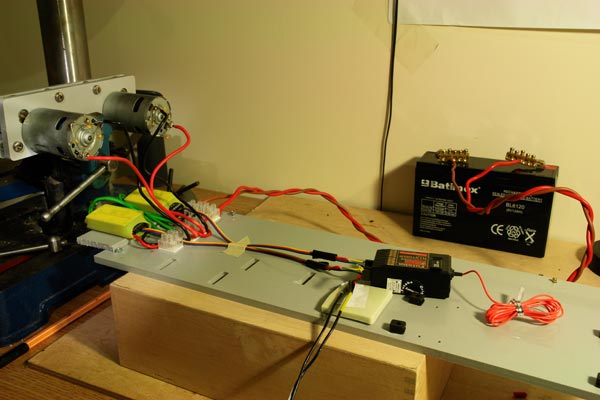
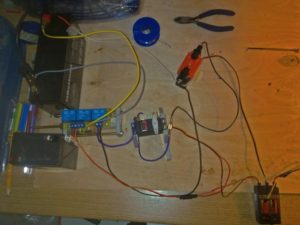
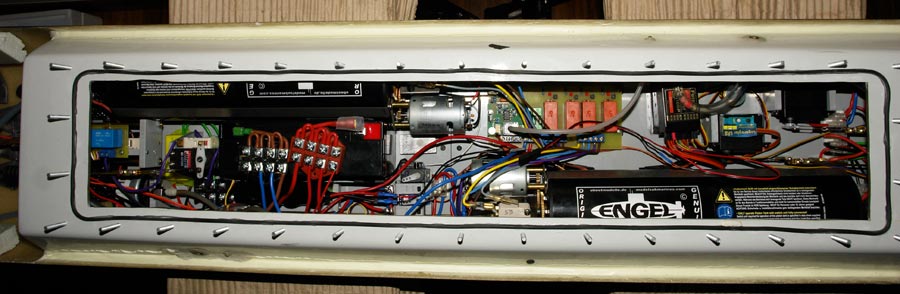
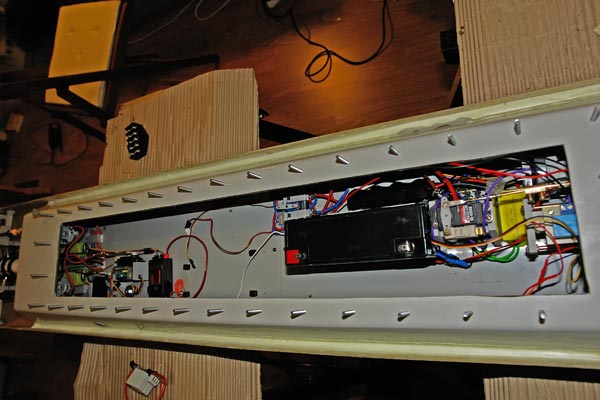
Electronics and wiring.
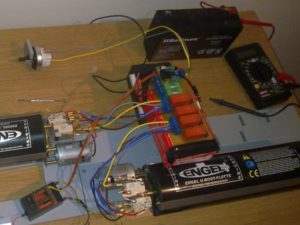
A very important part of the build as it will influence the model behaviour directly. Disorderly wiring can significantly reduce the radio range, cause servo jitter and even notorious problems with operating the model. Improper wire diameter can cause servo jitter while operating the dive tanks or even premature switching on the low battery warning/failsafe. Everything was carefully considered – especially high the long high power wirings and antenna position. The amount RC electronics and wiring which goes in the model is just overwhelming… The model submarine had to be equipped with 3 electronic speed controllers, a pitch controller, TAES driver, pressure switch, servo movement delayer, quite a few relays and switches, two Engel Piston Tank, two electric side thrusters, 6 servos, lead acid battery 6V 12 000mAh, RX battery 4,8V 3300mAh, and the RX itself – 10 channel Futaba R1410DP.
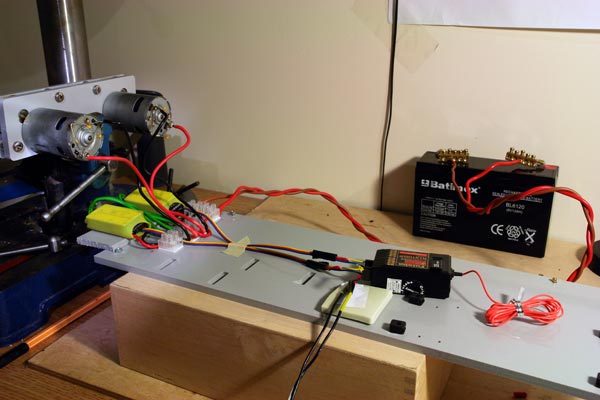
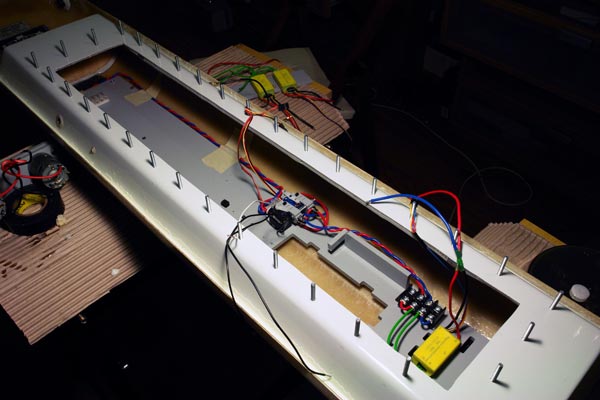
On the photos you can see the process of wiring in detail. The tests of the gearbox and the motors. My goal was to place all the high current wires on one side of the boat with the servo wires within some proximity to them. The receivers antenna has been placed on other side of the model, as far as possible. The wires for the main motors speed controllers are 2.5mm – both twisted together to reduce the electrical noise. You can see that one of the photos. Each motor has been additionally suppressed. The wires for the stern steering thruster were a little thinner (1,5mm) yet still twisted together too. In the end the model consumed more then 8 meters of various wires! However it was worth the effort as I was positively surprised by the models range.
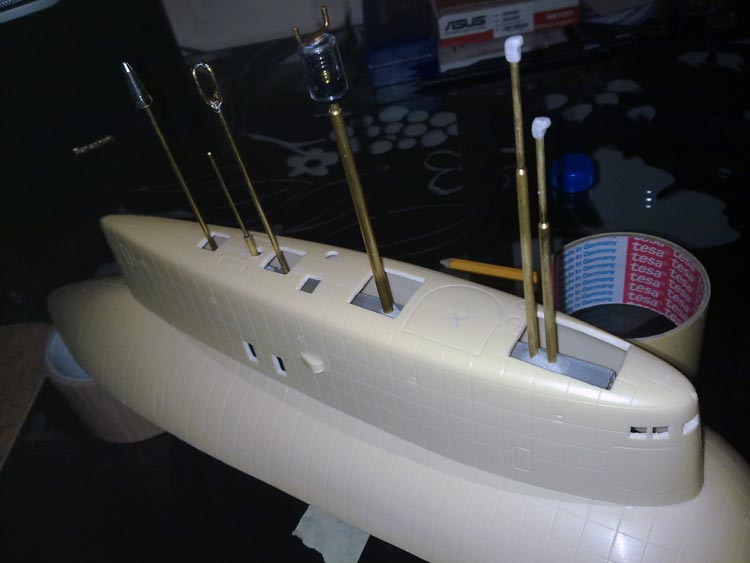
Submarines tower and the periscope/antenna retract mechanism
From the very beginning I wanted to have retractable periscopes and antennas in the tower. Of course you can buy a proper kit from Engel for that, but I was already low on money, and quite frankly I don’t like the design of the Engels mechanism – I think it’s overcomplicated. There are of course other manufactures, but they all involve using a threaded rod. That type of mechanism gives very limited possibilities and lots of things can go wrong with it. The biggest disadvantage of the mechanism based on a threaded rod is the limited extraction length which causes the antennas and periscopes being very short. Of course all the manufactures say, that it’s cause o the scale… Well I don’t like it. The second problem very often heard on the RC message boards and forums is that the Engels mechanism is a bit heavy and it causes the model to wiggle from one side to the other under certain conditions. The mechanism also requires extra relays and brings another brushed motor in the system which adds some noise into the installation for sure.
So I designed my own retract mechanism based on a scissor lift. It’s being operated by a “strong’ type servo, so there was no need for any additional electronics, relays or more electric motors. This type of mechanism also allows for the use of ALL THE SPACE available in the sail for the periscopes and antennas, so I could make them as long as I wanted! What’s the advantage of a having longer periscopes? It’s easier to maintain the periscope depth without “flashing” the tower through the surface accidentally. With a model of that size it’s a big difference with all that inertia! The movement of the servo has been slowed down by a neat little device wired between the servo and the RX, which slow downs the movement of the servo.
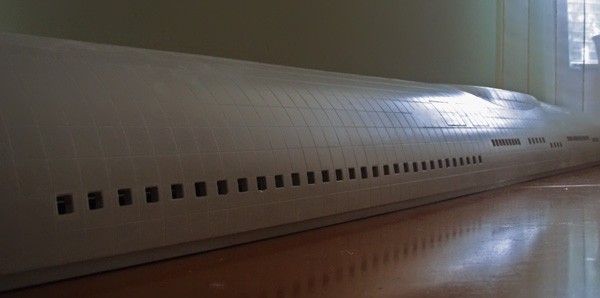
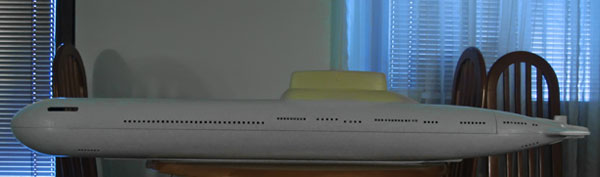
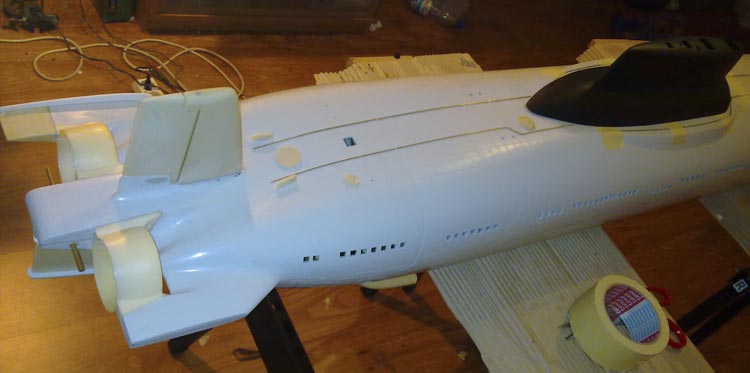
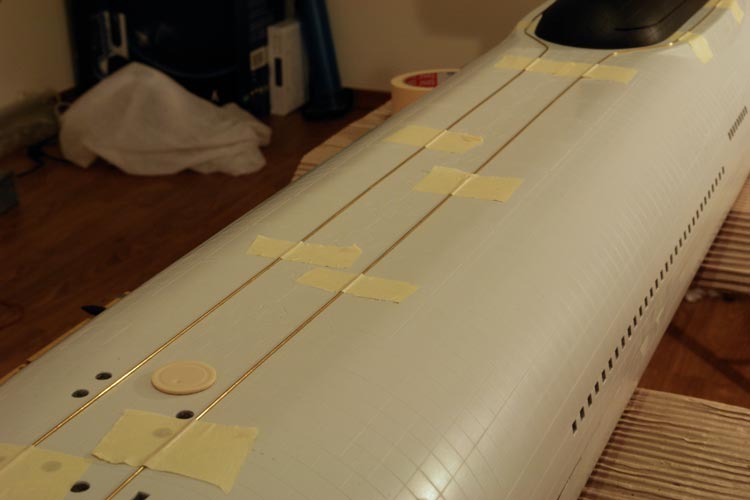
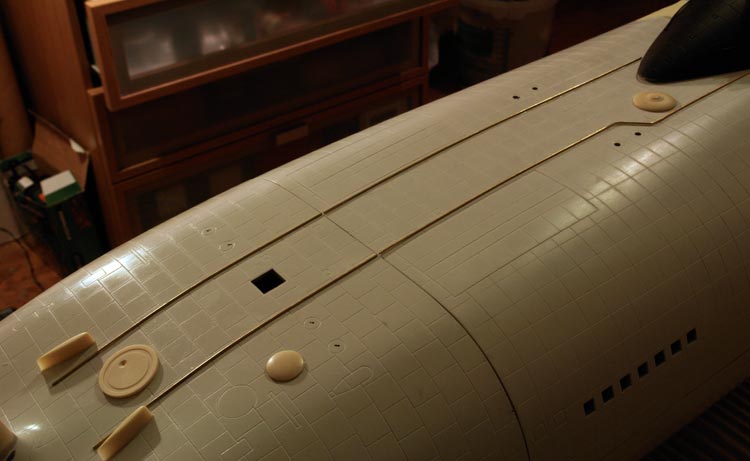
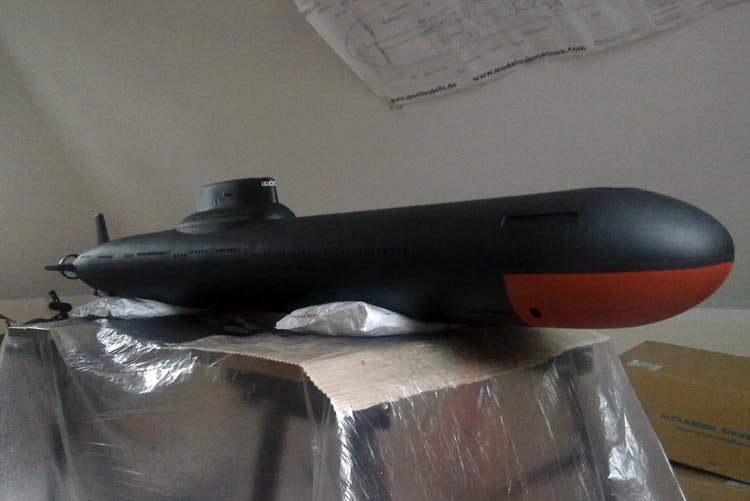
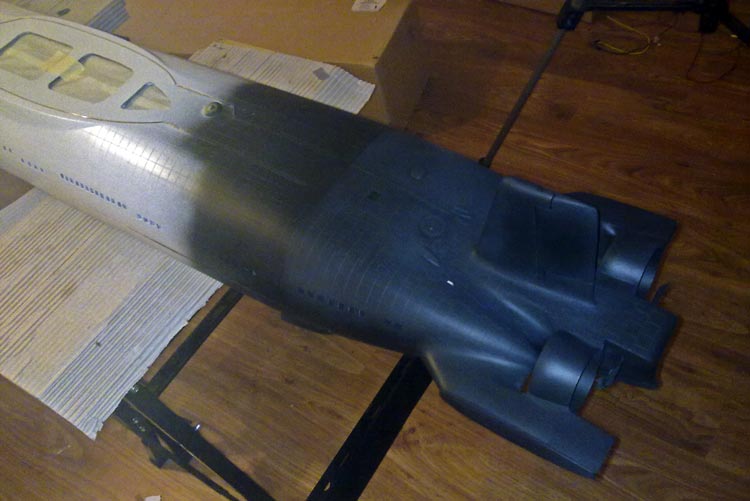
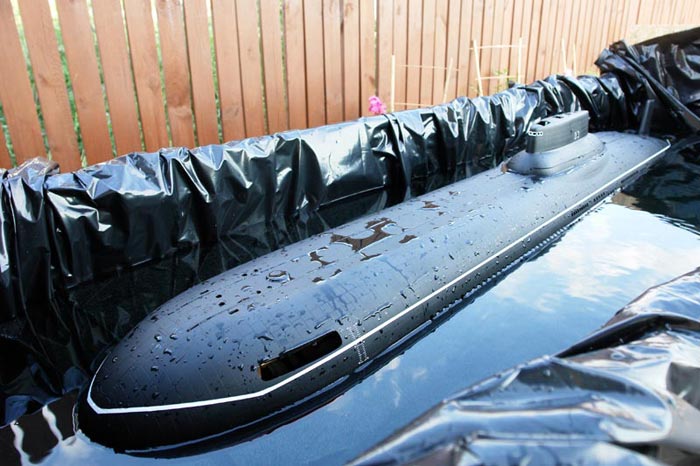
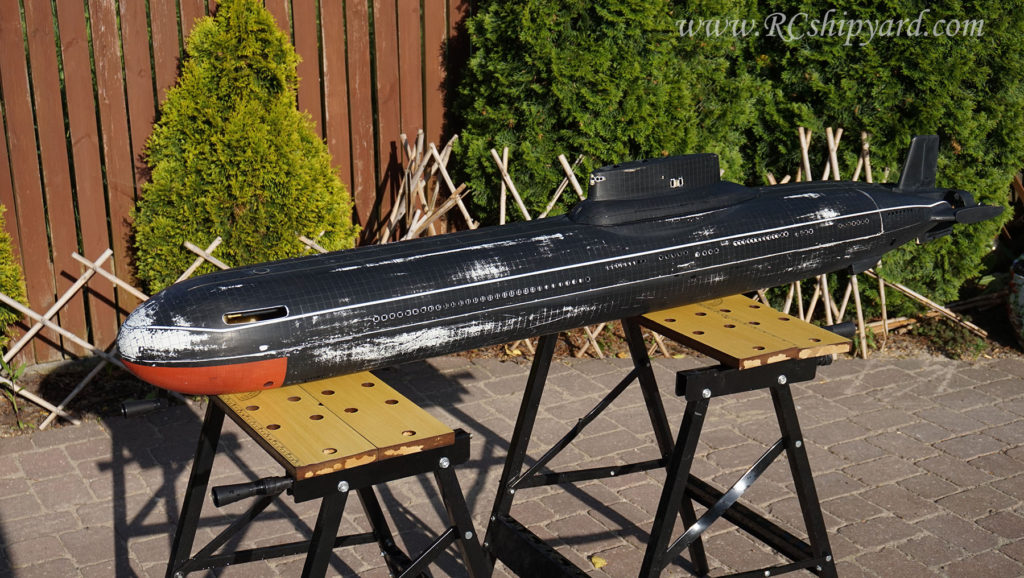
Hull details and painting.
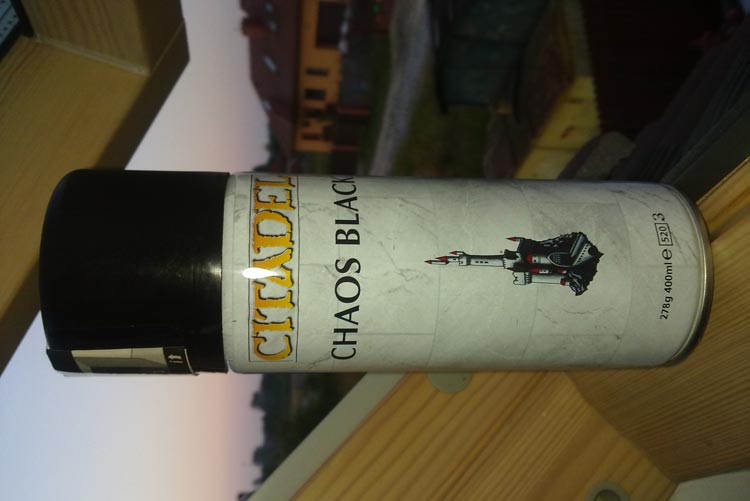
This model is not only great cause of the large scale, but also cause of all the details on the hull. Except cutting all the flooding holes, it doesn’t require much work as the are not many details on a hull of a submarine. The paint I’ve used for painting is Chaos Black.

Radio Transmitter setup and mixers.
Transmitter channel mixers are especially important for RC airplane model makers, but we – submariners should also welcome them warmly. This function allows for mixing two (or more) channels. This allows for example to control the bow thruster with the same stick and at the same time with the rudder to tighten the turning maneuver when needed. It even allows to add independent propeller rotations to tighten that turning maneuver even more (mixing 4 channels or more). Every mixer can be disabled or turned by a flip of a switch on the transmitter. Mixers can be hard to understand, so I’ve made a short clip explaining how it works in my submarine with a live view how the channels are bing mixed.
Trimming and leaking tests.
It took me about a week to test the model fully. I had two the leakages (they were exactly where I suspected that they may occur), but it wasn’t hard to correct these. Trimming however was a nightmare. This model is huge and as it’s equipped with a static dive control so it requires much more precision then my other boats. In addition all the typhoons, when they cruise on surface, are trimmed stern heavy to keep the propellers a bit deeper underwater, as if they are to close to the surface, they’ll quickly begin to “suck” the air from the surface and their effectiveness drops drastically. In the end I had to trim the model with an accuracy equalled to 5 grams!
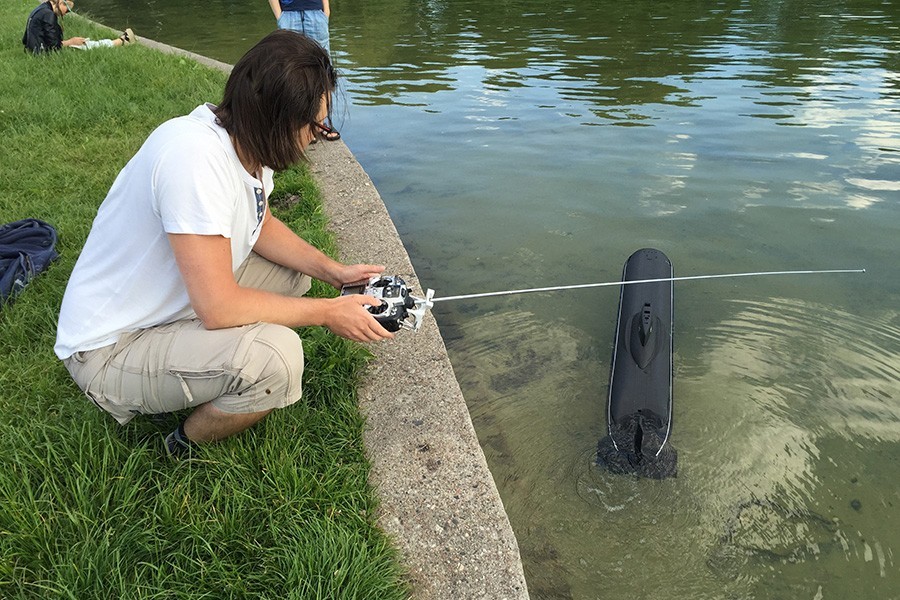
Running the model:
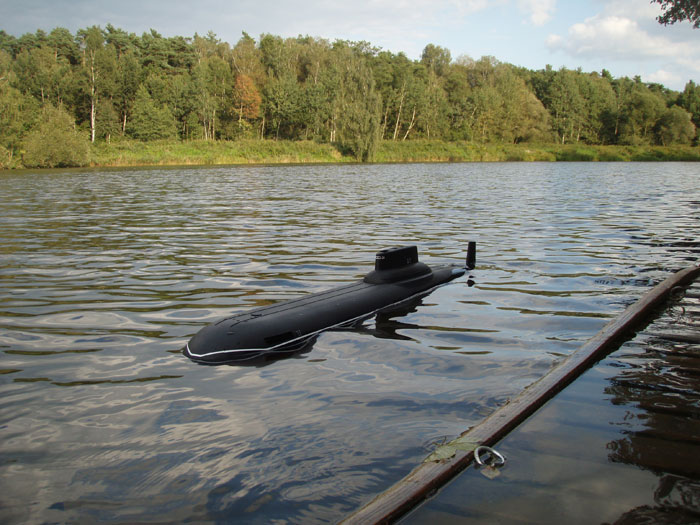

The maiden voyage revealed some problems, most of them were anticipated as not everything is possible to be done in a test tank. For example my trim was rubbish, the props were sucking in air and the thing barely run on the surface.
But on other hand! Some of my ideas really PAID OFF! Manoeuvrability is something which would not exist if not the two side thrusters and mixers of the independent propellers. The rudders are ABSOLUTELY NOT ENOUGH to turn this beast at all! At least during the surface runs. As soon you dive, you get the upper rudder working too and then you can turn off both turning helpers – both side thrusters and the mixer for the main propellers. The thing which surprised me is that my boat had a tendency to turn (drift) left. Why? Well, the motors are not identical I guess – they don’t get the same rpm at the same voltage. Luckily again – Transmitter mixers help and it was enough – one motor has to get a PWM signal higher by 4% and it smoothers the drift.

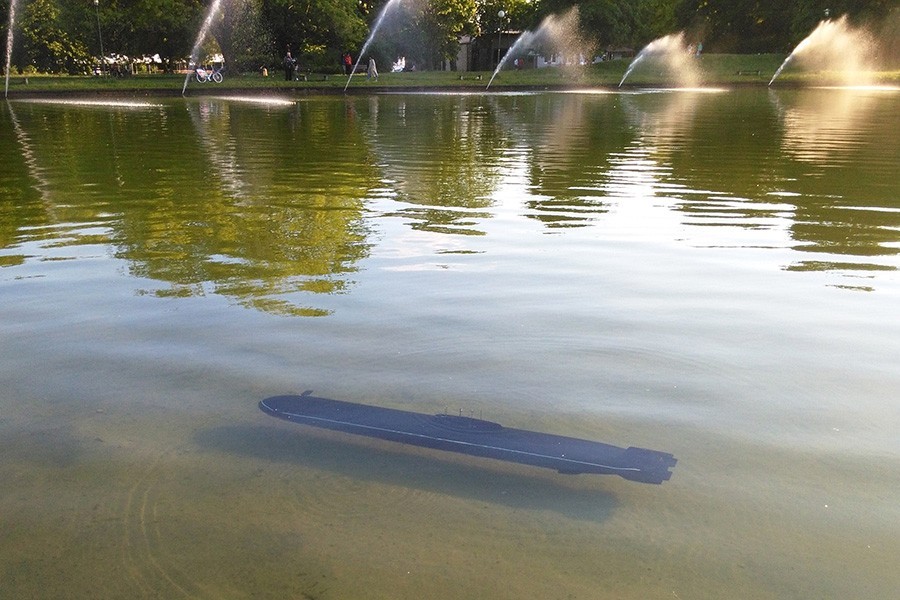
After all those rather minor corrections, running the model became pure pleasure. After few minutes you get used to the size of this thing and all the manoeuvrers become easier and smoother. It’s worth to remember that this model has a displacement 10 times bigger then my earlier boats: Seawolfs and the VIIC. One last thing worth mentioning is that the electronics and the ballast tanks are 100% worth of their price.
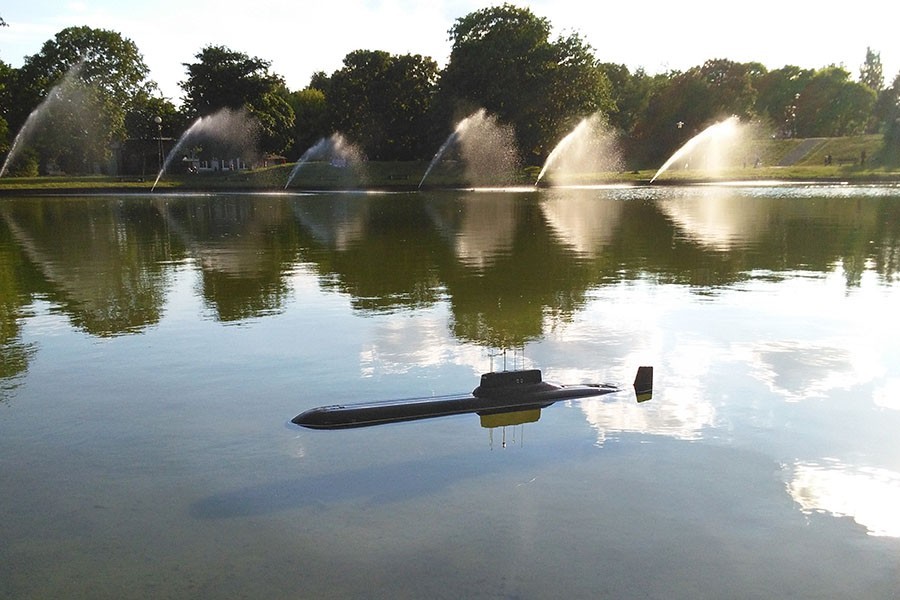
In the 2010 I made only one clip about this boat. It was the end of the year, cold Polish autumn already. Then what? Well it was boxed again as I lost my interest in it. It was waiting for me in the box until 2016 when it became my favourite boat to run and I use it since then almost 3-4 times a month during summer.
Update 15.06.2016.
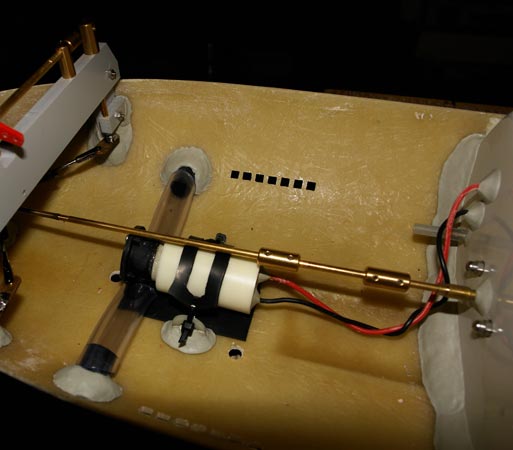
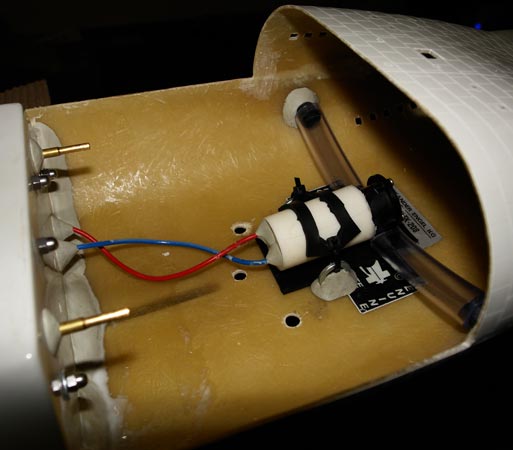
 During may 2016 Typhoon has been modified. It has gained a small piston – 90ml volume. Why? It’s a precise trimming tank. It’s fully proportional and allows for trim changes equal to 1,5 grams. It’s driven by a controller of my own design and works quite well. Used only when the quick change of trim is essential.
Update 13.09.2019.
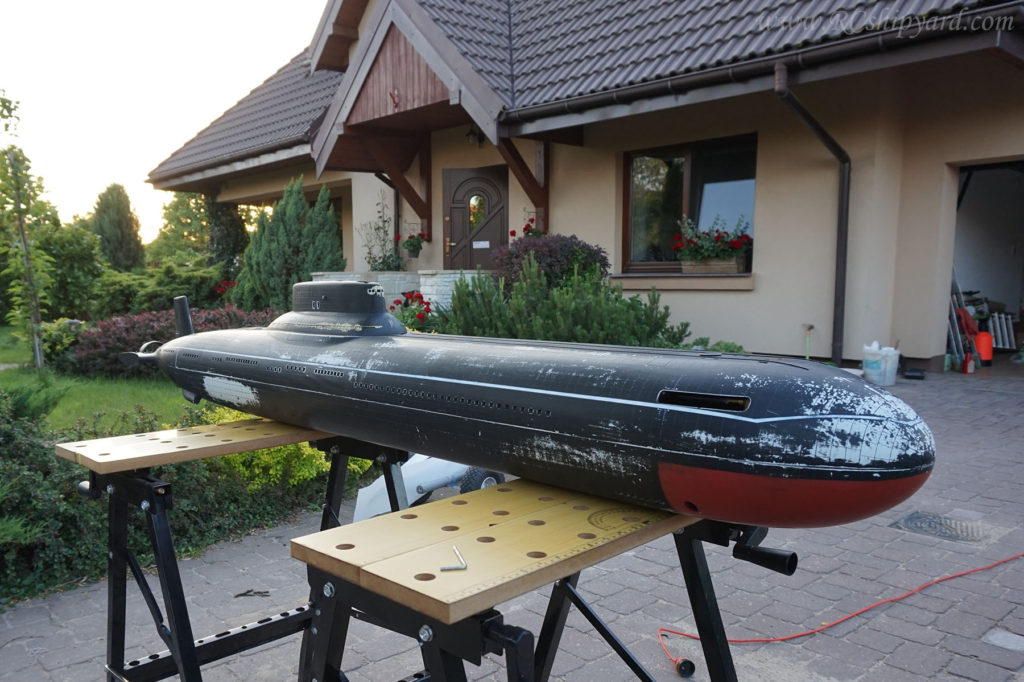
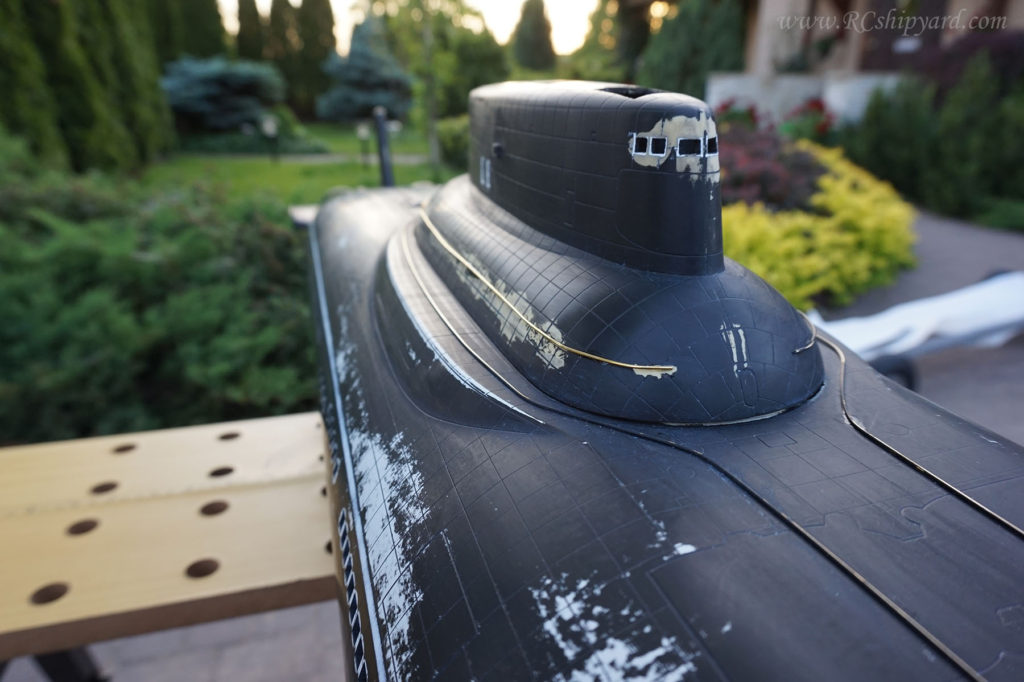
Refit and repairs after 10 years of operation!
After almost a decade of operating the model on a almost monthly basis, I’ve decided that it finally needs some time in the dry dock! What broke down? Just one thing really… After 10 years one of the side thrusters finally give up and required replacing, other work was rather visual – some of the hull details required removing, polishing and gluing them again as they were barely holding (or not holding at all), lastly the Typhoon model desperately needed a new coat of paint!
How the model looked before all the works and what were the problems with has been shown in this video:
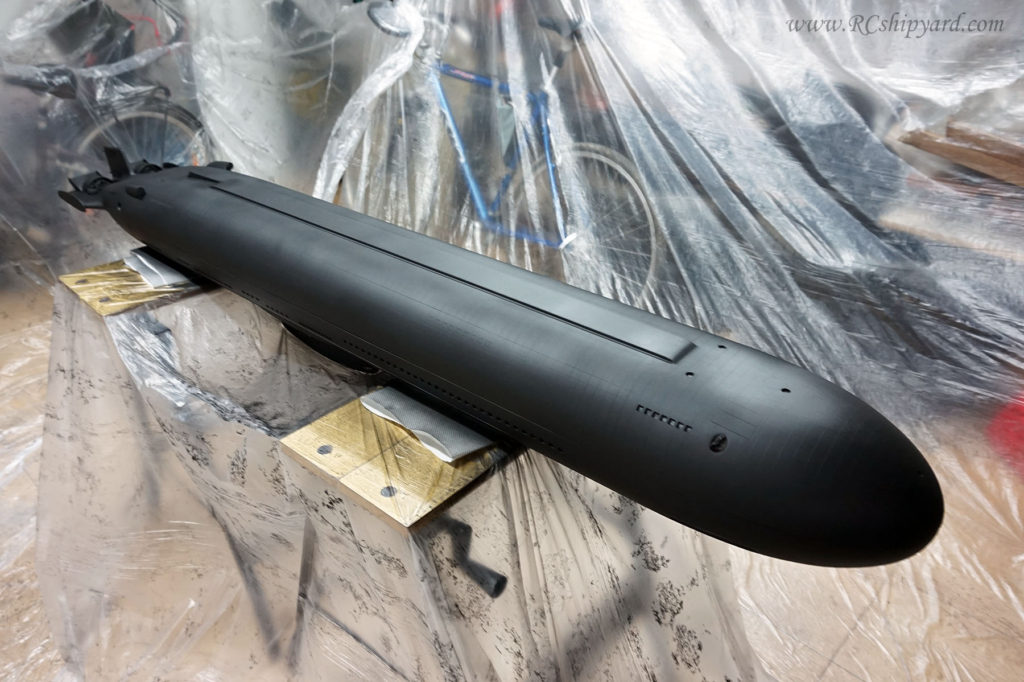
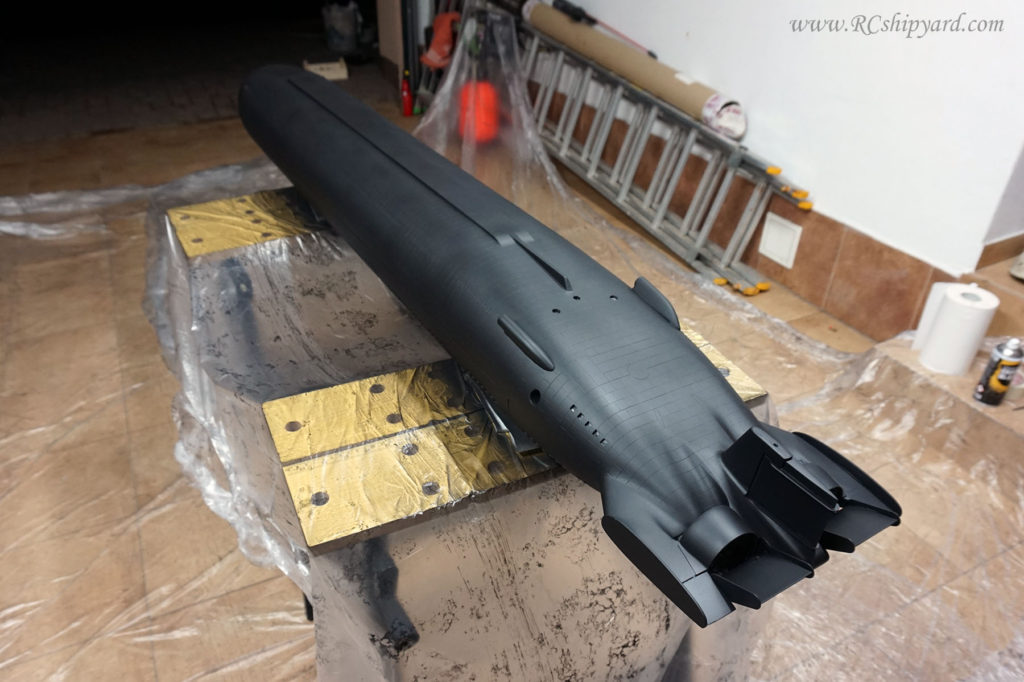
So at first I had to deal with all the glued in details on the hull. They have been removed and then I have begun removing the old paint with some wet sandpaper. You can’t really sand it to much as doing that will damage the scribed hull details. In my opinion the paint which stayed on the model will stay there forever. Everything else has been sanded and removed.
Work in progress:
And applying a new layer of paint. Those who watched the video “before the refit” will notice that the bottom of the boat has been fixed and sanded down to a perfectly smooth surface.
More info soon.
Last update of this article: 13.09.2019.
All rights reserved, copying the text and photos not allowed with out the consent of the author.